To take care of leisure time for your pet, you can make simple toys for cats with your own hands.
To do this, you can use cardboard boxes, paper, old teddy bears and other available materials.
You can make a cat toy with your own hands with minimal investment of money and time.
How to make a soft toy for a cat
With just basic sewing skills, you can sew your own soft toy.
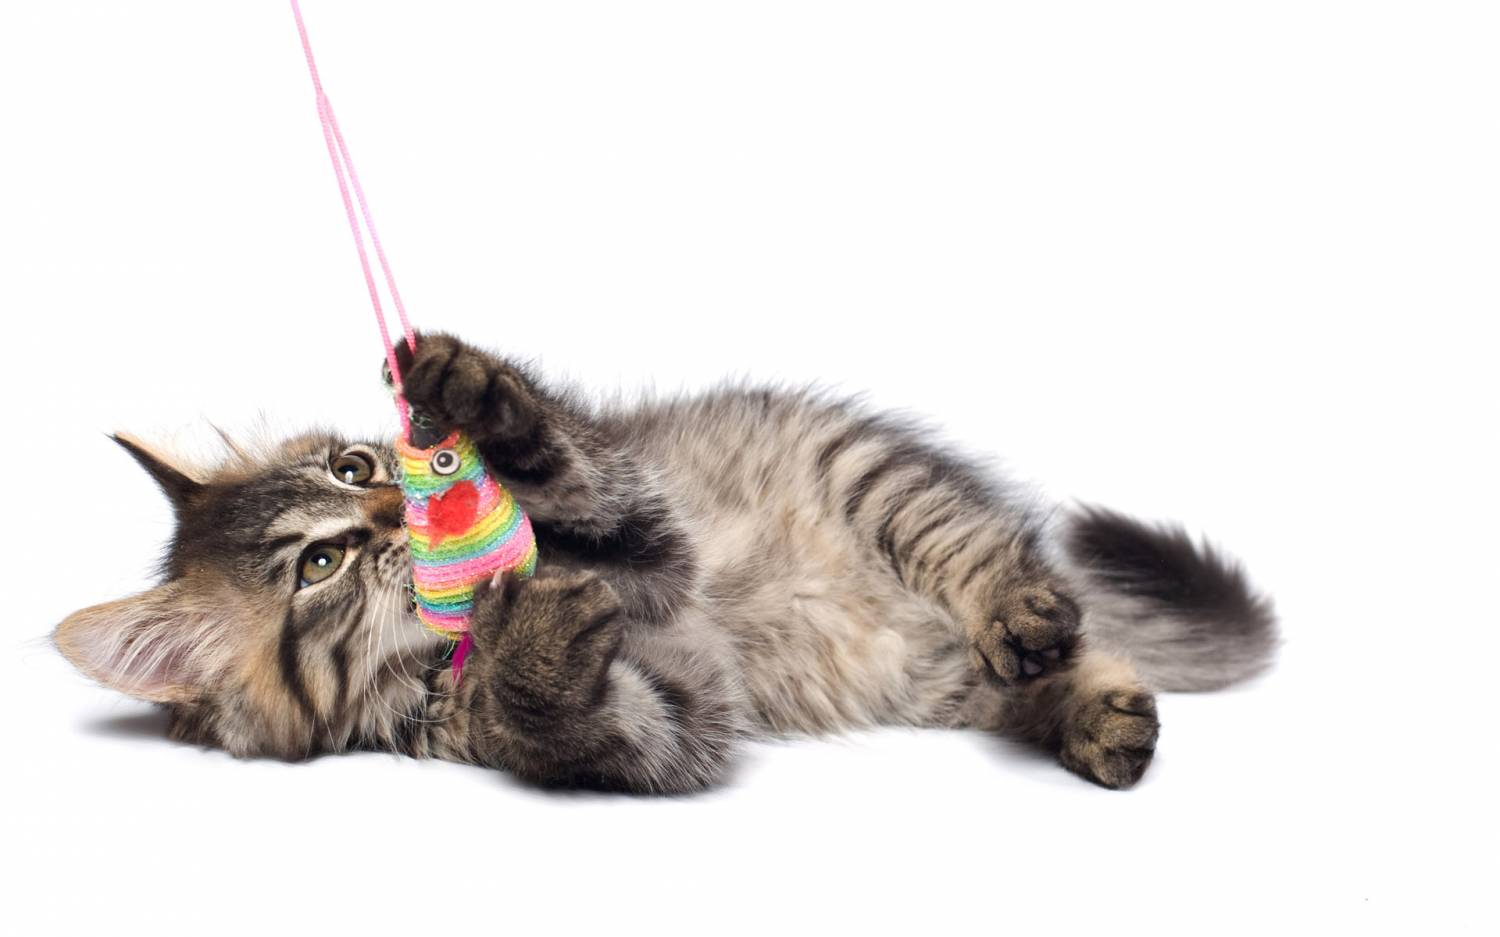
The traditional option is a stuffed mouse.
To make a mouse for a cat with your own hands, you will need the following materials and tools:
- thick fabric;
- interlining;
- cotton wool for stuffing;
- pattern (can be seen below);
- threads;
- sewing machine.
First, the patterns of the lower part and one side need to be transferred to the fabric that is selected for sewing.
Then turn the workpiece over to the other side and move the second side part. Cut along the lines.

Mouse pattern
To make the mouse look like a real one, it needs to have a tail and ears.
For the tail, cut out a strip of fabric measuring 2.5x10 cm.
The resulting part is stitched lengthwise, leaving a couple of centimeters to the end, and carefully turned inside out.
To prepare the material for the ears, the fabric is folded with the wrong side inward, interlining is placed between the layers and ironed.
Then the pattern is transferred to this material and cut out.
Now all that remains is to sew the prepared parts, leaving a small hole for the stuffing and tail.
The sewn mouse should be turned right side out and filled with cotton wool.
To distribute the filler inside the toy, you can use a regular pencil.
When the stuffing is completed, the tail blank is inserted into the remaining hole with the raw edge. Everything is sewn together with a hidden seam.
Now you need to fold the blanks for the ears in half and sew them on.
Embroidery is suitable for decorating the eyes, nose and antennae. You can simply draw them.
The soft toy is ready, and you can give it to your furry pet or leave it next to the food (among famous brands , ).

Another mouse idea
Important! Given the enthusiasm and energy of cats, the seams of soft toys should be strong enough.
Pompom - a light toy for kittens
Another option for a soft toy for a kitten or adult cat is a pompom.
It’s even easier to make than a mouse or a fish.
- Gather fabric strips of equal length.
- Fold the resulting bundle in half and tie it tightly in the center.
- Cut strips on the fold.
- Distribute the ponytails evenly.
This completes the pompom for the cat.
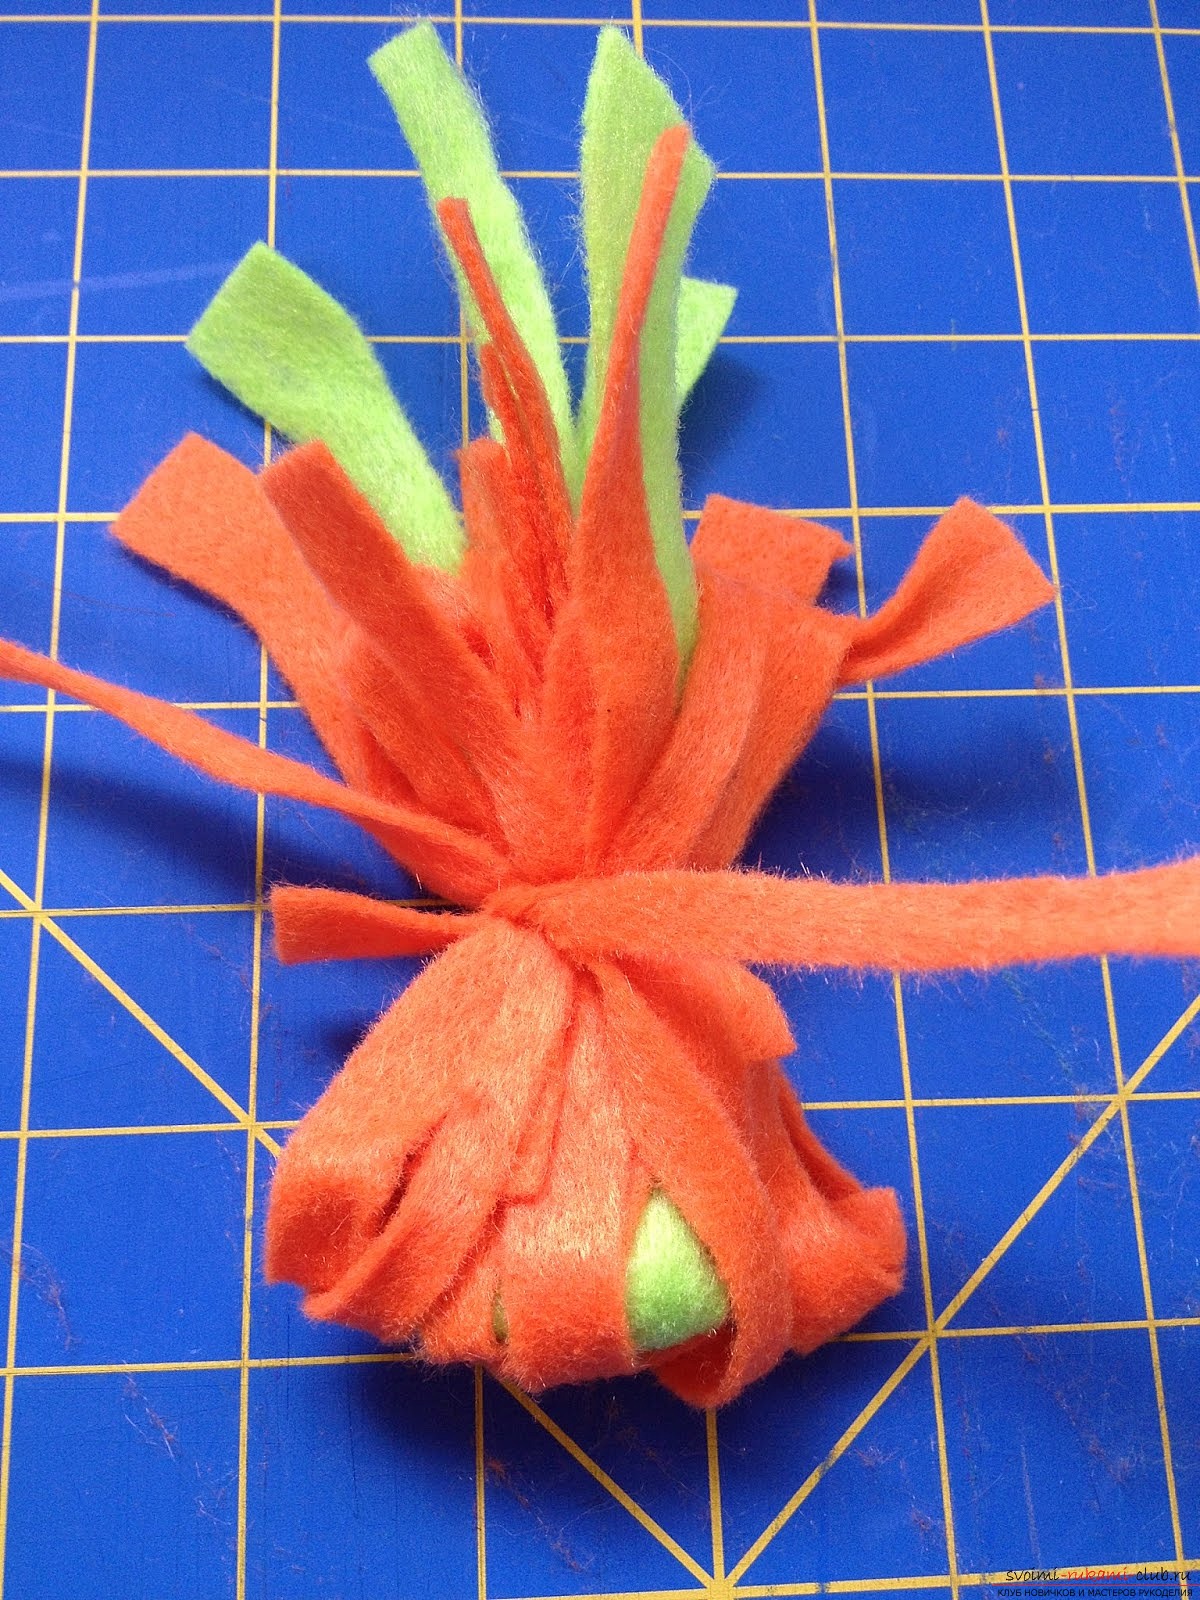
All that remains is to cut at the fold
How to make a fragrant toy
Using the principle of sewing an ordinary soft toy, you can make a mouse or fish with.
For work you will need:
- dense soft fabric;
- scraps of bags or other packaging that make a rustling sound;
- scissors;
- needle and thread;
- sewing machine;
- cat mint.
The highlight of this toy is its pleasant aroma for cats.
As a pattern, you can use either the silhouette of a mouse or any other.
The simplest pattern for a cube will do.
Transfer the workpiece to fabric and cut it out.
Place the pieces right sides together and sew.
Then turn it inside out and stuff the toy with torn pieces of bags and other rustling components.
Place catnip inside. Sew the hole for stuffing with hidden stitches.
At this point the toy is ready. Master classes can be combined into one by making a beautiful mouse filled with catnip.
Here everything depends only on the imagination of the owner.
Interesting! The most attractive toys for cats will be made of wool, felt, and fur.
Miniature rattle
The next cat toy idea is to create a rattle.
The sound-making beads inside will attract the pussy's attention.
The cat will chase her like prey and try to catch her.
To create a toy you will need:
- medicine bottle;
- beads or other elements that will rattle inside;
- cover and/or tape.
Wash the empty jar; if there is a label, remove it.
Then place the beads inside.
Alternatively, you can use any small items such as seeds or bells.
The toy must be tightly closed so that the cat cannot reach the contents.
If the lid is not tight enough, you can wrap the neck with regular tape.
Another option for a soft toy
Continuing the theme of soft toys for cats, it is worth paying attention to the puppet toy.
To make it you will need:
- an ordinary soft toy (you can also use the options that were shown in the master classes above);
- stick (or regular pencil);
- glue.
Toys on sticks
You need to cut a small hole at the bottom of the soft toy.
It should correspond in size to the diameter of the stick.
If filler comes out of the toy, the excess should be removed.
The animal should not be allowed to try to swallow the filler.
It is not advisable to use tape in this situation, as it is less secure and may pose a health hazard to the cat if it swallows it.
When the puppet is ready, you can call the cat and wave this toy in front of him.
An interested animal can pounce on her and pat her.
The main thing is that the pussy plays with the puppet under the supervision of the owners.
Important! A pet toy should be extremely safe. It is better for the cat to play under supervision.
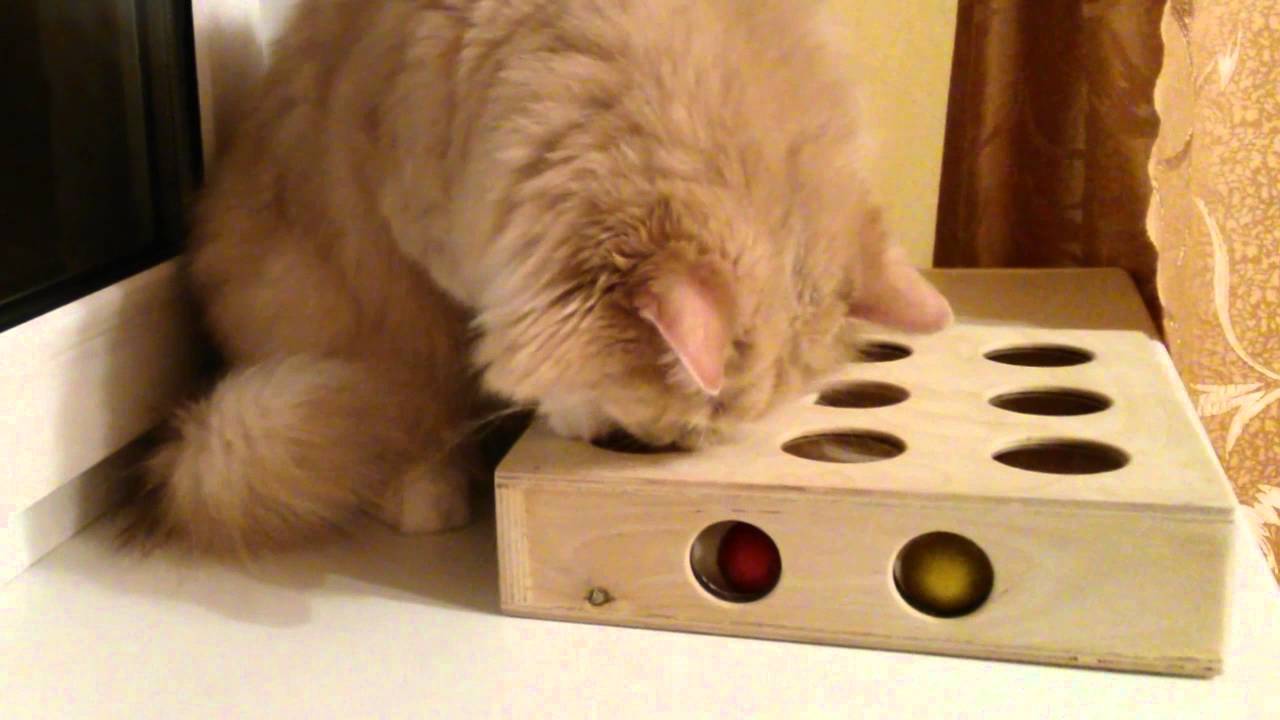
What is an interactive toy
Interactive toys are becoming increasingly popular.
They are intellectual entertainment where the cat has to go around an obstacle to get to the treat.
In pet stores you can find ready-made versions of labyrinths and other varieties.
However, such toys are quite expensive, and it is not known whether the pussy will like them.
Interactive maze for cats
There is such an option for an interactive toy for a cat.
- Choose a low cardboard box with a lid.
- Make small holes in it at different heights so that only the cat's paw can fit through it.
- Pour some treats or treats into the box.
Just three steps and the toy is ready.
Now the cat will try to paw the tidbit through the holes in the box.
Another option is also possible.
- Take a cardboard tube from under paper towels.
- Make small holes in this cylinder.
- Using this sample, make a few more (5 pieces) cylinders.
- Fold the finished products in the form of a woodpile and place a treat inside.
This interactive toy is easy to make with your own hands. This woodpile will look original next to cat furniture.
Option for an interactive toy made from pipes
Another version of the interactive toy is made from plumbing pipes.
For work you will need:
- four plastic elbows;
- drill with a special attachment.
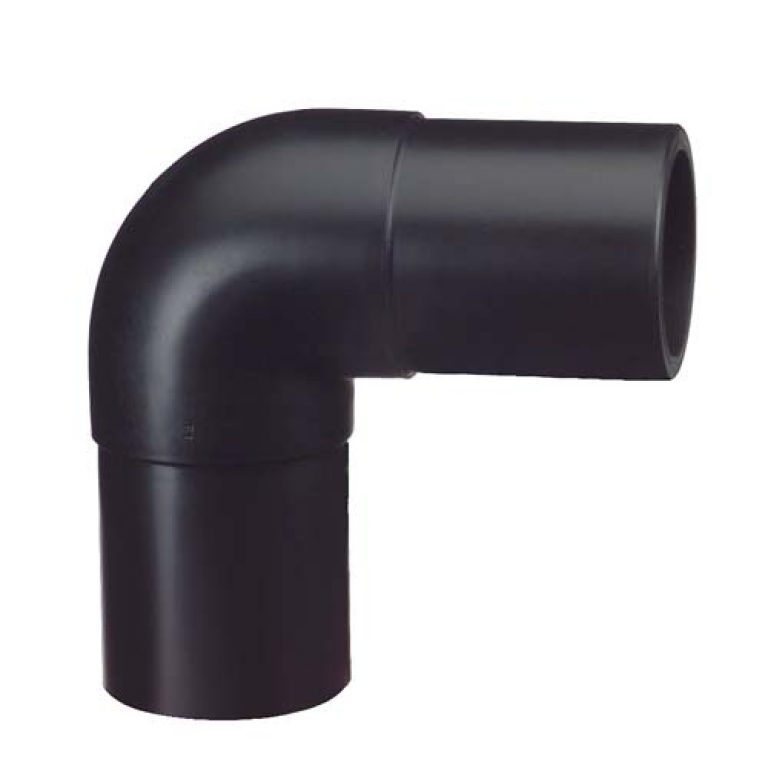
Original part
Connect the water pipe elbows together to form a vicious circle.
Using a drill with a special attachment, make holes in them that only a cat's paw will fit through.
Process the edges and throw a rattling ball into the resulting maze.
A complex labyrinth made from improvised means
To take care of their pet, some owners buy comfortable , , and in order to entertain him, they build complex game labyrinths.
Although it will take more time to make such a toy for a cat with your own hands, you will only need available materials for it.
You can see ideas using egg containers, parts cut out of plastic bottles, yogurt cups and much more.

The cat found a toy tunnel
To create entertainment for the cat, take a sheet of plywood.
A labyrinth is created on it using glue, various sticks and planks.
Additionally, other elements listed above are also included.
The cat needs to figure out how to get around obstacles and get treats.
The simplest and most accessible
Some toys require little to no time to make, but cats love them.
Watching a frolicking pet touches the owner.
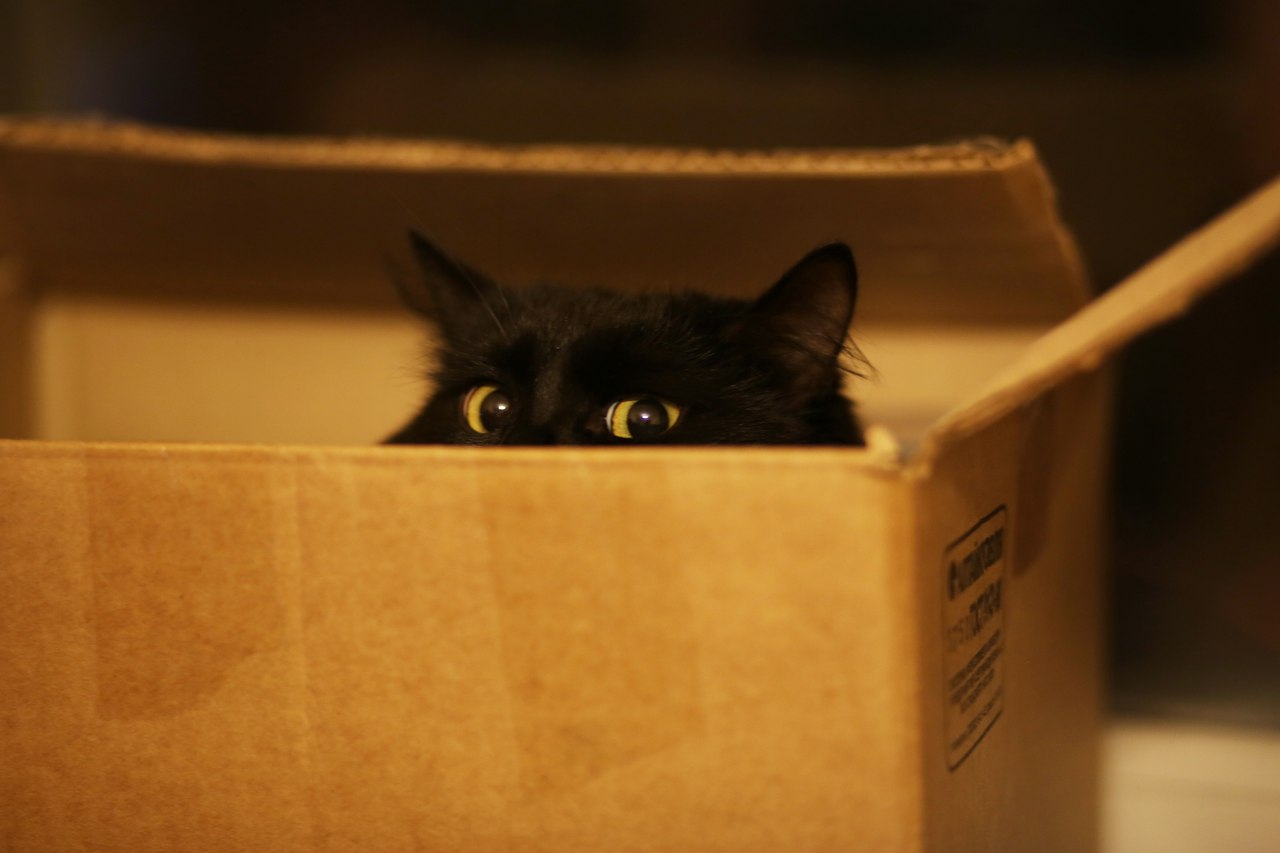
Sometimes an ordinary box will bring just as much joy to a cat.
- A ball of thread. It's unlikely that any kitten (or even adult cat) will remain indifferent to him. To prevent the ball from unwinding and the kitten from getting entangled, it is recommended to secure the end of the thread.
- Paper ball. Although this may seem too simple at first, when your cat is desperate for attention, a rustling wad of paper can be all it takes to redirect his attention to play.
- A cardboard box with windows that the cat can crawl through. A homemade tunnel may seem quite entertaining to your pet.
Do-it-yourself cat toys do not require large expenditures of money; they are often made from scrap materials. You can please your pet with a soft toy, a souvenir with catnip, a cardboard maze or an interactive game.
Cats are beautiful animals that have settled in the hearts of people since ancient times. In this article you will know how to make a cat from different materials with your own hands.
We are confident that both children and adults will enjoy this activity, as creative activity relaxes, calms and develops fine motor skills hands Over time, you will be able to create amazing work.

What can you make a craft from?
You can create a figurine of a furry friend from different materials. Let's list some of them:
- Paper, cardboard:
- Textile;
- Napkins;
- Balloons;
- Matches;
- Plasticine.


There are many materials that can be used as raw materials for a cat figurine.

Simple crafts
Here are some easy cat crafts that are perfect for kids. It is especially important for little masters to engage in creativity, because it trains imagination, sense of style, abstract thinking and fine motor skills.
CD cat
A cute portrait of a cat can be made from just a DVD disc. To do this you will need:
- Unnecessary CD;
- Colored paper;
- Marker:
- Double sided tape;
- Scissors;
- Corrugated paper.

Here is the algorithm of actions:
Cut out a circle from black paper. The size of the circle should be slightly larger size holes on the disk. Glue the circle to the center of the disk so that it covers the hole - the spout is ready.

Cut out ears and eyes from paper. You can make these parts of any shape or use a special instruction picture on how to make the craft.


Glue the ears and eyes to the disc using glue or double-sided tape.
You can make a butterfly for a cat from colored paper and glue it to the disk. In this case, a simple cat will look even more elegant.

Puff pastry panel
You can hang the panel on the wall, in which case it will become a wonderful accessory for your room. In addition, creating your own work of art will definitely be to your liking.


To do this you need to prepare:
- Pattern in the shape of a cat;
- Stationery knife;
- Salt dough (mix 1:1:1 water, salt and flour)
- Foil;
- Acrylic paints;
- Frame;
- Beads, ribbons optional.

Once you have prepared all the necessary elements, get to work.

Prepare a template in the shape of a cat. You can find it in a book and redraw it from there, or search for photos of crafts in the form of cats from the Internet.

Knead the dough in the specified ratio. Pour in a little water slowly, just 300 g of water will be enough to start with, then add more later. Water is necessary, otherwise the mixture will stick to your hands, which makes it unsuitable for work.


Leave the dough to dry warm time 3-4 hours will be enough for this year. When the dough has become stiff, sand the edges of the cat with sandpaper. Apply a design to its surface.

Gouache or acrylic paints start painting the figure. This is a very interesting and enjoyable activity.

Make a beautiful background for your future painting, you can paint it with gouache. Glue the piece to the background and then insert the cat into the frame.

Glue the cat using a glue gun. If you wish, you can stick beads, ribbons in the form of bows and other accessories on the figurine. Don't forget to varnish the product when finished.

Felt cat
To create a figurine of a four-legged friend, prepare the following items needed for work:
- Felt;
- Scissors;
- Threads different colors;
- Glue;
- Filler (you can use synthetic winterizer);
- Paper and a simple pencil;
- Beads and parts of old toys for decoration.


Let's get started:
Draw the outline of the cat on paper, then transfer it to felt. For greater convenience, you can connect the fabric to the paper using pins.

Make two sides of the animal and cut out its outline from felt.

Mark the eyes, nose and mouth on the cat's face. Start creating them: for example, you can use buttons or parts of old toys as eyes; you can embroider a nose and mouth with colored threads. It is worth noting that the use of threads of different colors makes the craft even more creative and bright.

Sew the felt parts to each other: the tail, the head and the paws to the body. As you stitch the pieces together, be sure to include some filling. An overlock stitch is best suited for this project.


Decorate the toy as desired: you can use ribbons to make a scarf, bow or tie. The craft is ready.

Master class on crafts on the topic: “Cat made of paper”
You can make a wonderful black cat from paper. This craft can become a desktop decoration that will lift your spirits every time you look at it.

Prepare the necessary items:
- Black and green cardboard;
- Bright yellow paper;
- Scissors;
- Black marker;
- Glue.

Let's start creating a member of the cat family:
Fold black cardstock in half. Cut it along the fold line. Fold one half of the black cardboard in half again, and cut a semicircle from the edge. This will create the cat's body.

Bend the edges of the paws to create fingers four-legged friend on which it will stand. Glue the cat's paws to the cardboard, which will serve as a stand for the product. You can use green cardboard to imitate grass. Make cuts in the back of the cat, into which we will then place the tail.

Fold the other piece of cardboard in half to serve as the head. Round the edges of the square. Make two cuts for the ears. Glue the animal's head to the body.

On yellow paper draw two cat eyes, and use a black marker to draw a pupil on them. Glue the eyes to the cat's head. Use the rest of the cardboard as whiskers and then glue them to the cat's head.

Cut the tail out of cardboard and place it in the slits. Place the finished product on a cabinet or desktop.

Conclusion
We learned how to create beautiful cat figurines from scrap materials. These lessons are simple, but the result of your work will definitely please you and your loved ones, because you can give the finished product to them as a gift.

Agree: it’s always nice to receive something made with your own hands, because every craft contains a piece of the soul of its creator.

Photos of cat crafts


It's no secret that when we take a cat into our home, in addition to the pleasure of communicating with our beloved pet, we acquire a lot of responsibilities and even problems. One of these problems is known to many cat owners - torn wallpaper, ties in curtains and upholstered furniture. This beloved pet is sharpening its claws.
You can’t argue with nature: it is impossible to wean an animal from sharpening its claws, since this need is inherent at the level of instincts. To help your beloved pet and save the furniture, provide your cat with a convenient place to “manicure” its claws, or better yet, a special design that combines both a house and a simulator. And we will tell you in step-by-step master class How to make such a scratching post for a cat with your own hands.
Of course, you can purchase a finished product in a store. There are many such products that combine everything at once in pet stores. However, their sustainability is questionable.
Why is it better to make your own claw sharpener?
The stability of most purchased structures is achieved through a retractable stop, that is, the house will stand between the ceiling and. Young, healthy, active animals will not miss the opportunity to climb on this support, which, most likely, sooner or later will lead to the fall of the structure. The supports themselves are of the same type, which also does not add strength to the structure.
In addition, such houses are designed for installation in rooms with a standard ceiling height, since the stop extends to a certain length. In apartments with high ceilings, for example, in “Stalin” buildings, you cannot install such a structure; you will have to order a stop of the required height from the manufacturer, wait for the order for several weeks, and it will cost much more.
Based on the above, a reasonable question arises: why buy a design in a store, and even pay a lot of money for it? It’s better to make something yourself from building materials, and save a lot of money.
Cost of a homemade house
Having calculated the cost of the manufactured house, we can say that such a house will cost about three times less than a similar ready-made structure purchased at a pet store. In addition, a homemade house is significantly superior to similar factory products in functionality, stability and reliability.
Project planning: diagram, dimensions
To make a scratching post, you need to first develop a design project, prepare necessary tool and purchase the necessary building materials. 
A practical and safe design option would be to place five crawling and jumping platforms on three support posts, a rectangular house, a hammock and a small platform on top of a long post. If there are several pets in the house, then it is advisable not to distribute the platforms evenly, since one cat, jumping on the platforms as if on a ladder, will not allow the other cat to sleep if he decides to do so on one of the shelves. 
Thus, on one base there will be three thick pillars connected to each other by the first platform. The second platform will connect the longest and shortest pillars, and the third will be placed under the rectangular box (house) and connect the main pillar with the middle one. Next will be the house itself, above which on the main (longest) pillar there will be two platforms of different sizes.
Preparation of tools and building materials
To create a house with a scratching post, you should prepare the following tools: a screwdriver, a jigsaw, an electric stapler, and an electric hacksaw.
You should also purchase the following materials:

Any material can be used as a covering for the house and platforms. Carpet is soft, durable and wear-resistant, so we will give preference to it. As for the rope for wrapping the post, you can use hemp rope, but jute rope looks better and is more durable.
Attention! It is better not to use cardboard for such a design, since the resulting scratching post will not meet the safety and stability requirements. After all, cats active creatures, and they need strong support.
How to make a scratching post with a house: step-by-step instructions with photos
Before you begin the construction process, there are a few things to consider. First, decide on the height of the future product. The maximum height of a stable structure is 2.2 m, so we make the tallest support column of this length. To do this, we cut off a 2.2 m long piece from the block. This will be the support pillar. 
Secondly, the basis for the structure must be stable. We cut a sheet of plywood into 6 equal pieces (approximate size - 750x500 mm) and take one of them as a base. The remaining pieces of plywood will be needed to make platforms. Preparatory stage finished, we proceed directly to the manufacturing process.
Making the basic frame
- First of all, in the platforms that will be attached below the house, we cut holes for the support pillars. We will leave the platforms that will be attached to one pole and placed above the house for last.

- On each platform that will be located below the house, using a pencil we make marks where the pillars will presumably be located.
- To simplify your task, you can make a stencil from a sheet of whatman paper with the locations of the pillars relative to each other marked on it.
- By marking the platforms using a stencil, you can be sure that the platforms will fit regardless of their geometric shape.
- The first connecting shelf will be the largest. It can be made rectangular (a cat can easily jump to such a height from the ground), or you can cut a semicircular groove in it. The more various holes and cracks there are in the structure, the more interesting it will be for cats to climb on it, so we make the first platform with a large corner round hole. From the cut piece we will later make a wall with an entrance for the house. We make the remaining three platforms according to the same principle: we either leave them rectangular, or use a power tool to give them a shaped shape.

- We make holes for supports in the prepared platforms. In the opposite corners of the rectangles drawn using a stencil, we drill holes using a drill with a diameter of about 12 mm, then using a jigsaw we cut out grooves for the supports. It is better to make the grooves a little larger than required. Otherwise, even a small millimeter deviation may interfere with the assembly of the structure.

- We assemble the finished platforms into one structure to make sure that the supports fit into the grooves.
Before proceeding with further assembly, the platforms should be upholstered with carpet, since upholstering platforms already attached to the posts is problematic. We do this using an electric stapler, it is much easier and faster than doing it manually.

Next, we attach the platforms to the pillars. To do this, we make marks on the pillars that will help place the platforms parallel to each other. To be sure, we make marks on all sides, so it will be more convenient to screw the corners in the future. We attach the corners that will hold the first shelf directly to the pillars, and we attach the corners that will hold the remaining shelves directly to these shelves. After this, we assemble the structure, that is, we screw the platforms to the pillars. You don’t even have to screw the supports to a single base just yet; the platforms already reliably hold the structure together.
Making a cat house: master class
We take pre-cut pieces of plywood as the building blocks of the house. From one piece of 75x50 we make the floor and ceiling, from another - the side walls and end. The wall with the entrance to the house is already ready - it was left over when cutting out the first lower platform.
We screw the corners to the side walls and bottom and assemble all the elements together. Even if the box doesn’t turn out very smooth, don’t be upset, the carpet will hide everything.
Let's start upholstering the house with carpet. We do the upholstery both outside and inside the house, and secure the carpet using an electric stapler.
We attach the house to a structure consisting of pillars and lower platforms. To do this we use a screwdriver. You can simply screw the house to a pole, but in this case the stability of the structure is unreliable. To ensure better stability, it is better to pass the support inside the house along the corner.
After this, we proceed to wrapping the pillars with rope. To do this, carefully wind the rope in a circle around the pole, pressing it to the base after each turn. We fasten the rope to the post using an electric stapler.
Making a hammock where it will be comfortable for both the cat and the kitten to lie
We cut out a frame from a piece of plywood using a jigsaw, tighten it with material and carefully attach it to the post. You can use carpet to make a hammock, but it is better for this purpose to purchase a special material that is just as durable, but not so dense. To attach the hammock to the pole, we use large corners with a stiffener. The fact is that this structural element is attached to only one support, and it must withstand the weight of one cat lying in the center. 
It is quite possible that the cat will not sleep in the hammock, but will use it as a kind of springboard or will simply play with the threads sticking out of the scratched fabric. In any case, the hammock will be used.
At the final stage, we mount the roof of the house and attach the entire structure to the base. The structure is quite heavy and relatively stable, so you can attach the pillars to the base using self-tapping screws. To ensure greater stability, you can additionally attach the main support of the structure to the wall using a large bracket.
In every pet supply department there are always several types of houses for cats. You can pass them by, considering the very thought of a separate home for an animal that is already at home as a whim. You can buy a bright and expensive product, which for some reason your mustachioed and striped one will not want to live in for a long time. You can also build your own version, unique, quite affordable, convenient and loved by your cat.
Why build a “cat house”? After all, the cat is already domestic
The house in which a cat lives is for it a whole vast territory, hunting grounds, running and acrobatic spaces with places for feeding and stroking.
However, she needs something else... The mustache-tailed creature cannot say what exactly it is looking for.
It only gives obvious signs, climbing onto a chair pushed under the table, nesting in the depths of cabinets and bedside tables that were carelessly left open, settling in boxes that are more or less suitable in size.
A personal shelter is what a cat without a home lacks. This need is strong and deep - it goes back to those distant times when the wild ancestors of domestic purrs lurked in solitary ambushes at night and made themselves a safe den for daytime sleep.
An attentive and caring owner (a huge two-legged giver of food, drink and affection) will naturally take upon himself to provide the cat with a suitable home.


An original solution could be a cat house made from a suitcase.
Isn't it better to buy?
Specialized departments and stores offer a wide range of cat houses - with cat beds, beds, and shelves.
However, making such a home with your own hands has significant advantages.
Firstly, you can select materials yourself, including from home supplies. The result: savings in price and confidence in the required quality.
In addition, you can build a house, the size, shape and strength of which will ideally match the character and dimensions of your pet.
A personal, creative approach to business will allow you to create a truly unique “cat house”, which, by the way, will fit into your interior if you think about it in advance.


Above are photos of do-it-yourself cat houses.
Cat and cat: different needs
Cat can lie directly on the roof of the house, which has only one hole. After all, all he, a constantly lonely hunter, needs is a personal safe shelter and the ability to see.
To the cat it is more comfortable if her home is equipped with an additional entrance and exit, and the “observation platform” is not on the roof, but on a separate stand. Such features are due to the fact that a cat’s home is, in principle, also a place for possible shelter for kittens. Therefore, the family should be kept away from the viewing area, and in the event of an attack on the nest, the offspring will escape through an additional hole, while the cat, with its claws extended and teeth sharpened, defends the main entrance.


A simple and easy solution on how to make a house for a cat from a pipe.
Typical project: what to choose?
Options for solving the cat's housing issue depend on the nature and size of the pet, as well as on the future use of the house.
Stationary or mobile
If you plan on long-term placement in a permanent place, you also need to choose solid materials - wood and metal.
In the event that moves are expected (for example, to the country and back) and replacement of cat housing, choose softer materials - cardboard, papier-mâché, wire frames, paper tubes, thick fabric, covered with foam rubber.


You can also make a house for a cat out of boxes.
Standard or exclusive
Most often, a standard box shape is used, which is convenient for manufacturing and easy to assemble.
Some breeds of cats, whose ancestors settled in tree hollows - the Siamese and - like to stretch vertically upward. They make taller dwellings - cylindrical, imitating a hollow tree trunk or the original "wigwams".
Wigwam for cats “comes from a hollow”:


“Soft” solutions, not designed for a long time, gravitate toward round and ribbed shapes.
Frame shelter from an old T-shirt:


Separate housing or communal apartment
For several cats, you can build a structure from individual houses, fixed at different heights. The leader of the cat hierarchy will certainly occupy the most profitable, top floor.
Taking measurements
The interior space of the house is created on the basis that the occupant will be able to lie comfortably on his side. Therefore, the average dimensions of the house are 40x60x40 cm. For large breeds need a larger scale.
The diameter of the hole should be sufficient for the purr to pass through it freely. At the same time, an opening that is too spacious is a “leaky”, bad shelter. As a result, the average entrance-exit diameter is 15-20 cm. For well-fed specimens, it increases accordingly.
A separate viewing platform should be at such a height that the animal can easily climb onto it, standing on its hind legs.


You can even make a house for a cat out of newspaper tubes, look at the photo above.
Materials: control by fine scent and soft fur
The coloring of the house and its upholstery does not matter to the resident: cats have little ability to distinguish colors. Therefore, the shade can be chosen in complete harmony with the interior or the color of the cat itself.
Smell, on the contrary, plays a primary role. The shelter should smell only of your own, your family, your acquaintances - home, owners.
This is where homemade plywood scraps come in handy!
For soft upholstery, it is better to use used material, even old foam rubber left over from reupholstering furniture or an old owner’s T-shirt - remember about saving?
If new building material is purchased to build a cat house, it should initially not have its own smell - at least not one that can be detected by the human nose. The purchase needs to be kept for another week: first on the balcony, then in the apartment, and only after that used.
In the video above you can see one of the options on how to build a house for a cat.
The subtlety of a cat's sense of smell is determined by the only type of glue that can be used: PVA.
Synthetic material or natural does not matter fundamentally, the only important thing is that there should be no electrified elements in the design. For this reason, for example, silk and silk threads are unsuitable.
Exposed metal parts are also unacceptable: through them a discharge of fur electrified by friction can occur. In addition, exposed metal fasteners - furniture corners, for example - often have narrow gaps that pinch the hairs of a cat's fur coat.
As a result, the ideal kit for making a house includes:
- plywood with a thickness of 6 to 12 mm, dry, well-weathered wooden boards;
- natural fiber spiral rope;
- wooden stick with a diameter of 5-10cm;
- furniture foam rubber;
- furniture fabric or carpet;
- padding polyester or similar material;
- PVA glue;
- small nails, wood screws.


You can make a house for a cat out of an old monitor.
Tools
You will need to work with wood, fabric, glue and nails, so the set of tools is simple and accessible:
- wood hacksaw, jigsaw;
- hammer;
- scissors and knife;
- screwdriver;
- awl;
- pliers;
- glue brush;
- ruler.
General scheme
One of the fairly easy-to-make houses with two round holes, a scratching post and a lounger-observation platform in the sketch looks like this:


Drawing of a house for a cat.
Uncover
Using a wood hacksaw and jigsaw, the common base, plywood parts of the house and platform are cut out.
Round wooden sticks of the required height are sawed off.
It’s good if part of the roof is removable - this will make sanitary care of the inside of the house easier.
Pieces of padding polyester, foam rubber, and furniture fabric are cut out according to the size of the walls and platforms for finishing surfaces.
Softness and comfort is our motto. Fastening and assembly
Plywood and wooden parts are placed on glue, fastened with nails and self-tapping screws.
Fabric and foam parts are carefully glued, applying PVA around the perimeter of the piece of fabric and fan lines from its center
The sequence of assembly operations is as follows:
- prepare the base and attach a post with a deck chair to it
- assemble a house from parts covered with fabric from the inside
- cover the outside of the house and the lounger with decorative fabric
- install the house on the base, securing it with glue
After a day or two, the assembled and dried house is ready to move in. A replaceable mat is placed inside.


The photo above shows do-it-yourself cat houses.
Housewarming: where to find the fifth corner?
Indeed, where to put an additional, ready-made cat corner?
From the general needs of all furry and clawed animals, it follows: they will happily settle where there is heating and a promising view from above of the surrounding area. Therefore, an informed decision arises: to celebrate a housewarming party not far from the radiator (stove) and the window with a window sill.
You can approach it individually.
Sociable cats will be happy with the open layout of their new nest.
An animal that turns its back on society and likes to snooze in a closet will prefer a secluded corner
If your purr likes to greet and examine incoming guests, it will barely open Entrance door– it is better to position the house so that the hallway is visible from it.
In the event that the appearance of a stranger is stress and the domestic animal waits out the invasion of a stranger in the safest, in his opinion, part of the house - that is where the most the best place for the home you made.
Video instructions on how to build a house for a cat.
Happiness is within
When your pet examines your product, tries it by smell and claw, and then blissfully stretches out in a serene rest, looking contentedly out of the hole-window, do not doubt: his little fluffy feline happiness has come to him.
Be happy, too, you, a reasonable person who understood the desire of the dumb little brother.
Surely cat owners have often noticed that their pets are more willing to play with objects accidentally found in the apartment than with toys from the store. The reasons for this animal behavior are inexplicable, but the fact remains. Therefore, instead of once again spending money on toys for cats, it is better to make them yourself from scrap materials. We share simple ideas that will tell you how to entertain your pet simple and fast.
1. Play station for furry explorers

Glue the rolls from toilet paper V different positions onto a thick piece of cardboard. Inside them, put little things that attract the cat’s attention - for example, large buttons, beads. The cat will try to get them.
2. For a few pennies

Make several holes in the base of the toilet paper roll in a chaotic manner. Thread them through cocktail straws, bright shreds or pompoms. This toy will keep the animal occupied for a long time.
3. From your favorite cardboard box

It is a well-known fact that cats are not indifferent to cardboard boxes. Take advantage of this feature and turn it into a gaming station out of the box. Inside the box there are small objects, and on top there are bright cords that will also attract the cat’s attention.
4. Mini tangle with protection

Letting your cat play with regular balls or spools can be dangerous as he may choke on the threads. Therefore, we propose to slightly modernize this option for entertaining a cat. Roll the threads into a medium-density ball, leaving one end free. Then wrap the ball in regular foil. Cats love its rustling and soft shine.
5. Second life for leftover water pipes

You can make a do-it-yourself cat toy from leftover water pipes. You just need to connect them using corner elements, which are sold at any hardware store. You will also need to cut holes in the pipes slightly larger than a cat’s paw, and put various little things inside. The cat will try to get them.
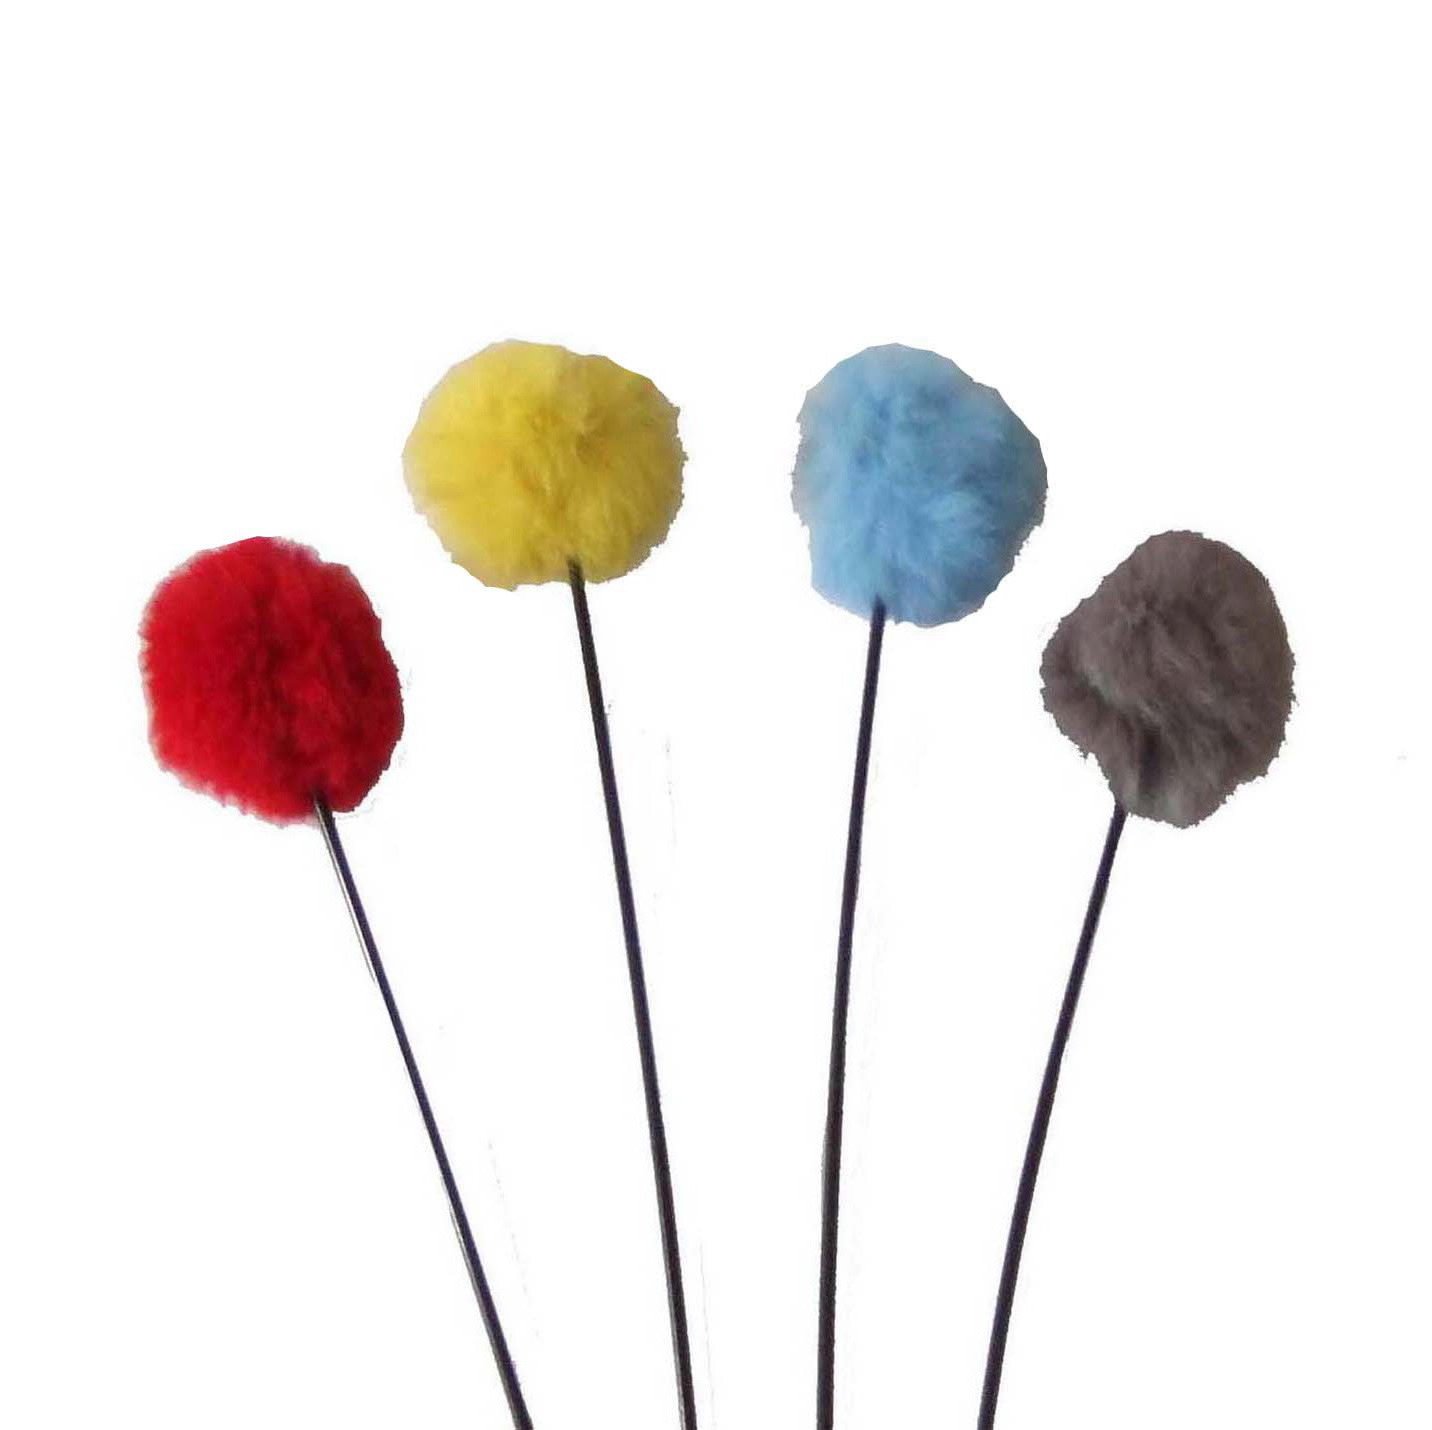
6. Soft pompoms

Pompoms on a string are a favorite toy of many cats that never gets boring for them. for a long time. Ready-made toys can be hung on the doorknob so that the cat tries to get them.

7. Making a sommelier out of a cat

Cats love to play with wine corks because they are lightweight. You can simply give the cat a cork, but if you have some free time, make a more complex toy. For example, tie it with a crochet hook or attach bright feathers or ribbons.

8. For needlewomen who are friends with a needle

A person who knows how to use a needle can sew a simple toy for a cat in a couple of minutes. We recommend choosing fabrics of sufficient density, such as wool or felt.

9. From a T-shirt that is collecting dust in the closet

To make such a cat toy with your own hands, you will need an old knitted T-shirt. Cut it into thin strips, fold them together and tie them in a knot. To make it more interesting for the cat, we recommend using T-shirts of different colors and knitwear that differ in density.
10. Disposal of corrugated cardboard

Corrugated cardboard, from which large boxes are made, is useful for creating toys for a cat. Cut a lot of circles out of it, make a small hole in the middle of each of them. Then string them onto a piece of lace, tying it into knots.
11. Bright shreds for a cat

Cut the pieces into square shapes. Foam rubber, scraps of fabric, and thread are suitable for filling them. To make the bag arouse the cat's increased interest, you can put a little catnip inside it.
12. If a child’s sock is left without a pair

Using the method described in the previous paragraph, you can make a toy for a cat with your own hands from a child’s sock. Just fill it with something soft and tie it in a knot.
13. Cat fishing rod

A thin wooden stick, strong thread and strips of thin fabric are all you need to make a cat fishing rod. Fold the fabric overlapping and use a needle to thread the thread through the strips. Tie the free end of the thread around the stick.
When the issue of entertaining cats is resolved, a lot of free time is freed up. Why not spend it on improving the interior of your home? For example, check out


