Chapter 1. Into the fire.
Chapter 2. Something went wrong.
Chapter 3. Resonance.
Chapter 4. Behind the scenes.
Chapter 5. Waiting.
Chapter 6. On the hunt.
Chapter 7. Thirst for art.
Chapter 8. Premiere.
Chapter 9. New evil.
Chapter 10. Initially hidden.
Chapter 11. Reunion.
Chapter 12. Bottomless abyss.
Chapter 13. Stronghold.
Chapter 14. The Burning Altar.
Chapter 15. The end of this world.
Chapter 16. Purgatory.
Chapter 17. Exit.
13. Stronghold
"Network": production premises
Having come to our senses, we learn that Torres has died. We take her weapon - assault rifle. This shelter has 1 red gel. Theodore's fortress appeared in the middle of Union; to get to it, we go through the previous location.
Business district
The whole area is overflowing with monsters. We kill ordinary ones to obtain the gel. It is better to avoid the two flamethrowers; they take too much ammo. But if we can kill them, we’ll get a flamethrower cylinder for each one. We connect 2 cylinders with a faulty flamethrower, and we get a new weapon - a flamethrower. New secrets also appeared at the location.
We'll find you in a locked warehouse 2 special details.
We'll find it inside the train.
Near the diner you can find pouch (sniper rifle).
Near Sykes's hideout there is pouch (shotgun).
Near the hotel "Obitel" there is pouch (assault rifle).

Add. task: The last step
We arrive at Sykes's hideout. He is about to leave Union through an experimental facility. On his instructions, we go down into the dungeon into the experimental wing, kill several possessed people inside, and solve the puzzle with the switches on the panel. In the last room we use the installation, Sykes will disappear, leaving us a reward - slide (10/11) and double barrel shotgun.
We return to Sykes’s hideout, on the table near the TV we find a paper note - document (37/40).
We get to the Abode hotel in the south. Hoffman comes there after us. Together with her we are preparing for the journey through the fire to the stronghold. In the dialogue, we refuse to go in order to first collect a couple of items at the hotel.
In the hotel, on the table there is Hoffman's diary - document (38/40).

Path through the fire
Hoffman will come with us and use a special device to protect us from the wall of fire. We protect her from attacking fire monsters.
At a certain moment, the force field of the installation will begin to narrow, we stand still and shoot back from a dozen enemies. There will be another such moment a little later.
At the end, Hoffman will die, and we will be thrown inside Theodore's church.
14. Burning altar

Church hall
In the church there are some resources on the sides, in the center there is a document (39/40) on the table.
There is a fork in the next room. On the right there is a dead end with a mirror for saving, we will find it there pouch (assault rifle). To the left is the main path with a long staircase.
locked hall
We enter a large hall with bridges, here we are locked in with several fiery enemies, we can kill all of them silently. We examine the hills on the ground from where the golems came out, there may be resources there.
On the left in the corridor we can go down to a separate room. We burn two ordinary enemies, and when we enter and take all the items, two fiery enemies will attack us. In the corridor, press the lever to open the gate in the main hall.
When we defeat all the enemies in the hall, we go up the spiral staircase. Up on the table we take 1 red gel.

Corridors with valves
On the way, gas pipes with escaping flames will interfere with us; we turn the valves to close them. Some pipes need to be turned off by shooting at the dampers, usually they are located under the ceiling.
On the right side of the table we will find Theodore's Scripture 2 - document (40/40).
We go to the far right corner, we will find pouch (pistols).
We reach a locked staircase, you need to press all the levers around, turn all the valves. Here we will be attacked by several dog monsters.
Upper hall
We go up the stairs to the hall with the fiery cross.
We are not in a hurry to enter the doors, first we go down the vertical ladder into the central pit, we will see how Theodore gave the task to the photographer - fragments of memories (20/24).
We meet Theodore again. He will again send the illusion of Lily to us, but this time the feeling of guilt will not work. Then he uses our forgotten fears - the bosses from the previous part of the game.

Boss: Sadist. We find ourselves in a narrow corridor, a maniac with a chainsaw is chasing us. Here you just need to dodge in time and attack from behind. After this, we saw the enemy.
Boss: Guardian. We find ourselves in the basement of the safe-head. We run in circles, collect ammo, and attack him from afar. He will appear again and again, and in the end two Guardians will attack at once. But eventually the safe will fall apart.
Boss: Laura. A multi-armed girl appears. Up close, she kills in one shot, so we constantly run from her. We don't waste ammo, we need to drive her into a fire trap. We choose a moment while she is not nearby and alternately turn the two valves. After that, we lure her to the center, stun her with an electric or cryo bolt, and quickly press the lever. The girl will burn in the fire.
To get the achievement, you need to kill Laura with your flamethrower. He doesn't have much health, so first we fire 5 shots from a magnum on normal difficulty, and then finish him off with a flamethrower.
Having defeated all the bosses, we return to Theodore. It will not be possible to kill him; Mira will appear and do it for us.
15. The end of this world

Building debris
We have defeated all enemies, but now a new danger has appeared - our wife Mira. Her white gel filled the entire world of Union, crushing it into smaller pieces. We follow Mira through the rubble of buildings. When we go lower, we look into the side room, there 1 special item.
Battle on the road
We go out onto the road and fight with the white possessed. They are much stronger than ordinary enemies, but are easily killed with this technique: we shoot at their legs, and when they fall, we trample them.
1 fight. Several enemies.
2 fight. A dozen regular enemies.
3 fight. A boss will appear - a large double monster with a pillar. We shoot him at the red dot in the center and explode the barrels near him. For winning we will receive 10,000 gel.
We catch up with Mira, and together with her we fall into her reality.
16. Purgatory

Memories of Mira
We appear in the white desert. At the top of the hill we see our house, where Mira hid her daughter Lily, we gradually climb there. Along the way, we watch several memories, tracking them with the communicator.
Kidman, Mira, Torres and Theodore come up with their plan - fragments of memories (21/24).
Mira plans to become the core instead of her daughter so that she can be released - fragments of memories (22/24).
Mira saved her daughter, but Theodore claimed his rights to her, began to attack, and destruction began in Union - fragments of memories (23/24).
On the way to the house there is a piece of our police office, we save in it. Nearby we find 1 red gel.
Mira hid her daughter in her reality, and took part of her power to protect her - fragments of memories (24/24).

Boss: Mira
Right in front of the house we meet Mira, she turns into a huge monster made of white gel. A shotgun is useless here due to long distances; it is better to have a supply of cartridges for a pistol and a sniper rifle.
1st phase. First we shoot her in the stomach, soon the armor will collapse, revealing a vulnerable heart underneath. At this time, the boss attacks with his hands, you need to watch their movement and step aside. When we inflict a lot of damage, blood will flow out of it, which will turn into red spiders. We trample spiders to replenish our ammunition.
Phase 2. Vulnerable points will appear behind her shoulders. We wait for a blow with our hand, we dodge, we shoot at the yellow growth. Having received enough damage, the hand will fall away and grab us. We shoot at the yellow growth on the hand itself.
Phase 3. We repeat the same with the second hand.
Phase 4. We shoot the monster in the face. At this time, she will attack with tentacles instead of hands.
When we win, the boss will melt into white liquid. We enter the resulting lake, take out our wife, she is conscious again and cured of obsession.
17. Exit

Sebastian gets to his house.
At this point, Kidman in the real world begins to carry out his part of the plan. In the control room we shoot back at the Mobius agents. The administrator manages to escape and continues to communicate with us, standing on top.
The Evil Within 2.Walkthrough
The main character is a young detective Sebastian. His house is on fire ahead and therefore it is necessary to save his daughter, Lily, as soon as possible. The front (central) door turns out to be blocked, so go through the window with right side. Once inside, quickly go up to the 2nd floor. Sebastian finds his daughter in the children's room. Soon all this turns out to be a nightmare and in fact the man was unable to save his daughter at the time.
Sebastian comes to his senses already in the bar. 3 years after the events that occurred at the Mayak hospital, special agent Kidman comes to him. Over the past years, the main character managed to get on the trail of the Mobius organization, which is behind all these experiments on merging consciousnesses with the STEM machine.
Kidman reveals that Sebastian's daughter is actually alive, but she is being used as the central mind in the new "STEM" system. The system, in turn, worked perfectly, but literally a week ago it began to malfunction abruptly, and now “Mobius” offers the hero to eliminate the consequences of these problems in order to save Lily (daughter). So the hero has to plunge back into the gloomy virtual world, which is created from thousands of thousands of human memories and consciousnesses.
After running around in the dark for a bit, you soon find yourself in an office at the police station. Kidman will contact you in a few seconds. Carefully examine the drawing and photographs of the Mobius agents who have disappeared and who now need to be found: the group commander - William Baker, responsible for combat interactions - Miles Harrison, responsible for technical support - Liam O'Neill, STEM programmer - Julian Sykes, responsible for psychoanalysis - Yukiko Hoffman.
Chapter - 2: “Something went wrong”

The Evil Within 2. Walkthrough
"Police station"
It's time to leave your office. On the table, the first thing you will definitely notice is the black cat - this is Kidman's cat. The first ♦ will lie near the cat "" (1/11). Nearby, look closely at the film projector: on it you will see the collected photos. To save the game, you need to use a special communication device located in the suitcase - this is a police terminal. As for memories, you still need to use a mirror to move between them, so nothing complicated.


"Museum"
Once in the main character's house with his daughter and wife, you will soon be transported to the museum. There will be a picture of doors hanging on the far wall - go to it and after that the same door will appear behind you. Come inside. Go to room number “102”, where inside you will find the first agent - William Baker. The special agent's body froze at the moment of the murder right in front of the camera. A little further ahead in the red room there will be the first ♦ "" (1/40). Take the document and now go to the far room on the right to move the shelf aside and go into the corridor.
"House with Stairs"
There is a telephone hanging on the wall on the right side - answer the call. In response, someone simply laughs. On the 2nd floor you need to crawl under the rubble, and then pick up the second ♦ on the table "" (2/40). Next, go higher - to the 3rd floor, where there is a room with red curtains. In the next room there will be such a picture: a maniac photographer kills a person with a knife and at the same moment photographs it, and the body once again freezes in a dying state. In just a few minutes you will have to hide from the maniac behind the sofas on the left. Don't worry, he won't find you, so he'll leave this room soon.
"Twisted House with Stairs"


Through the corridor, which is hung with paintings, go back to the house with the stairs. Upon arrival you will notice that it has already changed. Go up to the 2nd floor and go into the hall in which there is a sculpture of a many-armed young lady (girl), where you then crawl through the grate to the other side.
As a result, you will now find yourself in a room where many corpses are suspended. A red eye will be drawn on one of the walls, and on the opposite side there will be a camera standing near the wall: approach it and after that a door will appear in place of the red eye. Go through the doors and the hero will be photographed.
Now, near the next glass, carefully examine the body. And get ready, because very soon a multi-headed monster-girl with a saw in her hands will burst into Sebastian. From it, first run around the boxes, and then break out into the corridor and then run forward along it. At the end, you will have to quickly find your bearings and jump over the fence: the key that is responsible for the “Forward” movement + the “E” key. However, this is not the end: now you need to quickly climb into the ventilation shaft. Crawl quickly to the next room: the monster will not leave you behind, so it will continue to pursue, but now the photographer will throw a knife. Therefore, if you fall into the clutches of a monster, fight and run away at the first opportunity (when this very “opportunity” appears). In the end, thanks to your efforts, Sebastian will escape and he will now have his first weapon - «» .
"The First Abandoned House"
This time you will find yourself in a house on the very edge of the city. Inspect all the rooms carefully - there will be one syringe in the bathroom. When leaving the house, be very careful, because there will be a second weapon - «» . In addition, at this point, if you pre-ordered the game, then you will receive additional starting items as a bonus. In the new location, go inside the locked room on the left to pick up the third ♦ inside. "" (3/40). When leaving this house of the main character, also be sure to look at the photo if you want to get the fourth ♦ "" (4/40).
"Second Abandoned House"
And on the street, the first thing you do is just run to the next house. Along the way, you can take one herb, which will lie on the right side of the house. There will be a corpse lying in the car nearby. In addition, at a certain moment you will notice an unknown woman running into the house nearby. A little later, when you are inside, it turns out that she has turned into an possessed monster, so you will have to kill her. As a reward you will receive 200 gel. Be sure to go up to the 2nd floor because the 4th gunpowder is there. After this, you can safely go back outside (there will be grass on the right side right next to the house).
"Shootout"


Continue along the road. Very soon you will find yourself in a city called “Union”. At the same moment, you can already hear shots from afar: several special agents are firing back at the possessed, and one of them still manages to escape inside a nearby building.
So, there will be a lot of possessed people ahead, so I recommend acting as secretly as possible. The enemy who comes running can be killed secretly from behind. After that, make your way further, sticking strictly to the left side, hiding behind the cars along the way. In the bushes nearby you can find a little more grass in the amount of 2 pieces. In nearby cars you can find useful resources. Now you need to get to the monster that is eating the corpse in order to kill it and get 500 gel for it. After it, you need to get to the next monster: the goal is a monster that is breaking into the house. Secretly kill him from behind, go inside the building and do not forget to barricade the doors behind you.
Chapter - 3: "Resonance"
WalkthroughThe Evil Within 2
"O'Neill's Refuge"
Inside in the bathroom, in the cabinet (hanging) there will be two syringes. To talk with special agent O'Neil, go down to the basement. And although he is just a technician who does not know how to fight, he promises to help, namely, to help with communications. During the dialogue, talk about all available topics. Thus, you will receive an additional task: «» . Inside the room, I definitely recommend collecting all available resources. By the way, in the same place there will be a save terminal, a workbench for creating items, and a coffee machine for restoring the main character’s health.
In any case, in the corridor you will see the ghost of a nurse and a mirror. Once at the police station, you can find a short excerpt with Sebastian's memory of the Lighthouse. Sit down in the chair, and a nurse named Tatyana will appear next - this way you can make improvements thanks to the collected green gel.
"Southern part of the city"
The Evil Within2. Completing side quests
It's time to go back outside. From the outside, the first thing you will notice is that the city is gradually beginning to collapse and, for example, the road along which you walked before is no longer there. Now you have a huge section of the open world in front of you, where you can go in any direction. The enemies you encounter here will be extremely dangerous, and ammo is very limited. So I recommend collecting various garbage, constantly returning to the shelter and creating ammunition for yourself at the workbench.
On the right side on the far street there will be a lone enemy wandering: wait until he drags the corpse into a pile, then kill him carefully from behind. There will be several useful items on the boxes around - be sure to take everything. You can throw bottles at your opponents' faces, and then calmly finish them off with a knife, but in this case you need to act quickly and not hesitate.
"Church"
First of all, I recommend getting to the church. Three opponents will be waiting inside the hero at once, so if there are no cartridges, then immediately run back and try to eliminate each one one by one on the street. On the altar inside there will be one syringe and nearby, if you look carefully, you will find another herb. There will be a figurine hidden behind the altar, and if you break it you will get "" (1/32).
"Tourist centre"
After church go to tourist centre, where there will be no more enemies inside. Inside there will be one herb and four units of gunpowder. Behind the tourist center there will be a stationary enemy. Inside the tourist center there is a fifth one on the table. "" (5/40). There is another one on a bench right in front of the tourist center. "" (2/32). The three-story building will be locked from the outside, but it will be possible to enter through the roof. There will be a new weapon inside - «» . In addition to the weapon, there will be a sixth "" (6/40).
"Crossroads with armored personnel carrier"
After a thorough search of the tourist center, go to the crossroads, where Sebastian will come across three opponents, one of which will be mobile: you can pass by him along the wall on the left side. However, if you kill enemies, then you can pick up 3 cartridges from the corpse of the killed agent.
Following the intersection there will be a military armored personnel carrier, and behind it there will be another new weapon - "Guardian". In addition to weapons, you can also find there: 2 electric bolts and 2 harpoons. I recommend immediately shooting an electric bolt at the puddle that is located behind the fence in order to lure many monsters to you. But keep in mind that electricity will not kill enemies, but will only stun them, so you will have to finish them all off. This way, you will save yourself a lot of problems, and then you can find 3 more cartridges in the dead end behind.
"Crimson's Supermarket"
There are more cartridges on the roof of the supermarket, but to do this you will have to kill one stationary enemy at the top, and to climb onto the roof you need to go around the building on the right side. On the left side near the supermarket there will be two shadows - in this place you will need to use the radio station to hear the military conversations - this is how you will get the first "" (1/24).
"Eastern part of the city"
Completing additional tasks inThe Evil Within 2
"Cider Avenue, No. 322"
Move along the eastern street, where almost all the houses will be locked, although you can still enter some. Houses that are available for search can be identified by audio signals yellow color at the top left of your screen. So when you see such an icon, use the communicator for which the “G” key is responsible. After this, track the signal and get a new mark on your map.
Inside you will see negotiations between the next military men, who will tell the hero that there is an arsenal in this place - this is how you get the second "" (2/24). There will be a syringe in the bathroom (in the cabinet). The building also has a basement, when you go down into it you will come across two computers - use them. In connection with these actions main character moves to another part of this virtual world. Along the way you will meet several monsters, but now there will be much more ammo.
Now, in order to break into doors, you need to substitute one on the oscilloscope sound wave under another. To shorten your way back, I recommend shooting an electric bolt at the shield. In a dead-end room there will be a silver case, and inside - «» . And near the shotgun in the corner there will be a figurine, inside of which the third one is hidden "" (3/32). And as soon as you take all the useful items and things, return back to the main virtual reality.
Continue along Cider Avenue. Then you will come across a rather large two-story building, but you won’t be able to get inside, but at the end of the balcony of this building there will be one syringe and a useful item for a shotgun - «» . In addition, on the way there will also be a cunning trap from a maniac photographer: the main character will be unexpectedly attacked by a zombie in slow motion. In the end, on the platform in front of the two-story house, the corpse will have another useful item, but for pistols - «» .
"Cider Avenue, No. 336"
Near this house, Sebastian will suddenly hear the frightening screams of an unknown woman - move towards the screams. You can pick up the seventh inside "" (7/40). Soon the house becomes terribly cold and several women appear - after which the hero ends up in a hospital with two rooms. Make your way past the spirit and be sure to take the key card near the couch to unlock the doors further down the corridor. When you get rid of the disturbing spirit, you can find a second one on the table "" (2/11). And let me remind you that all the slides found can be reviewed at the police station, after which you can talk about all this with Kidman. For each slide you find you will receive 700 gel.
"Cider Avenue, No. 344"
This house can only be entered from the garage. You won't be able to find anything particularly important inside, except for resources. And one more important point in this house: when you go inside, the doors will slam and after that one enemy will attack the main character.
"Cider Avenue, No. 345"
Come inside pretty an ordinary house. In the back room, find a couch - behind it there will be a request for examination of the main character - "" (8/40). As soon as you take the document, the house will immediately close and it will be impossible to leave - Sebastian begins to be drawn further and further into personal memories. So when he finds himself in the past, turn on the TV and watch the hero’s appointment with a psychologist. In the bedroom on the bed be sure to take the ninth "" (9/40). After that, go to the kitchen and inspect the tap, then go to the back room and finally to the bathroom. At a certain moment, the hero will find himself in the corridor of the Mayak hospital, where at the end the third one will lie "" (3/11). After all these events, return back to the ordinary house and be sure to take one harpoon and one red gel near the TV.
"Western part of the city"
The Evil Within2. All additional tasks
"Trains"
It's time to search and clear the western part of the city. In this part of the city there will be trains on the tracks and there will be two of them in total. In the carriage that is turned, there will be another «» . There is a car parked near the same carriage white, and right behind it is a figurine, inside of which lies the fourth "" (4/32).
The first and second train cars on the left can only be entered from the middle, and there will be only one enemy inside. At the southern end of the train there will be regular resources, and at the northern end of the train, on the last seat, the first unique item will be «» . There will be another monster sitting inside the third and fourth cars, so it’s better not to go inside without ammunition. In the fifth car of the left train you can find one red gel (at the dead end of the north car) and a girl's shadow: use the communicator to get the third "" (3/24). The second and third trains on the right have nothing interesting or useful, except for a couple of enemies.
"Treadwell Transportation"
Near the supermarket there is a fairly large fenced area, inside of which there will be several cars. There will also be several enemies wandering around (four in total). You can throw a bottle into a white van, and when the enemies gather near the source of noise, simply blow up an explosive red barrel nearby. IN trucks There will be useful resources. There is a lever near the fence in the northern part - pull it, a passage will open into the building, where more resources will lie. However, another part of this building will be securely locked.
"Auto repair shop"
There is a car repair shop in the northwestern part of the city. Moreover, it is from this place that the largest unknown signal will come. Near the workshop there is a parking lot immediately behind the fence: you will be able to get into the parking lot using boxes. Inside, examine the corpses that lie in the center and thus you will find a new weapon - «» . However, when you take up a weapon, the enemy will attack Sebastian. Be sure to check out the green house, which is located opposite the same auto repair shop: on the porch of the house there will be another figurine, and inside - "" (5/32).
The entrance to the workshop is only open on one side. Inside you can listen to the military man's conversation and it turns out that he blocked the way to the basement - "" (4/24). Inspect the nearby electrical panel. You will have to solve a fairly simple puzzle: you need to find two correct switches based on the amount of energy. The answer is the 2nd and 4th switch. Once the puzzle is solved, you can turn on the car lift (under the car lift you can open the hatch and listen to another conversation - "" (5/24)).
Carefully crawl under the building next door. Soon you will come across a code door, where the corpse of an agent will lie nearby, and he will already have a map of the city’s security system. In addition, the map will contain a table with values. Take a close look at the locked door number - “B-34”. If you look at the table after this, then you will find the correct code - «» (there is also a possibility that the code is generated randomly, so if it does not work, then you will have to look for the code in the table yourself). In any case, behind the door there will be a lot of useful things: 6 cartridges, one first aid kit, 20 parts and one special part. Also nearby, don’t miss the “Request for Cleanup” - this is the tenth "" (10/40).
Additional task: “Unusual signal”
The Evil Within2. Completing additional tasks
When you find the warehouse located directly below the auto repair shop, go back to the tourist center, because this is where the doors leading to the basement have opened. In the basement you will find that the military man was caught and killed by a maniac photographer - this is also part "" (6/24). It's on the table nearby «» and because of it, three additional important points will appear on the map, which will be located in the northern part of Union. And don’t rush to leave immediately after this, because there will be an eleventh one on the table "" (11/40).
The conditions for completing the “Unusual Signal” task are that as soon as you collect 6 fragments of military memories, the task will be completed. All that remains is to return back to O'Neil and tell him everything. As a reward you will receive 150 parts to improve your weapon. So if you followed this walkthrough, you can go back to your character and finish this quest.
"Northern part of the city"
The Evil Within2. All the secrets in the game
"Garage"
The last thing you should do is move along the northern street from west to east. The first house you come across will be locked, but in the backyard of this house there will be a garage, and inside - «» . So if you previously found a broken rifle on the roof of a three-story building, then now you can make a full-fledged and working weapon.
"Northern Refuge"
The second house you come across will also be locked on all sides, but there will be a panel and an electric bolt hanging near the doors to the garage: shoot the electric bolt at the panel and the doors will open. Inside, the hero will find a dead military man hiding, who was killed by the ghost of a girl - another "" (7/24). There will be another one on the table in the same place. "" (12/40).
"Pit stop"
On the road that leads north you can see a sign in the distance with the following words - “Pit Stop”. There will be a figurine under this sign, and inside - "" (6/32). Get closer to the diner in the middle of the road and you will notice the spirit of Lily (the main character's daughter). Follow her steps inside. Soon you will come across a locked service room, but there will be a hatch in the wall on the left side. Once inside, you will find a girl's doll. Then, from the outside, carefully inspect the dump directly behind the building and thus receive a completely new signal.
"Search for Daughter"
Move to the building, which is located in the center of the northern street, where you will again find traces of the girl. After this, you go to the building, again in the center, but on the western street - there are also traces of your daughter here. Eventually, all these tracks will lead you to a warehouse called Treadwell's Shipping, which you should have already visited. Inside the fence, find a wooden partition - it can now be removed. The stairs will soon lead to a dead end. Walk between the boxes, kill the next monster along the way and then climb higher up the now vertical stairs.
At the top, first of all, take the door on the side "" (13/40). In the second door on the side there will be a second Lily doll: watch the girl’s memories and see how she was caught by a maniac photographer. On the way back, try to catch the maniac's spirit, although your attempts will be in vain. Outside, the main character will be attacked by completely new monsters, most likely reminiscent of some kind of dogs.
Now it’s time to return back to O’Neill: he detected the signal from Sebastian’s daughter, albeit on a different piece of Union. To get to that part of the city, you will need to go through the second layer of this world - through the “Backstage”. In the end, O'Neill also gives the hero «» for this operation.
Chapter - 4: "Behind the Scenes"
WalkthroughThe Evil Within 2
Comrade O'Neil gives the main character the password that is needed for the computer in the northern shelter, so it's time to go there. If you move to a key place along the eastern street, then you will be able to notice how the monsters are chasing another woman. So if you kill all the monsters and save the woman, then you can talk to her inside the house.
"Network": Management Department
Using the computer, you will be taken to underground tunnels. Near the model of the city lies another "" (14/40). A little further there is a door with an oscillogram: you adjust one wave to another and that’s it. Gradually all the doors around will begin to open, so I recommend hiding in one of them, because more and more monsters will appear in the center. In the room to the north is a dead-end room, and in it «» , so pick up the valuable item and go through the southern doors.
"Network": Tunnels - central passage
So, you pull the lever and go down into the drained canal. There are cartridges in the dead end on the left side. You should climb somewhere else. A little further you will find a gas leak, but if you put on a gas mask, it won’t be scary. Along the way, it will be possible to quietly and unnoticed kill one ordinary enemy, and I highly recommend not shooting. In the corridor further you will come across a non-working electronic door - follow the wires. And if you go from the electronic door to a dead end on the left side, then you will find "" (7/32).
There will be a huge monster wandering in the corridor and you won’t be able to kill it unnoticed the first time, so it’s better to walk past it. Of course, it's unnoticeable. In the back room, you will now need to configure the electrical panel in the following sequence: 1st, 2nd and 4th switches. After that, you can go back to the electronic doors.
Behind the electronic doors lies a new one "" (15/40). Move further until you come across a cliff, where you will see the shadow of another military man: scan him and get new ones "" (8/24). In order to get over this cliff, you need to carefully crawl into the second hatch of the ventilation shaft. In the last room, use the nearby computer.
"Refuge"
And finally, you will find yourself in a completely new shelter. Use the mirror to make a shooting gallery appear in the hospital bay, where you can complete small bonus tests. In total there will be: 4 shooting competitions and 1 casual competition (collecting colored targets). If you manage to collect 2,500 points on a very hard challenge level, then you will receive "" (8/32). If you collect 70,000 points at the casual level of the challenge, then you will receive another "" (9/32).
Chapter - 5: "Waiting"
The Evil Within2. Where can I find all the documents?
"City Hall"
Finally get to the surface and first of all, on the left side in the gazebo you will get "" (9/24). But on the right side, from the corpse of a dead special agent, be sure to take «» . There will be a photo in the center right next to the city hall gate - this is another "" (16/40).
Boss: "Guardian"
The Evil Within2. Passage of all Bosses
In a vast square right in front of the city hall, the main character is attacked by a multi-headed girl with a saw. You could have met her before, but then you just had to run away from her, but now you have to fight her. Besides, now you are fully armed and you can give her a worthy rebuff. I'll mention a couple important points that will help in battle: on the right side there is an explosive barrel that can be blown up next to the Boss; on the left side there is a puddle of fuel, which can also be used in battle (or it is better to use both the barrel and the puddle at the same time). In addition, there are fences on the side, and in them there are separate rooms, inside of which you can hide from the monster, although this will only last a couple of seconds. As a reward for defeating the Boss you will receive 5,000 gel.
The central entrance to the city hall will be closed, but on the left side you can blow up a standing car and thereby open the way to the back entrance to the city hall. Further along the basement, make your way inside the building. Soon Sebastian meets special agent Harrison, and next to him on the table will be "" (17/40).
Move further along empty rooms, then at the end go up to the second floor. In the first room there will be a painting of a woman hanging, and next to it there will be a place for filming. On the left side, take a necklace and a rose from the table: hang the necklace on the mannequin, and place the rose in the vase right in front of the camera. After this, the mannequin will need to be turned forward so that everything corresponds to the picture with the woman discussed above. Once you have everything ready, go to the camera, set the camera's focus to the middle position and take a photo. As a result, after all these actions, the scenery in the background will form a corridor, so you can move on.
At the end of the opened corridor there will be an inscription from that same maniac photographer, so that you supposedly appreciate his masterpieces. As you examine the paintings, a picture of Sebastian's daughter will soon appear. Also in this corridor on the table there will be "" (18/40). In any case, move forward along the corridor until you reach the photo development room, where another "" (19/40). In the end, move forward into the hall where all the monsters that you killed will be displayed, there will be a new note near the doors - "" (20/40).
Move on. As soon as you reach the room with the emitter, start its restoration. And at this moment, the photographer himself will finally appear. The photographer slows down the protagonist and introduces himself as Stefan Valentini. Moreover, although he leaves the hero alive, he leaves behind a monster.
Boss: Obscura
Walkthrough of all Bosses inThe Evil Within 2
An obscura is a four-legged body that has a camera instead of a head. Despite the fact that there are 90 seconds left before the emitter restarts, the monster is able to stop time with the help of its flashes. Therefore, your main task in battle is to distract him so that the emitter continues its work of restarting. When you attack Obscura, you need to shoot exactly at the camera on the head, and it is best to use explosive bolts in battle against this Boss. As soon as the allotted time expires, the monster will begin to rapidly die, and the room from the museum will turn into an ordinary city hall room.
"City Hall"
It's time to go down to the first floor of the city hall, because some rooms have opened below that were firmly locked before. First, go through the doors opposite the doors that lead to the basement (where you actually came from). In the corner of this room there will be a figurine on the table, and inside "" (10/32). You can examine other rooms, but there will be nothing useful in them. In any case, go back out onto the street through the central doors of the city hall. On the street, turn your attention to the sky: a giant eye, resembling a lens, has moved to the next island. So it’s time to contact O’Neill, who in turn will tell you how to get to the next section of the city.
Chapter - 6: "On the Hunt"
The Evil Within2. Location of all documents
"Network": Tunnels - western passage
It's time to head back to the shelter to go online, since the tunnel there has been restored. On the left side, examine the rooms and collect resources there, including a new «» . On the right side there is a cable channel, and through it you can get to a dead end on the right side, where, looking up, under the ceiling you can find "" (11/32).
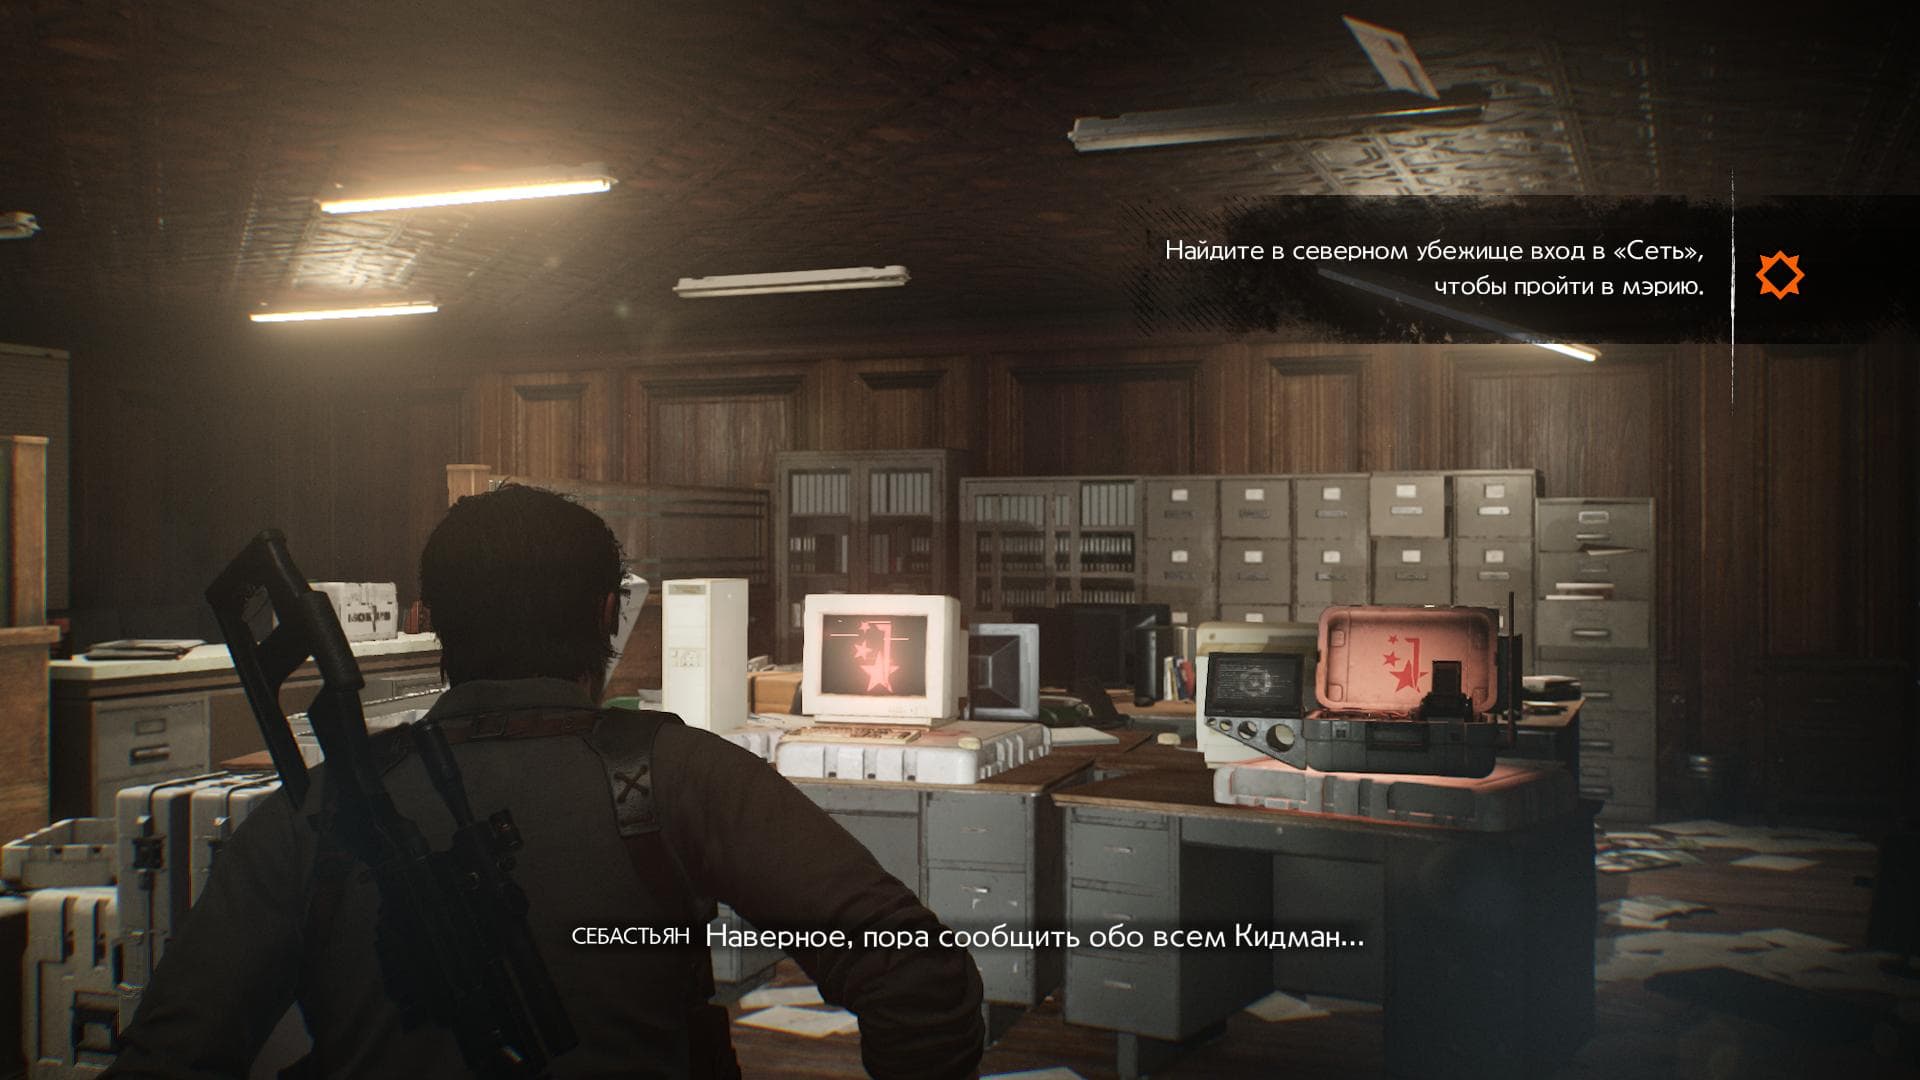
"Network": Production premises
Go down the stairs below. In the corridors below, on the walls there is an unknown, but mobile white gel, and there will be more and more of it. Also along the way you will come across a room with a film projector, inside which there will be "" (4/11).
In the large hall, a monster will come out of that white gel and it is better to run past it on the right side so as not to waste your energy and ammunition. Immediately after the white monster, when you find yourself in the safe room, behind the drawers on the left side there will be an item - «» , which is a reference to the Fallout games.
"Asylum Hoffman"
Look at the security cameras, and then meet with special agent Yukiko Hoffman. Discuss with her how best to neutralize the maniac photographer. A few important things in this place: one red gel; in the surveillance room "" (21/40); on a free computer "" (22/40).
Chapter - 7: "Thirst for Art"

Location of all documents inThe Evil Within 2
"Stock"
Straight from the shelter, go up to the business district through the post office. At the exit from the post office there will be a corpse of a military man - "" (10/24). The closest building to the post office is a warehouse. However, it will be locked with a key. You can find the key a little later (in an alley in the south of the city). And when you return back here, you can take a new weapon from the case inside - «» . There is also a coffee shop between the post office and the theater, which is also locked, so you won’t be able to go inside yet, but you can climb to the roof, where there will be a locked chest.
"Theater"
If you believe the signal, the photographer is now in the theater, so first of all, inspect the entrance inside. It won't be possible to go inside yet, because the path will be blocked by two paintings. At this location you will need to find the depicted sculptures and then destroy them. On the left side of the paintings there will be a cliff, and behind the fence there will be "" (12/32). From the cliff near the theater you can go to the northern small alley: in addition to two slow but strong enemies, at the end of the alley you can find «» .
"Refueling"
Your next important location should be the gas station. There will be a couple of monsters walking around the gas station. There are a bunch of burnt bodies in the backyard of the gas station - you need to scan around them if you want to get more "" (11/24). And then a new Boss will emerge from the corpses - a multi-headed Guardian. I recommend escaping to the south: in this place you can find and explode barrels of fuel so as not to waste a large amount of ammunition.
"Train"
In fact, the place is not particularly notable: the train is located on the edge of the eastern cliff and will have two cars. There will be nothing interesting or useful inside, except for two creepy monster dogs.
"Roadside Snack"
You can find it right next to the building «» . However, something else is much more important now - communicators. On the north side of the roadside diner, look for a green building: near this building, right behind a metal sheet, there will be a figurine hidden, and inside "" (13/32).
One way or another, you have to go inside the diner. Inside, first of all, examine the corpse of the owner of this establishment and listen to new "" (12/24). After listening to the memories, as usual, the building will be instantly locked, and the ghost of an unknown girl will appear inside. A corridor will appear at the exit, so run straight there past the ghost.
After this, Sebastian appears in the hospital with couches around. No matter what doors you enter, you will still return to the original room. Now the main thing is to get into the night version of this room to look in the mirror. If you do everything correctly, then the ghost will appear again and at this time you will have to evade it for some time. Only after this you will be able to exit through any doors. If everything works out, the main character will return back to the diner and you can pick up a new one "" (5/11).
Additional task: "Out there"
The Evil Within2. How to find all slides
On the west side of the diner there is a fairly large courtyard just behind the fence - go there through the southern gate. Inside you will notice how a black special agent shoots back from the advancing crowd of possessed people. I recommend helping him in this matter. There will be cartridges scattered around the corners of the yard. In addition, there are barrels with dangerous fuel on the territory, so if you use them correctly, then quickly destroy the crowd of possessed monsters. There will be two waves in total, so you shouldn’t relax after the first attack.
As soon as you manage to fight off the enemies, enter the hideout of special agent Sykes. Sykes is a programmer and he offers to complete the task. The essence of the task is that you need to turn on the server in the “Network” basement. In return, if you complete his instructions, he will unlock absolutely all the locked chests that are on this level (there will be three in total).
Additional task: “Back in touch”
The Evil Within2. How to find all documents
If you go back to the basements, then now the white living gel will no longer be here. Therefore, you can safely activate your computer and the chests will immediately become publicly available. Location of chests on this level: the first chest is located here near the computer, and inside there will be 8 cartridges and 50 parts; the second chest is located on the roof of the coffee shop, and inside there are 10 cartridges and 35 parts; the third chest is located in Sykes’s hideout, and inside there are 75 parts and a new weapon “Pistol with a silencer.”
"The Devil's Private Bar"
When you find yourself at the bar, first of all go to the table where the bartender's diary will be - "" (23/40). The bar will also have the photographer’s first picture, which you will actually end up in next. To enter the hall in which the sculpture stands, you will need a key. For the key, move along a straight corridor, and return back along the side of the room, simultaneously destroying several standard opponents. You can kill them all unnoticed, so no difficulties should arise.
There will be quite a large number of electrical streamers inside the hall. Follow the right side and you will soon find yourself behind the statue. When you find yourself in place, then all that remains is to destroy the statue.
In the alley in the south there will be a corpse of a military man, and from it you can get "" (13/24). In addition, in the pocket of a dead military man there will be «» . The only problem is that as soon as you examine the corpse, another multi-headed Guardian will appear next. For this reason, there is a barrel in this place to quickly destroy the monster.
Hotel "Obitel"
On the south side, in the farthest building, go up to the 2nd floor and you will come across the photographer’s second painting. The first step, as usual, is to find the key. Then you will need to carefully make your way past the Obscura, because in this place it is generally useless to fight with it. Inside the hall, be careful, because there will be a lot of electrical tripwires in this place, so walk along the left side, a little closer to the center.
Chapter - 8: "Premiere"

The Evil Within 2. Walkthrough
After destroying two key paintings, you can go inside the theater. It will be empty inside, so feel free to immediately go up to the 2nd floor. Now in the theater hall, Sebastian meets photographer Strephan face to face and instantly finds himself in a location with rubble.
Pay attention to the top: a huge eye will be watching all your actions from above, so at this stage you will have to try to move unnoticed from cover to cover. You can get caught and it’s not fatal, but only if it doesn’t last long (a couple of seconds).
Very soon you will find yourself in the development room, where you can collect useful resources and one red gel. Inside the museum, go down to the floor below. In the last room you will have to fight Stefan.
Boss: Stefano Valentini
How to get to Stefano'sThe Evil Within 2?
You should not be happy that the enemy is armed with only a knife, because he will move very quickly, and appear for almost an instant, after which he will disappear again. The most effective weapon in this battle is a shotgun and plenty of ammo for it. Why a shotgun? It's simple - there's a greater chance of hitting the enemy. In addition, the huge eye on top will also not remain idle, so at any convenient opportunity will hit with its tentacles in three completely different directions, so it’s best to stay close to the walls on the sides. In addition, if Stefano tries to take a photo of the main character, try to quickly react and run as far as possible, otherwise he will greatly slow down the hero and he will become too vulnerable. Therefore, after the victory, Sebastian will meet his daughter, Lily. The only problem is that she will get scared and run away to Mira, who has turned into a monster because of that very living white gel.
Chapter - 9: "New Evil"
The Evil Within2. How to find all the fragments of memories?
Castellanos now appears at his home police station in personal account. An interesting point is that an altar has appeared, so go up to it and instantly find yourself in unknown catacombs.
"Catacombs"
In the catacombs, first of all, carefully examine the dead end on the right side and directly in front of you to collect all the useful resources. The main path at this point will lead down. Under the stairs there is a hole, and at the end there is a separate designated room with two monsters. A little further ahead there will be two more holes, in which this time there are already resources.
Get to the room where the prison cells are located and you will see that many of them contain possessed people. A little further there are locked doors and a round-shaped mechanism. Moreover, if you are attentive, then you will understand that this mechanism lacks leverage. So you have to find it in order to move on. So turn around and go into the room on the right side to pull the lever from the nearby mechanism. The only problem is that when you pull the lever from the other mechanism, the chambers with the possessed will open, so you will have to fight your way back. I recommend carefully inspecting all the cameras, if you don’t want to miss the next one "" (14/32).
In any case, when you get to the desired mechanism, insert the lever, pull it and go through the opened gate. Next there will be a corridor with a large number of doors. Now you should go through the nearest doors on the left side to find a bunch of boxes inside, behind which a secret hole is hidden. The hole, in turn, will lead to a locked room next door, where the following items will already be lying: 8 cartridges, 3 shotgun pellets and a corpse, which will rise up in just a couple of seconds. And in the far room on the right there will be a shadow of an unknown woman - these are new "" (14/24).
"Underground Temple"
Go down the stairs even further. After passing the corridor, enter a dark room. It will soon turn out that this is actually a crypt and three fiery opponents will appear near the hero. There will be ammo scattered around, so shooting the creepy creatures won't be difficult. Although the room is so dark that you can hide and try to kill enemies unnoticed from behind, this can only be done when there is no fire on them.
One way or another, go out into the large hall, where you have to solve a new puzzle. There will be 4 round-shaped mechanisms on the balcony. The essence of the puzzle is that the circles on the floor must be rotated so that the resulting symbol of the cross is obtained. You should start from right -> left, so that if you catch adjacent fragments, nothing will prevent you from creating the desired symbol. Try to orientate along the cutouts on the floor near the circles. In fact, there is nothing complicated, so when you make the right symbol, the gate will immediately open.
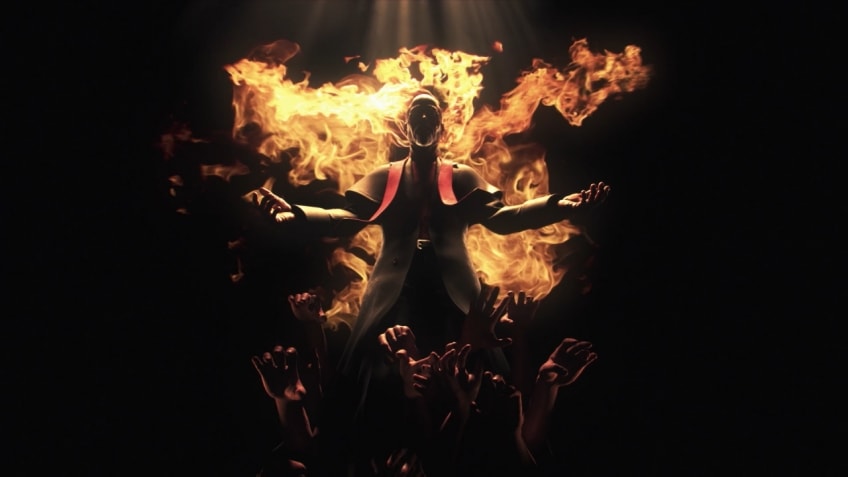
In the next room, Sebastian will meet Father Theodore, the leader of the sectarians and also the second psychopath, who seeks to take control of the core. He immediately invites the main character to cooperate, but he refuses, so he instantly flies out of his part of virtual reality.
Chapter - 10: "Initially Hidden"
The Evil Within2. Location of all memory fragments
"Shed in a woods"
Sebastian comes back to consciousness in a completely new and unfamiliar place. Now he is in an unknown hut, which is beginning to be attacked by hordes of possessed monsters. But you will not be alone - an unfamiliar woman will also shoot with you. You can find some ammunition in the house. There will be a barrel of fuel in the center, but I recommend leaving it for the last wave, because it will be the most difficult. First wave: at the very beginning you will be attacked by no more than 6 possessed people. Second wave: now there will be about a dozen enemies. Third wave: again, a dozen enemies, but this time they will attack from different sides. Fourth wave: at the end, monster dogs will climb inside.
After you fight off the monsters, you can calmly meet the girl, who turns out to be Torres - she works with Kidman, the hero’s wife Marie and Theodore. The point is that all these people had a plan to fight Mobius, but nothing worked out and therefore now Marie and Theodore have turned into monsters, so they will have to get rid of.
"Reserve"
Now you have to go to the next shelter through the wooded area. After passing through the cave, you will see a small camp ahead, which was attacked by fire monsters and one flamethrower. Due to the fact that there will be too many monsters, it is best to eliminate them one by one and silently. And be sure to get to the jeep, because in the back there will be «» .
"Torres' Refuge"
When you find yourself in the shelter, immediately contact Kidman and O'Neil. O'Neill suddenly won't get in touch, so you'll need to check on him and find out what happened. At this point, use the last coffee machine. Inside the case there will be a completely new type of shells - «» . On the far table to the left will be Torres' diary - "" (24/40). After the conversation, Kidman left a new one in Sebastian’s personal account. "" (6/11). There will be one special item lying at the exit of this hideout, so don't miss it.
Chapter - 11: "Reunion"
In the hideout, find Torres' diary (documents 27/40) lying on the table. By the way, from the information in the diary you can understand what exactly prompted Torres to take part in the operation to rescue Lily. Inside the box located in the shelter, you will find the first cryobolt. Pay attention to what Kidman will say in the conversation about some gift left in Castellanos' office. There is a mirror in the next room - move into the office and go exactly to the detective’s office, where the information board hangs. Directly below it you will find a slide.
Use your computer to return to the Network. Search the room, take the capacitor, which will be useful for creating shells for the flamethrower. Go out and you will see a large gate. Interact with the electrical panel on the side and switch all the toggle switches, as they add up to 10 lit lights.
You will find that Father Theodore has already been here. Immediately turn left, where the burnt corpse is located. Near the door there is a red cabinet with candles - there is a slide on it. Enter the room on the right, where the corpse of a Mobius soldier with a syringe lies. There is a cart here that can be pulled aside to access a supply crate. Go to Hoffman's hideout, but you won't find the girl here. But you will be able to see a fragment of memories (16/24) to find out that Hoffman went to the other end of the laboratory, into the forbidden zone. BE SURE to examine the computer to obtain the Hoffman Notes file (documents 28/40). Go to the restricted area, behind the corridor there will be a corpse of a Mobius soldier with a shotgun pouch.
Take the elevator down. There are security turnstiles and two dead guards ahead. On the left, through the window, you can see a computer and a room with a mirror. You will have time to visit there, but now, right through the window, you can interact with the computer to get the “Security Protocols” file (documents 29/40). Walk past the laboratory with the flasks, go forward and see another piece of memory (17/24). You will learn that you can only go through the door if you have a cerebral chip. We should find him!
Face the door that requires the cerebral chip. Go behind the screens on the left, where there is a corpse on a gurney. The STEM Integration Failure report (30/40 papers) will be pinned to the wall. Look around the hall and you will see a door with an electrical panel on the side. It can be opened by shooting an electric bolt here. We'll do this a little later. In the meantime, turn left from the door and you will find stairs leading upstairs. Don't rush to get up! Go left of the stairs to find a small door leading to the morgue. Enter there and turn into the far room on the left. On the gurney, find the Crash Investigation report (Documents 31/40).
Now open those same gates by shooting an electric bolt at the shield. Run forward along the tunnel and enter the room on the right. Interact with the computer to obtain the "Pit Surveillance" file (documents 32/40).
Soon the cold will appear again. Try to return the same way, but an unknown woman will attack you. Avoid her by hiding behind pillars and a couch. First try to go to the right, but the woman will throw over a whole pillar, blocking your path. Go left. Here you can even run to go down the steps. But that is not all. The difficulties start from the bottom. You will have to change the direction of movement over and over again in order to get out of the trap and not get caught by the witch. If you are not particularly worried about death, then I would advise you to run wherever your eyes look, because if you die, you will wake up where the witch is last time moved objects - and this is closer to the exit!
Run forward along the corridor and into the hall with wheelchair turn right to find the survey report on the table around the corner (bottom - documents 33/40). Now move to left side hall to find a letter from the chief of police on the gurney (documents 34/40). Ultimately, Castellanos will finish off the piece of himself that was left in STEM after The Lighthouse. You will automatically receive a new-old revolver. Also, don’t forget to pick up the slide from the table near the computer.
Now go back and go up the steps. After killing the enemies, go to laboratory No. 3. Go to the far room, where an unknown man lies on the operating table. Interact with the computer in the far left corner to obtain the "Agent Case" file (documents 35/40). Now on the same floor, go to laboratory No. 2. Use the communicator to view a fragment of memory (18/24). Search the body of the Mobius soldier to take the syringe pouch.
Go to laboratory No. 3, which is on the second tier, and go into the room where a person is lying on the operating table. Examine the hanging signs - there will be various code combinations. Try entering each of them at the terminal located at the feet of the dead man. Sooner or later the code will work, and the device will remove the cerebral chip from the employee's head. Take it, go downstairs and go through that very door. In my case, the code was 0128. Try it, maybe yours will be the same.
Get to laboratory number 4, where you will meet Yukiko and Liam. The latter will have to be destroyed - a few accurate shots to the head from a sniper rifle will help you with this. Do not forget to periodically use the switches that start the fire extinguishing system. In addition, you can explode nitrogen cylinders. After winning and talking with Yukiko, pick up the faulty flamethrower lying near Liam.
Enter laboratory #4 and use the communicator to view a piece of memory (19/24). Look around and go forward along the corridor, into the room with the device that Liam asked to blow up. A moment later, Torres will appear. But don't rush. Go around the device and destroy the figurine with the key. After this, talk to Torres about all topics, and then order her to blow up the device.
Chapter - 12: "Bottomless Abyss"
You will find yourself in an unknown place where Theodore dragged you. Go to the light source, turn right and go to another one to pick up a pistol pouch. Next, you will need to move around the location, killing opponents. I recommend killing the enemies first, and then turning the lever at the gate. The next location is replete with monsters - you need to get to the stairs leading down. Go down and watch a long cut scene.
Note. When you see the burning statue, go up to it and take the second page “Submit to Freedom” (documents 36/40) from the altar. Once in the house, leave the bedroom and enter Lily's room. Take the slide lying on the shelves on the left. In the room near the stairs leading down, look for a mysterious symbol. This is another Easter egg. Go downstairs, go to the kitchen and pick up a letter from Mira from the table.
Chapter - 13: "Stronghold"
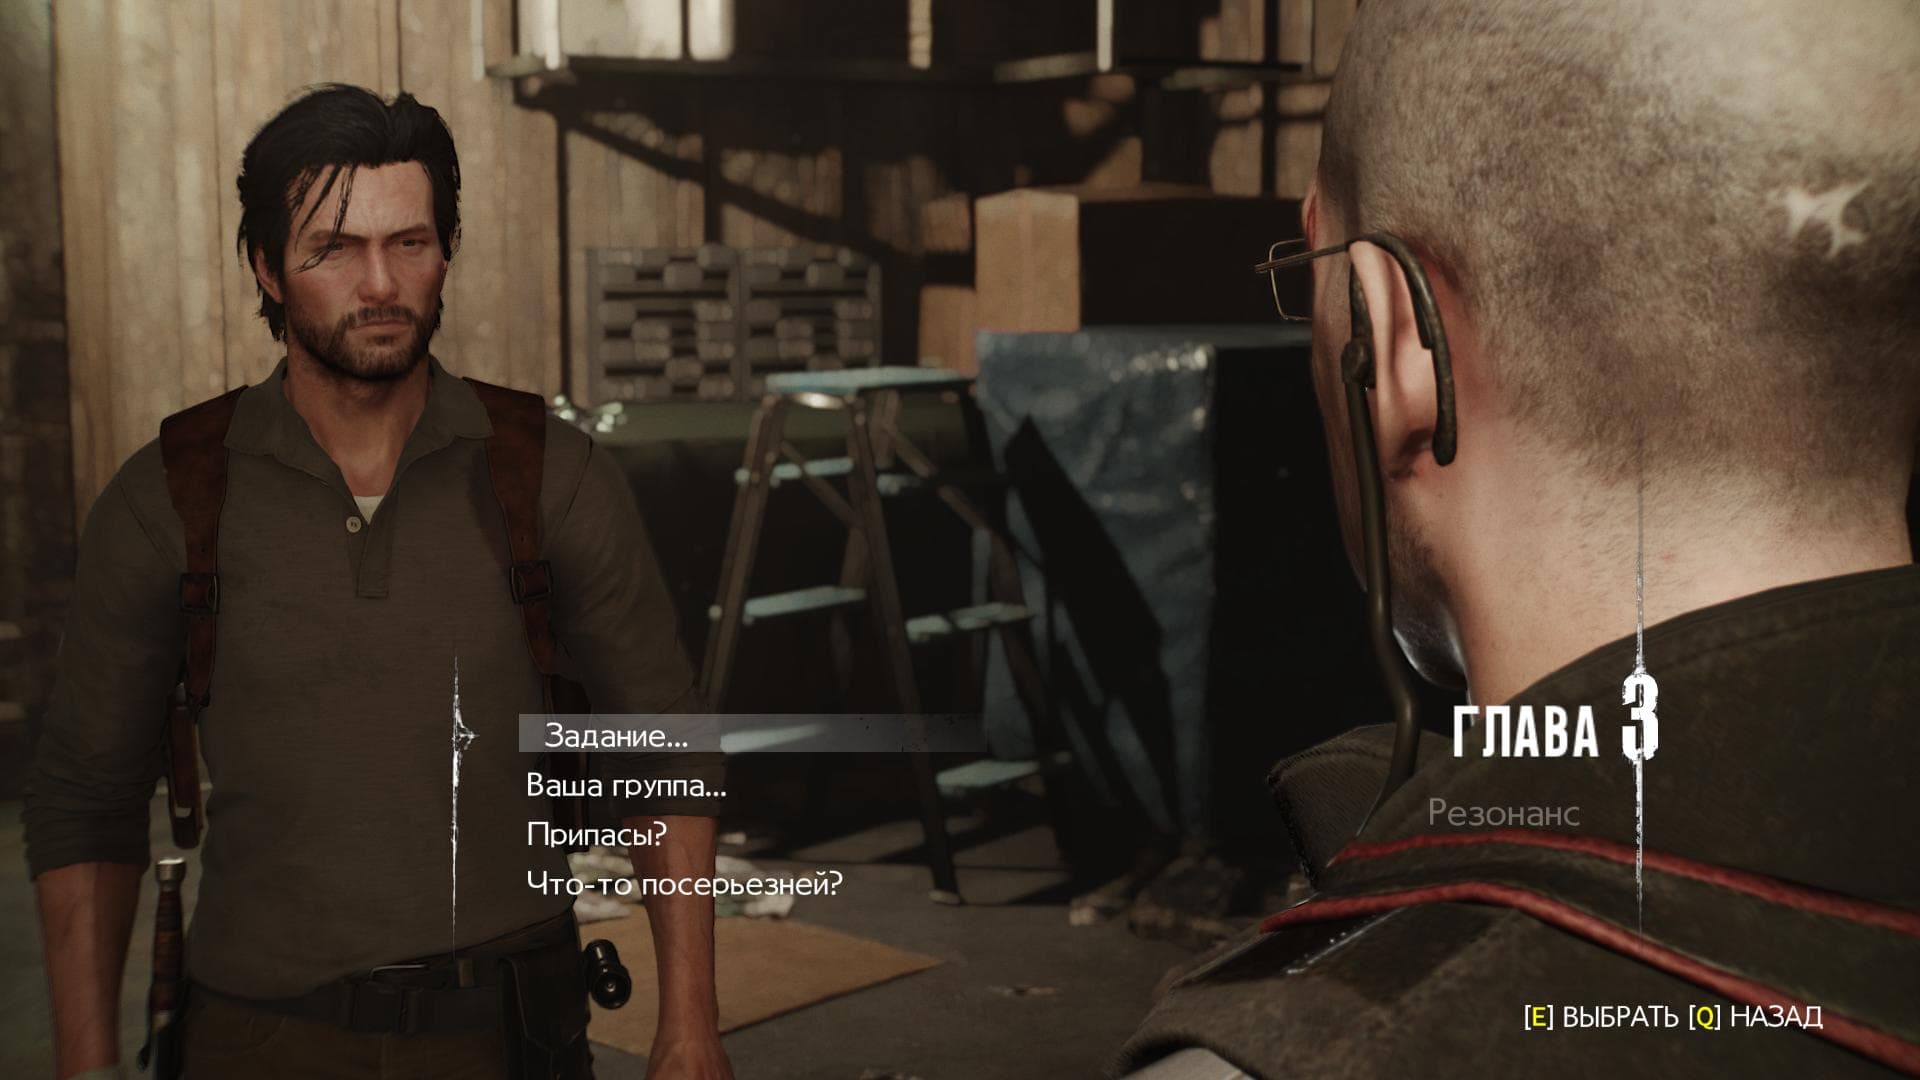
After talking with Yukiko, take the assault rifle lying near the dead Esmeralda. By the way, you will find out why Torres decided to help you save Lily. Go to the computer nearby, Sykes will contact you and an additional quest will begin.
Side quest: "The Final Step"
Go outside and you will see an enemy with a flamethrower. It is IMPORTANT for you to kill him, because upon death he will drop one of the two missing flamethrower parts. Also go towards the theater, but turn to the left of it. Go down to the rift and go up to the parking lot on the left. You can use a communicator to make it easier to detect the resonance point. Go to the corpse of the dead Mobius soldier, search his body and take the pouch for the sniper rifle. By the way, this is next to Sykes's hideout.
Go into it, talk to the man who will point to the computer. Interact with it to move to the experimental sublevel. Kill the enemies in the corridor, and then move through the air duct into the next room. Kill the enemies, get to the electrical panel and do everything you usually do. In my case, it was necessary to lower the first, second and fourth toggle switches. Go to the door to the laboratory, and when you are inside, Sebastian will automatically contact Sykes. After the cutscene and Sykes disappearance, go to the room with the capsule (bathtub) and take the slide from the stand. Take out the double-barreled shotgun from the box in the left corner.
ATTENTION! If you followed our walkthrough, you've collected ten slides, but there's still one more to go. To get it, return to Sebastian's office and look through each slide, being sure to discuss it with Kidman. As soon as you do this, follow the black cat, which will show the location of the last, eleventh slide.
By the way, at the location in Union there are several enemies with flamethrowers - kill another one, take the part and make another new weapon in your inventory through handicrafts - a flamethrower. Also in the laboratory with the capsule you can read a report about the emergency exit from STEM. Thus, it remains to be seen whether Sykes managed to escape.
After completing this side quest, go to Sykes' hideout and find a letter from Sykes on the table (documents 37/40). Go back outside. In the alley with the garbage truck, to the right of the Devil's personal bar, lies the corpse of a soldier with an assault rifle pouch. You can find another pouch for an assault rifle on a corpse lying behind the Abode Hotel. Also, don’t forget to visit the Devil’s personal bar to find a figurine with a key in the corridor where Stefano’s painting was. Go inside the Abode Hotel, after which Sebastian will contact Hoffman. After your conversation with Hoffman, take your time and look around. On the table opposite the fireplace is Hoffman's diary (documents 38/40). Easter egg. Go behind the reception desk and find the mysterious mug. Think about what game you could see this in?
When you're ready, tell Hoffman about it. Follow the girl, periodically killing opponents. Pay attention to containers that fall under the protective sphere and replenish your ammunition in time. You can take some ammunition from Hoffman herself from her belt. Eventually you will overcome the wall of fire.
Chapter - 14: "Burning Altar"
Go forward, collecting various resources, go up the steps and be sure to take the writings of Theodore I from the altar (documents 39/40). Open the door ahead, from here you can go left or right. First, go right, into the room with the mirror, and on the table you will find the last pouch for the assault rifle. Now go left and you will find yourself in a hall with suspended burning cages. Fiery opponents will appear, which you, fortunately, will be able to shoot.
Next you need to pay attention to the two available passages. In any case, they are connected to each other. First, go to where the fire pipes are visible. Approach the grid, behind which the fire is visible, and go down the steps to the right of it. Shoot the opponents behind bars, and then pull the lever. After a while the grate will rise. Search the room, and then return upstairs, because the second grate should also rise.
Go through another doorway, follow the corridor to the right (there will be a liquid nitrogen tank in the corridor) and in the room near the wall find the same lever (it’s not so easy to notice). Pull it. You will see the gate you need open. Follow them and up the steps. Turn the valve to turn off the fire, and then go a little higher up the steps. Enter the room on the left and take the writings of Theodore II (documents 40/40) from the table ahead.
Climb up and shoot the small lever at the top to turn off the fire pipes. You should remember this mechanic from the first part of the game. Move along the right wall to find a door. When you get close to it and try to open it, enemies will attack you - kill them. Behind the door on the table is the penultimate shotgun pouch.
Next, make your way through several fiery barriers, kill the monsters and take the elevator to Theodore. When you get up, don't rush! Open the communicator and use the stairs at the back of the room to go down into the pool of blood. Here you will find a piece of memory (20/24). Watch the cut-scene, at the end of which you will have to remember all the monsters you saw in the first part.
First, run away from the crazy guy with the chainsaw, then watch the video, at the end of which go up to him and cut him in half. Press the E key several times. Next, kill the butcher with a safe for a head three times. After three deaths, a cut-scene will start, and another reptile will crawl out of the safe. You can simply shoot her, or lure her into the fire - it's up to you. After this, watch the cutscene.
Chapter - 15: "The End of This World"
Go through the door to see what happened to the world. Here you just need to pursue Mira, killing ordinary monsters and one thug. It is advisable for him to shoot at the red spots in the center of the body.
Walk forward through the snowy area and use the communicator near the pillar to listen to a piece of memory (21/24). Go right and listen to another piece of memory near another pillar (22/24). After that, move right to tall building to view the next piece of memory (23/24). Go up towards the house, watch another piece of memory (24/24) and follow up, where a cut-scene will start.
Here the battle with Mira will begin, who will turn into a real monster. It's actually quite simple (in theory). First you must shoot in the abdomen area, where the glowing organ is visible. After it explodes, destroy one of Mira's arms. This hand will grab Sebastian, but all you have to do is shoot its glowing part with a pistol several times. After that, destroy the second arm, and then deliver several accurate shots to the head. All this time it will be possible to replenish supplies by destroying frozen opponents and killing spiders.
Chapter - 16: "Exit - Final"
In this chapter everything is much simpler. You need to get to the house and go up to the second floor, to Lily’s children’s room. At the same time, you will have to control Kidman, who must destroy several Mobius soldiers. Otherwise, the last chapter of the game is a lengthy cutscene.
The Evil Within 2 is a game that immediately, without warming up or preludes, gives the gamer a hefty slap in the face with the words: it will be hard. The user is thrown into a nightmare creation of a perverted mind with a pistol and a couple of bullets - survive as best you can.
Surprisingly, it is true: The Evil Within 2 turns out to be even more difficult than at first glance. Although, it would seem, where else? But in order to complete the plot, you need to be flexible and use all the character’s strengths: somewhere to go stealth, somewhere to use traps, somewhere to crawl around the city in search of ammunition. In general, it won't be easy. We have prepared some useful tips for fans of the second part to simplify the passage and not have to change your chairs every half hour of the game. Are we watching?
Head back to the coffee and crafting havens
A priority place to visit when exploring a new location. Every home has a coffee maker that can be used to restore health. Machine tools - The best way crafting, where you can assemble new items more efficiently.
What to do on the new map?
Ignore the main story and go do side missions. The fact is that the main tasks lead to certain points in the campaign without return. It may happen that you will not receive any warning in this regard and weapons with collectibles may disappear forever. So take a break from the campaign and complete the side quests.
Save your ammo with stealth kills
Even if the situation does not require silent action, you can take advantage of an unexpected stab in the back, ambush strong enemy and so on. This is a good saving on ammunition, which is always in short supply in The Evil Within 2.
Smash statues for cabinet keys
Crafting materials and collectibles along with keys are the most valuable things that can be found in the open world. The keys to the cabinets are in strange statues depicting a female figure. They are quite difficult to recognize at first, but after the first two or three broken statues, the search will go like clockwork. Found master keys can be used in the Mirror Room.
In the third chapter you can find 3 weapons
Technically even four. There will also be a shotgun in the third chapter, but the other three items will make your life in the game much easier. These are a pistol with a laser sight, a crossbow and a sniper rifle. The gun lies in the Auto Repair Shop on a corpse by the fence.
The crossbow is in the southwest corner of the map on a crate next to Mobius' truck.
The sniper rifle lies on the roof of the building to the left of the Union Visitor`s Center directly opposite the southern shelter. To repair it, go northwest and look for a garage with a workbench where the weapon components are located.

Use a shooting gallery
It is available after completing Chapter 3 in the room with the nurse as a mini-game that can be played at any time. Bonuses after victories in the shooting range are keys to lockers and gel for upgrades. An excellent auxiliary tool.
Unlock the Bottle Break perk as early as possible
An excellent perk that helps Sebastian run away from enemies using the sound of a broken bottle.

Kick vending machines
Do you see a vending machine in front of you? Gut it for useful loot. Very often there are components for weapons, cartridges and bolts, green gel for upgrades.
Use the environment
The open world in The Evil Within 2 is littered with dangers and traps that can be used against enemies. If you shoot a shock bolt into a pool of water, you can shock several enemies at once. The gas escaping into the atmosphere explodes with a single bullet. Red barrels can be broken, the oil pouring from them can be set on fire and the monsters can experience Vietnamese hell.
Complete walkthrough games The Evil Within 2.
Part 1
The plot begins with a sort of prologue to the main plot of The Evil Within 2. We need to follow to the house (the front door will be locked), after which we turn right and interact with the glass door. The character will then perform the action himself, after which we will find ourselves inside.

Follow the stairs, go around the fallen beam and go to the kitchen. There you will find a workaround upstairs - to Lily's room. What follows is a cutscene in which the hero returns to STEM. Follow forward to the lighthouse, instead of which you will see a table and a communicator. Then you will be directed to Sebastian’s office, which will serve as a sort of base in the future. Talk to the NPC, study the files of missing people associated with Mobius.
Part 2
Leave the office and look at the black cat. There will be a slide next to it - pick it up and go to the far part of the room. Approach the cracked mirror, watch the cutscene and go through the double doors once it's complete. Follow the end of the corridor, run into the locked door and go through another opening into the room and the next corridor.
We go forward, turn left and find Baker behind the door. Interact with him and the camera, then go through the door. We take Baker’s photograph on the table and go through the open curtains into the next room. We move the cabinet in the far part of the room, go through the resulting hole and interact with the phone. Don't worry, nothing else will happen except an ominous voice.

We go up to the second floor, turn left and follow the locked gate. We crawl under them and pick up the letter. We return back to the stairs, go up to the third floor and go through the open door into the room. We follow further and watch how an unknown person kills a man. Here you need to act secretly: bend down, move behind the sofas and leave the room so that the killer does not notice you. Move forward past the photographs hanging in the air.
Before going up to the fourth floor, go to room 103 and pick up the following photo on the table. Then you can continue higher to a room with an open door, where you will meet the killer again. Follow him, go up two flights of stairs and “enjoy” meeting the creature. Go to the elevator on the left to move on.
After exiting the elevator, find a hole in the fence - you find yourself in a room with corpses hanging in bags. Go to the back of the room to see a red eye on the wall. We turn around and follow the camera. We turn around again and see how a new door has appeared in place of the eye. After a flash from the killer's camera, we again find ourselves in front of the red eye. We turn around and see a mirror in place of the camera. We take the photo, notice the ghost and look at the mirror. It needs to be broken, as a monster and a chainsaw flashes in it. Run through the resulting passage where the mirror used to be to the metal gate, crawl under it and go through the door at the end of the corridor.
Then we climb the stairs and enter the ventilation shaft. We move forward to the next monster, wait for it to stop. First turn left, then right and forward into a dark room. We follow to the light source, the monster will appear again. We run as hard as we can and go through a short cutscene with QTE mechanics.
Before you leave the house, pick up the diary in the bedroom. We find ourselves in an abandoned building and get a knife at our disposal. We go through the door to the kitchen, take the syringe from the table (restores certain part Hero's HP) and use it following the prompts. We go to the bedroom, take the diary and leave the house. At the end, the hero will receive another item - a pistol.
We go left, go down the road and watch the girl disappear into the house. She will be infected - you need to kill the girl and leave the house. We go further along the road, watch another cut-scene and meet a large crowd of enemies. Don't kill them, follow the car to the left and, bending down, make your way into the courtyard of the house. After killing two new enemies, follow to O'Neil's hideout.
We go down the stairs, open the door and meet the character. He will help you set up a special device that will allow you to determine resonances. Resonances are important plot elements that will need to be discovered to progress through the scenario.
Part 3
This chapter will allow you to complete not only story missions, but also complete side quests.
Chat with O'Neil on all topics and drink coffee if you suddenly need to restore your HP. Using the found gunpowder, you can make cartridges at the workbench.

For the first side quest, Sebastian needs to follow the markers and tune the device to the desired frequency. There are also several documents and two slides that can be found in this part of the Union.
Follow the nurse to the mirror. The hero will find himself in the office, after which complete the upgrades according to the prompts using the green gel.
Leave the shelter and follow left to the armored personnel carrier. Here you can find a crossbow, which is useful for silently eliminating enemies. Follow Lily's voice to the cafe, go to the bar, move the refrigerator aside and find a girl's doll in the new room. Explore the dumpster to find the next resonance and fight two new monsters. Shoot in the heads and dodge in time - at this stage of the game these creatures can cause significant damage.
After the battle is over, we go to the communicator. There you will again meet Lily's silhouette, tune in to her and follow her. We find a trail of blood, after which we see the girl running away, and the next resonance marker appears on the map.
We follow in the girl’s footsteps, examine the area with the truck and see Lily moving towards the warehouse. We go there, but carefully - there are many opponents in the parking lot next to the building. We move secretly past them until we find a power relay hidden in the courtyard. We break the castle, kill two opponents and activate the switch. We go back a little and move the lever, which opens the way inside.
To find an Easter egg from Wolfenstein: The New Colossus, before entering the warehouse, go to the truck and look for a new item in it.
We go inside until we meet enemies. We kill them, go up the stairs and open the door on the left. Inside we find a document and a workbench for creating cartridges. We pick up the Lily doll lying in the blood, move towards the exit and meet the killer again. We follow him into a long corridor, find a killed operative and move further to the exit.
After the cutscene completes, Sebastian will be attacked by new enemies. The easiest way to kill them is with explosive bolts. We go to the shelter, get a gas mask from Liam and go to the next chapter of the plot.
Part 4
We will need to move to another part of Yunin, where the city hall is located. Use your computer to access the Internet. The computer itself is located in the Vault; go through the gate to two elevators. After shooting the control panel with an electric bolt, you can go through the left door into room BE-C03. This door will help you get back through a shorter route.
Go through the large door and stealth kill the enemy eating the corpse. Go further, find the enemy on the floor and kill him before he attacks you. You will see a door on the left, open it using the panel - here you need to get to the moment when the green wave coincides with the red one.

After activating the alarm, enemies will crawl towards you from the opened doors. You won't be able to run away, so you need to fight them. After the battle, we move to the next room and see a locked door. We break the castle in close combat and penetrate into the tunnels, where in the upper left corner of the podium you will see a lever. By activating the device, Sebastian will drain all the water and open the path further.
Move to the stairs, look behind them and search the corpse of the Mobius soldier. We move up and put on a gas mask. Follow further, avoiding enemies - here you cannot use any weapon except a knife. At the end of the path you will find a door. We move to the right, we see an acid enemy and under no circumstances let him grab you! The squeak must be destroyed secretly, inflicting several fatal blows with a knife. We go further to the panel with the switches, move the first, second and fourth to the “down” position. We return to the door that we opened, study the computer and go through the next door at the end of the hall. After detecting the next resonance, we go back, open the air duct and go to another part of the room. Here you will find a way out of the Internet and an opportunity to get into the mayor's office. The mirror, coffee pot and workbench will allow you to make ammo, drink coffee and return to the nurse for upgrades. Climbing up the stairs, you will see the city hall building and move on to the next story part.
Part 5
We search Agent Mobius and fight after the cut-scene with the next enemy. You can destroy it by luring it into traps located in the location. You can also lure him to a truck near which fuel is spilled. You can figure out what to do with it yourself :)
When the battle is over, go to the mayor's office and talk to the wounded operative. He will give you the communicator, which you will need to restore the field emitter.

After the conversation, we go to the post office, go behind the registration desk and see another agent. We move further along the city hall until we see stairs leading higher. In the first room, turn the mannequin to face the camera, hang the necklace lying nearby on its neck, and place roses in the vase. After this, take a photo and proceed through the resulting passage.
We move forward, inspecting the area on the right. We take the newspaper from the table and go to the end of the corridor. Study the photos and listen to Stefano's comments, and when you're done, you'll see a door open. Listen to the monologue, go through the next door and pick up the photo of operative Mobius. We return to the already familiar corridor, which has changed. Approach the killer who is trying to take your photo. Turn around and follow the light to the stairs leading down. Open the door, collect the items and leave the room.
The new room will be in darkness, and frozen enemies will appear around you. Bypassing them, go outside to the room with the mannequin. Next you will find a room with an emitter, interact with it and fight the boss. Here you just need to dodge the flashes and activate the device in a timely manner. To immobilize the enemy, use bolts with an electrical effect.
After the battle is over, we inspect the offices on the second floor of the city hall. Leave the building, watch the cutscene and move on to the next chapter.
Part 6
Through input D5 we return back to the Network. You will hear Lily's voice, to which the path is blocked by a locked door. Solve the puzzle, visit the room and return back. Go through the fence to find yourself in a long corridor. At the end you will meet two opponents, after killing them we go down to the corridor with white slime. There will be doors ahead that close when you approach. Find the right one, meet a big monster, go around him and move on.

Run away from the slug, solve the puzzle and go through the opened door. Move further to the shelter, examine the computer and leave the building through passage D5. From the outside you will immediately see the resonance and go towards the theater. Talk to Stefano to move on to the next part.
Part 7
Follow the markers until you meet an operative. He fights with enemies, you need to help him and activate next task. Once you have dealt with all the enemies, proceed to the shelter, where Sykes will offer you another side quest.

Follow the communicator to the bar, find the diary on the table to the right of the entrance. Go to the back room to the painting. Go back, find the locked door and the key to it. Go through it, kill the enemies and return to the gate. Unlock them and go into the room filled with traps. Crouching, move to the right until the gap, inside which destroy Stefano's work and return to the bar.
Get to the Abode Hotel, go up to the second floor and examine the painting. It will consume you, so you will have to look for the key again. Go down the stairs, go around the Obscura on the left and take the item from the table. Go back, open the door. If Obscura notices you, use electric bolts. Go around the wire and destroy Stefano's second item - after this the path to the large theater will be cleared.
Part 8
Once in the theater, go through the large door into the lobby, after which you will see a cutscene and a conversation between Sebastian and Stefano. After its completion, hide behind shelters from big eye, entering the next room with a mirror. After replenishing your supplies, go down the stairs and begin the boss battle.

Stefano will try to get closer to you. When he appears nearby, shoot him with powerful weapons, stun the enemy and move away. Continue this way throughout the battle, avoiding damage. After you reduce the enemy's HP to half, a familiar monster will appear. You need to attack him from cover, without getting noticed.
Part 9
After the battle with Stefano, Sebastian will wake up in the office and find an altar with candles. Explore the room for useful finds and go through the door behind the altar. Continue forward, turn right and enter the room. Go through the door to the mausoleum and further to the room with the cells. Go around the corner to the next door and interact with the handle. Here you can fight with enemies freed from cages or simply bypass them.

After killing the lone enemy, next to whom you will find a crossbow pouch, go through the line of enemies into the open gate next to the coffin. Proceed to the gate and the mechanism into which you need to insert the handle. Open the gate and move on, entering a new room with cells. In each of them you can find valuable loot, so don’t miss the opportunity!
After breaking the boxes, go through the resulting opening and search the Mobius operative. Return the same way you came, killing the infected along the way. Near the corpse on the bed you will find a passage in the wall in which a memory fragment is hidden. Move along the corridor to the stairs, go down them and, without stopping, move on. During the cutscene, move towards the house and fight the burning enemies that appear along the way. On the wall in the house you will see an emblem that will open a path in the wall. Use the mirror to replenish supplies and upgrade, then go up to the room and search the four wheels. Your task is to turn them so that the emblem becomes correct form. As soon as you do it, a door will open in front, after going through it you will see a cut-scene and proceed to the next chapter.
Part 10
The chapter begins with helping a girl who was attacked. This way you will meet Tores, who will express her readiness to support you. She is the agent of Mobius that you need to follow.

Walk past fallen trees to the cave. Follow the girl until an enemy with a flamethrower appears. Continue past the burning enemies to the shelter. Open the hatch in the ground, go down and watch the dialogue with Tores.
Part 11
Navigate to the Network after you find Thores' diary. Pull the fuses down to open the door. Find the altar with the slide and go to Yukiko's hideout via D5. In the girl's place, you will find a resonance that will tell you where Hoffman went.
Leave the shelter, following the elevator. In front of him, search the corpse to take the shotgun pouch. After taking the elevator, move towards the laboratories through a bright corridor and a room with tanks. You will find a door that requires a code. Open the fuse box, open the gate and crawl under the door.
Before leaving the area, go to the office, pick up the file, after which a ghost will appear. Sneak past him using cover, go down the stairs and move to the right. Move the carriage and go through the center of the room. On the left there will be a gap between the pillars that you need to go through. Move along the wall, go around the rack for corpses and follow the exit. Throughout the entire journey, Anima must not detect you, otherwise Sebastian will die immediately.

Return to the Network, pick up the file and go along the corridor back to the room on the right. Take the report on the table and head into the hall, where you will see a corpse behind the screens. Return to the gate, go up the stairs and find laboratory 2. There you will find a new resonance, then go to the third laboratory for dead body agent Mobius. Interact with the keyboard (correct code 0128) to pick up the cerebral chip.
Return to the door through which Hoffman entered. There will be a large number of enemies nearby, so move carefully. Approaching the passage, wait for the door to open, then go further to laboratory 4. Fight the flamethrower using freezing bolts. There will be devices in the location that will help put out the fire.
After the battle, take the flamethrower and go to the laboratory. After viewing the fragment of memories, move to the next room with the emitter. The hero will be able to order Thores to destroy the emitter, after which we will move on to the next plot part.
Part 12
You will find yourself in the ruins of a house, where you need to get a communicator and track the resonance. You will see an arched doorway and enemies nearby. Kill them from a distance, then turn the handle and open the door. Follow Lily's voice and pick up an item on the table next to the fire. Examine the found doll and follow a series of “glitches” to the tombstone. Follow the voice further, killing the infected along the way, until you find a staircase. Go down and watch the cut-scene.
Part 13
After you wake up, pick up your rifle and go to the shelter. There, collect all the items and go to the hotel. Powerful opponents will now roam the streets, so try to avoid meeting them as much as possible. By the way, if you want to repair the flamethrower you received earlier, then to do this you will need to destroy other flamethrowers and collect tanks from them.

As soon as you find yourself at the hotel, the hero will contact Hoffman, who will bring the emitter here. But before that, take her diary, which lies on the table next to the fireplace. Follow the girl and kill the burning enemies that jump out at you. Follow the girl until you find yourself in Theodore's fortress.
Part 14
Here we need to constantly move up, where Theodore is waiting for us. In the first room, collect the items and follow the back door leading to the next room. First, turn right to get supplies, and then come back and turn left. Go up to the second floor and follow to the end of the corridor. There you will have a battle with the infected, after which we pull the lever on the right side and open the gate of the main hall.

We go up the spiral staircase to the third floor, shoot at the switch on the pipes and turn the valve. When the flames have subsided, we search the room and find writing and other objects. We move to the second fiery wall and again perform the same manipulations. Continue moving, eliminating the infected, and go through the intermittent wall of fire.
We go until we see a lever. Pull it, setting the gate in motion, fight the opponents and move towards the elevator. We run away from the enemy with a chainsaw to the QTE scene, deal with him and fight again, this time with the Guardian. During the battle, a second and then a third boss will appear. Fight with everyone (there are no special rules, shoot at them with any weapon) and just keep your distance so that your comrades with safes on their heads and the spider don’t get close. To kill the spider, activate the valves and fire in the room, or act according to the standard if you have enough ammunition at your disposal.
After the battle is over, watch the cut-scene with Theodore and leave this location.
Part 15
Union was reduced to ruins. Talk to Mira, who is blocking the path to Lily. Destroy the barrier that Mira will erect and kill the enemies that appear. Then it works the same way, as the enemy will erect several more barriers.

After the second barrier, Mira will create a monster that you can destroy with explosive bolts. Having finished the battle, we communicate with the girl again and move on to another chapter.
Part 16
Head towards the house, finding resonance along the way. Watch a cutscene between several characters and watch the following flashback. Go to the destroyed building, in which you will find Sebastian's office and the next segment of memories. Here you can replenish supplies and health, go outside and go to Mira.

After a short cut-scene, the girl will turn into a monster - the final boss of The Evil Within 2. You must shoot luminous point, simultaneously replenishing the supply of ammunition from smaller enemies. Gradually destroy new vulnerable points, shoot projectiles flying at you and dodge the tail that has grown from Mira’s body.
Part 17

After the battle with Mira is over, go inside the house and start controlling Kidman. The girl will kill Mobius operatives while clearing the premises. When the enemies are finished, control will return to Sebastian. In Lily's room you will find a girl and see Kidman. After this, kill the operatives, watch the cut-scene and move towards the light. At the end you will see the final video and the end of The Evil Within 2.
General information:
Achievement Difficulty: 7.5/10
Offline: 51 on XONE (1000 ) and 52 on PS4 (36 , 14 , 1 , 1 )
Online: 0
Estimated time to obtain all achievements: 30+ hours (highly dependent on skills, as well as the number of deaths on Classic difficulty)
Minimum number of playthroughs: 3+
Achievements you can miss: everything, except for the plot ones (there is no choice of chapters in the game)
Unbreakable/glitchy achievements: No
Does difficulty affect achievements: You must complete it on Classic difficulty (Akumu). Everything else can be obtained on easy. You will also unlock Classic Mode by beating the game on Low difficulty. To get the Brass Knuckles weapon, you must beat the game on Nightmare or Classic difficulty.
Introduction:
Welcome to The Evil Within 2 Trophies/Achievements Guide! Just like the first part of the game, this platinum is not for the faint of heart! Akumu difficulty has returned under the guise of "Classic Mode". In this mode, you are given the opportunity to make only 7 manual saves for the entire passage and decide on the ability to buy upgrades for weapons. Unlike the first game, here you will find open locations to explore. You can easily run away from enemies and pass without them even noticing your presence. Because of this, the game may seem a little easier than its predecessor. Classic difficulty is unlocked by beating the game for the first time (on any difficulty, including the lowest). All trophies can be considered skippable, with the exception of story ones. Among them there are achievements for collecting various collectibles. There are 115 collectibles in total, plus coffee machines to drink coffee from, and all the weapons you need to find. After beating the game for the first time, you will also unlock New Game+. This way you can get the remaining upgrades for the corresponding trophies. However, nothing can be transferred to Classic Mode. Having decided on the complexity, we move on to the first step.
Step 1: Complete the story on low difficulty, collect all collectibles, get combat and chapter-related trophies
All trophies in the game are missable, except for those given for completing certain points in the story. You'll have to play through the game several times anyway, so it's okay if you miss something now. Your main task is to find all the weapons and collectibles. If you missed something, you can collect it in New Game+. All of your collectibles, equipment, and weapon/skill upgrades carry over.
We recommend starting the game with low difficulty. This is the easiest way to get various trophies that are more difficult to unlock on higher difficulties due to lack of ammo. Also in this walkthrough you will be able to familiarize yourself with the game and be able to plan where it is better to stockpile supplies for higher difficulty levels. The subsequent playthrough on New Game+ will also be faster on Easy.
The most overlooked trophies are those that span multiple chapters:
- "SykesOut/ From(in)treatment" - Chapters 7 and 13: everything needs to be completed additional missions in Chapter 7 to get the final task in Chapter 13.
- “I" llTakeYouDownMyself/ I'll kill you myself” - Chapters 11 and 14.
There is no chapter selection in this game! If you miss them, you will need to get them in New Game+ or by loading a manual save, if of course you made one at the right time.
Step 2: New Game+, upgrade all weapons and purchase all skills
After your first playthrough, you'll unlock New Game+. All collected collectibles, gear, and upgrades carry over to New Game+. You will receive all transferred upgrades and items at one point in the second chapter. Green gel and weapon parts will be in abundance, so unlocking all the upgrades will not be difficult. Kill all enemies and thoroughly explore all locations to get enough raw materials for improvements. You need to fully upgrade your weapons and buy all the skills to get trophies" StickitinMyVeins / Inner strength " And " TheyNeverEvenStoodAChance/ Not a chance".
You can complete this step on any difficulty. If the second playthrough is not enough to get all the upgrades, then you can start a third playthrough in New Game++.
Additional step: preventative playthrough on Nightmare difficulty before starting Classic Mode
This is optional, but recommended to be prepared for the challenges that await you in Classic Mode. The problem in classic mode will be the lack of auto-saves and the ability to save only 7 times, as well as the inability to buy upgrades. Complete the game on Nightmare difficulty without buying upgrades to understand where it is better to save ammo and look for loot. Of course, you can skip this step - it's up to you.
Step 3: Classic Mode (Akumu Difficulty)
The Akumu difficulty from the first game returns under the guise of “Classic Mode”. You are only given 7 manual saves for the entire game and you cannot buy upgrades. Unlike the first game, here you will find open locations to explore. You can bypass enemies or escape from them. Because of this, it has become much easier to play than in the previous part. There are also fewer boss battles. Classic difficulty is unlocked by beating the game for the first time (on any difficulty, including the lowest).
The most a big problem in the game - saving ammunition. Perform stealth kills whenever possible. In open locations, kill everyone secretly and look for loot more carefully. Make one save every few chapters. There are 17 chapters in total, so one save of 2-3 chapters is normal! Save before difficult sections or boss battles.
| Learn to Survive / The ability to survive | |||
| You have survived the nightmare and everything that comes with it. | |||
| If you're playing on PlayStation 4, you'll unlock this achievement once you've completed all the others. | |||
| Rookie/Rookie | 20 | ||
| Completed the game on Walk difficulty (or higher). | |||
| Walking difficulty is available from the very beginning of the game. Get started new game on this difficulty and complete the campaign to get this trophy. | |||
| Survivor / Survivor | 30 | ||
| Completed the game on a difficulty level of at least Survival. | |||
| Survival difficulty is available from the very beginning of the game. Start a new game on this difficulty and complete the campaign to get this trophy. | |||
| Against All Odds / Despite everything | 40 | ||
| Completed the game on a difficulty level of Nightmare or higher. | |||
| Nightmare difficulty is available from the very beginning of the game. Start a new game on this difficulty and complete the campaign to get this trophy. | |||
| You Asked For It... Again / You asked for it... again | 50 | ||
| Completed the game in Classic mode. | |||
|
Classic mode opens after beating the game for the first time (on any difficulty). Complete the game while walking to unlock this mode. This is the difficulty of Akumu from the first part. You are limited to 7 manual saves for the entire game and cannot purchase upgrades. Luckily, most sections of the game consist of open areas and you can easily kill enemies quietly or sneak past them. We recommend practicing at the beginning on Nightmare difficulty to learn how to save ammo. |
|||
| Welcome to Union / Welcome to Union! | 5 | ||
| You find yourself back in STEM. | |||
| Taken/Vision | 10 | ||
| You had a terrible vision. | |||
| A story achievement that cannot be missed. | |||
| Not Running This Time / You Can't Run From Me | 15 | ||
| Defeated the Guardian near City Hall. | |||
| You can get this trophy at the beginning of Chapter 5. You can skip it if your goal is to get the achievement "". However, you can reload your save and get both achievements in one playthrough. To do this, kill the guard boss at the beginning of Chapter 5. | |||
| The Team Psychologist / Corporate Psychologist | 10 | ||
| You have found a potential ally on the Internet. | |||
| A story achievement that cannot be missed. | |||
| Premature Finale | 30 | ||
| You stopped the bloody performance. | |||
| A story achievement that cannot be missed. | |||
| Another Ally / Another ally | 10 | ||
| You survived the ordeal with the help of a new friend. | |||
| A story achievement that cannot be missed. | |||
| Crossing to the Other Side | 15 | ||
| You allowed the Harbinger to rest in peace. | |||
| A story achievement that cannot be missed. | |||
| Spiritual Awakening | 10 | ||
| You have made peace with your past and present. | |||
| A story achievement that cannot be missed. | |||
| Fire Walk With Me / Step into the fire with me | 15 | ||
| You have reached the enemy's fortress. | |||
| A story achievement that cannot be missed. | |||
| Overcome the Past / Overcoming the past | 30 | ||
| Your injury no longer exists. | |||
| A story achievement that cannot be missed. | |||
| Everything Comes Crumbling Down | 15 | ||
| You have literally reached the end of the world. | |||
| A story achievement that cannot be missed. | |||
| Unfortunate Consequence | 50 | ||
| You did what was necessary to save your daughter. | |||
| A story achievement that cannot be missed. | |||
| Backup Ain't Coming / There will be no help | 15 | ||
| You have completed the additional task “Unusual Signal”. | |||
|
Chapter 3 You receive this additional task from O'Neil in the hideout at the beginning of Chapter 3. Select the option in the "Supply?" dialogue when you talk to him. This way you will receive the quest. The quest markers will be marked on the map. You will have to track radio signals in the city and explore them. Then return to O'Neill to report the results of your search. |
|||
| Sykes Out / From (to) treatment | 15 | ||
| You have completed the additional task “The Final Step”. | |||
|
Chapter 7 and 13 First you need to complete all the additional tasks in Chapter 7. There are two of them: " There, outside" And " Back in touch". If you have completed these tasks, then this will automatically open an additional task for you " Last step" in Chapter 13 after going through the "Network" computer in the hideout (beginning of Chapter 13). Complete this quest to get the trophy. |
|||
| Finally Free / Finally free | 15 | ||
| You have survived all the traumatic incidents and come to terms with your inner demons. | |||
|
You will receive this achievement by completing four demonic illusions (Anima Events). This happens automatically if you have collected all the collectibles. Getting to know the monster in the head will begin with receiving the second slide in the third chapter. The second glitch occurs due to the "Woman's Diary" collectible, which you find in one of the houses on the way to Lily's signal in Chapter 3. The third encounter with glitches occurs in a diner in the business district after listening to a fragment of memories using a walkie-talkie in the kitchen. The last meeting with the “beautiful” person from the White Pillars will take place in chapter 11 after reading the “Observation of the Pit” file on the computer, which is located in the room next to the pit for dumping corpses in the “Network” laboratory. Just get all four collectibles and you'll trigger hallucinations. After completing all the illusions, you will unlock the trophy. See "". |
|||
| You Got Red in You | 10 | ||
| This is your first time using red gel. | |||
|
During the game you will only encounter red gel in certain places. For example, in the shelter in chapter 4 (end of chapter) / chapter 5 (you have to return to the shelter from chapter 4). Red Gel is used to unlock high level skills. Return to your office through the mirror and sit on the wheelchair. Buy multiple skills and you can use the red gel to unlock higher level skill upgrades. |
|||
| Stick it in My Veins / Inner Strength | 30 | ||
| You have fully upgraded all your abilities. | |||
|
To do this, you will have to start a New Game+ and farm a lot of Green Gel. Fortunately, Green Gel is much more common in New Game+ than on the first playthrough. Abilities can be improved by sitting on a wheelchair in your office, which you can access through broken mirrors. You also need to collect red gel to unlock higher level skill upgrades. |
|||
| Making Things a Little Easier / Everything will be a little easier | 10 | ||
| This is the first time you have used special weapon parts. | |||
| Special weapon parts are found in certain areas of the game and in some hideouts. Buy the first two upgrades for your weapon, and then use special parts at the workbench to upgrade your weapon to the next level. | |||
| Now You"re Playing with Power / Now it’s a different matter | 20 | ||
| You have upgraded one weapon to level 3. | |||
| To upgrade a weapon to level three, you will have to use special parts at the workbench to unlock high-level upgrades. You don't need to buy all the upgrades, just use special weapon parts to unlock the latest set of upgrades. | |||
| A Little Extra Kick to it / There’s simply nowhere better | 20 | ||
| You have maximally upgraded one bolt for the Guardian crossbow. | |||
|
Will unlock automatically if you plan to unlock the "" achievement (you must fully upgrade your smoke bolts for this). You will find the Guardian crossbow in the third chapter (see description of the trophy ""). Once you find a crossbow, you can upgrade different types of bolts at any workbench. There are 5 types of bolts in the game (smoke, shock, explosive, freezing and harpoon). The harpoon bolt is the cheapest to upgrade, as you will need all 1120 weapon parts and 2 special parts. Since you need to upgrade the smoke bolt to get the trophy" Smoke Assassin / Smoke killer", then we recommend that you deal with it first. |
|||
| They Never Even Stood A Chance | 30 | ||
| You have fully upgraded all weapons. | |||
|
To do this, you need to collect many weapon parts and special parts, which means you will have to start a New Game+. They can be found scattered throughout all locations of the game. Just look carefully at each building and you will collect a lot of details. All improvements are carried over to New Game+. In the second chapter, you will get all your things back and can continue to improve them. |
|||
| DIY / Do it yourself | 10 | ||
| This is the first time you have created something on your own. | |||
| This can be done as soon as you reach the shelter in Chapter 3. Simply craft one pistol bullet at the workbench in the hideout and you will unlock the achievement. Workbenches can be found in shelters and in the area when crossing the mirror. You can get resources for crafting by collecting them from the bodies of fallen enemies and finding them scattered around the world of the game. | |||
| Handyman / Craftsman | 25 | ||
| You have created at least one item of each type. | |||
|
This trophy can only be obtained on New Game+ (because Magnum ammo cannot be crafted on the first playthrough) and you need to obtain the Shotgun, Sniper Rifle, Assault Rifle, and Flamethrower to craft the ammo. First, you need to collect all the weapons on your first playthrough. Once you have access to the workbench on New Game+ (the first one will be found in the hideout in Chapter 3) and create all the items listed below (every type of weapon ammo, crossbow bolts and healing items). Weapons and ammunition:
|
|||
| Echoes Within STEM / Echoes of Events | 20 | ||
| You have observed all residual memories. | |||
| See "". | |||
| Doing Some Detecting / Investigation in progress | 15 | ||
| You have collected 20 documents. | |||
| See "". | |||
| Diligent Reader / Diligent Reader | 30 | ||
| You have collected all the documents. | |||
| See "". | |||
| Half the Stash / Half the job done | 15 | ||
| You have opened 16 lockers. | |||
| See "". | |||
| Locksmith / Burglar | 30 | ||
| You have opened all the lockers. | |||
| See "". | |||
| Good to See You Again / It's nice to see you again | 10 | ||
| You received the Guardian crossbow. | |||
|
The Guardian Crossbow can be found near the APC on the southwest corner of the city in Chapters 3 and 4 (turn immediately left down the street from the first hideout in Chapter 3). It is needed in order to gain access to the shelter in the north of the map. This is also a great place to get the achievement" Shock Therapy / Shock Therapy", firing an electric bolt into a puddle of water as an enemy walks across it. |
|||
| Chatting With Kidman / Conversations with Kidman | 25 | ||
| You told Kidman about all the slides. | |||
| See "". | |||
| Powerhouse / Strengths and means | 25 | ||
| You have received all standard weapons. | |||
| An automatic pistol purchased for pre-order does not count toward the trophy. | |||
| All in the Family / The whole family is assembled | 25 | ||
| You have collected all the mysterious items. | |||
| See "". | |||
| Caffeine Addict / Coffee addict | 20 | ||
| You have used all coffee machines at least once. | |||
|
Coffee machines can be found in shelters. There are 7 of them in total. One per shelter. You will be taken to six shelters as you progress through the story. However, the last refuge in Chapter 13 is optional and can be skipped! Find it using the map. The trophy will unlock after you drink coffee in the Chapter 13 hideout in the business district (outside, not in the hideout where the mission starts). Drinking coffee completely restores your health, so it's worth it. Coffee machines are impossible to miss in shelters. |
|||
| Thinning Them Out / Weeding | 15 | ||
| You have killed 30 enemies. | |||
| A story achievement that cannot be missed. | |||
| Clearing a Path | 25 | ||
| You have killed 60 enemies. | |||
| A story achievement that cannot be missed. A story achievement that cannot be missed. You will have to kill much more than 60 opponents as you progress through the story. | |||
| Smoke Assassin / Smoke killer | 15 | ||
| Killed 3 enemies with upgraded smoke bolts. | |||
|
To achieve this achievement, you need to fully upgrade your crossbow smoke bolts using a workbench. You will have to spend 1650 weapon parts and 2 special parts to fully upgrade the smoke bolts. Either upgrade these bolts as soon as you have them, or do it in New Game+. Fully upgrade smoke bolts to get poisonous smoke that kills enemies. Simply find a group of three or more enemies and shoot them with a bolt. The poisonous smoke will kill them. |
|||
| Shock Therapy / Shock Therapy | 15 | ||
| You immobilized an enemy standing in the water using an Electric Bolt. | |||
|
You will find him at the APC in the southwest corner of the location in Chapters 3 and 4 (turn immediately left down the street from the first shelter in Chapter 3). You will automatically pick up the Electric Bolt along with the Crossbow. After this, you will see a short cutscene with a wet area and two enemies running through the water. Shoot an electric bolt into the water with enemies and the trophy will open. |
|||
| Wait For It... / I was waiting for you... | 15 | ||
| You killed an enemy from an ambush. | |||
|
To do this, you need to acquire the "Ambush" skill. You can acquire the skill by entering the area through a mirror and sitting on a wheelchair (a mirror can be found in any shelter). First, sit in cover (press or ) and when the enemy approaches, make a grab from around the corner by pressing (PS4)/ (XONE). This will unlock the achievement. You can lure the enemy with noise, but remember that this way they know you are there, and corner grab only works when you are in stealth. |
|||
| Kick, Shoot, Burn / Lay, shoot, burn | 15 | ||
| Killed at least 2 enemies simultaneously using spilled fuel. | |||
|
Chapter 3 North of the hideout where Chapter 3 begins, you'll find a warehouse with a courtyard filled with shipping containers and trucks. There are also quite a lot of enemies there, as well as puddles of spilled oil on the ground. Lure enemies into the puddle and shoot into the oil. You can climb onto the box next to such a puddle to avoid getting burned (opponents will not be able to hit you). |
|||
| Bootable Offense / Footwork | 25 | ||
| Trampled 15 fallen enemies to death. | |||
| When you shoot an enemy's legs with a pistol a couple of times, he falls to the ground (or once when he runs towards you). When close enough to an enemy, you can press (on Xbox) to crush the enemy's head with your foot. Do this 15 times throughout the playthrough and you will receive the achievement. You will encounter quite a few weak enemies in the chapter, so you can get the trophy early in the game. | |||
| I Am The Night / Shadow in the night | 25 | ||
| Killed 10 enemies using stealth kills. | |||
| To perform a stealth kill, you need to sneak up behind an enemy and press (on Xbox). In Chapter 3 you will meet much more than 10 enemies, so getting the trophy in the early stages will not be difficult. You must get 10 stealth kills in one playthrough. | |||
| Sometimes Fighting Isn't the Answer / To fight or not to fight - that is the question | 10 | ||
| You avoided unnecessary bloodshed near City Hall (chapter 5). | |||
|
Chapter 5 At the beginning of Chapter 5 you will encounter a boss with a circular saw instead of right hand(the one that haunted you earlier in the second chapter). To unlock this trophy, you cannot fight this boss. Instead, you need to go around the building on the left side, destroying obstacles, shooting barrels, and bypassing/defusing tripwire traps. At the back of the building you will find a door leading inside. Enter it to skip the boss battle. The trophy will unlock as soon as you enter through the door. |
|||
| Death From Above / Death from Heaven | 15 | ||
| Killed at least 2 enemies simultaneously using a hanging lamp (chapter 9). | |||
|
Chapter 9 In Chapter 9, there are several candelabra hanging from the ceiling. Shoot one of them when two opponents are walking/standing underneath it. This way they will catch fire and burn. Can be done on the first two enemies you encounter after you lift the lever for the gate mechanism. |
|||
| No More Playing With Fire / Stop playing with fire | 15 | ||
| You have torn a true believer from his favorite pastime (chapter 11). | |||
|
Chapter 11 At the end of Chapter 11 you will have a boss battle with the flamethrower. The trophy can be obtained by shooting at the balloon on his back for a long time, which will eventually explode and the enemy will not be able to use his weapon. |
|||
| Melancholy Memories / Sad memories | 10 | ||
| You remembered your entire past (chapter 12). | |||
|
Chapter 12 In Chapter 12 you will return to your home in the past. You'll see a scene where you wake up in an upstairs bedroom. This will happen after escaping from the hellish burning location. There are 3 objects in the house that you can interact with (the / button will appear if you aim at them). Two items on the second floor (one by the stairs, one in the room to the left of the stairs) and one on the lower floor (check the sideboard in the living room). Do not interact with the letter in the kitchen as this will continue the story. |
|||
| I"ll Take You Down Myself / I'll kill you myself | 20 | ||
| You hosted a barbecue with your own brazier (chapter 14). | |||
|
This trophy can be obtained by fulfilling several conditions from chapters 11 to 14. The most overlooked trophy in the game, which requires several steps to complete. If you forget to do something, you won’t see the trophy. Step 1 (Chapter 11): After defeating the flamethrower boss, pick up the flamethrower next to his corpse. Step 2 (Chapter 13): The flamethrower you picked up is broken and you'll have to find two fuel tanks to repair it. Tanks drop from Harbingers, which can be easily found in Chapter 13. You can easily find three in the business district. Sneak attacks deal a lot of damage to them. After each successful surprise attack, hide from them, and then repeat the attack again. This way you will save a lot of ammo on them. Headshots from a sniper rifle and close shots from a shotgun also work great on them. Simply loot the bodies of the two defeated Harbingers to obtain fuel tanks to repair the flamethrower. Step 3 (Chapter 13): Go to the hideout and go through the mirror. At the workbench, you can combine fuel tanks with a broken flamethrower to restore it. Step 4 (Chapter 14): Keep playing until you reach chapter 14. Here you will again encounter Laura, the boss from the first game. Kill her with a flamethrower. Make sure you have plenty of fuel for the flamethrower. To kill her you will need at least 80 units of fuel. You can also make a manual save in Chapter 11. This way you can replay multiple chapters instead of replaying the entire game. |
|||
| That Cinematic Feel... / Like in a movie... | 10 | ||
| You agreed to watch video inserts. | |||
|
After completing the story for the first time (on any difficulty), you will unlock the Letterboxing mode in the game options. From the main menu go to Settings - "General" tab - Interface settings - Letterboxing - Show. Now start a new game (or load any save) and after a few seconds the achievement will unlock. |
|||


