After a long work week, every person wants to rest, relax and simply get positive emotions.
After all, constant stressful situations, stress at work and other factors have a negative impact on health. The best way to do this is a classic back massage.
A properly performed session allows you not only to relax and relieve muscle tension, but also to prevent the occurrence of back diseases, which often affect people at different ages.
The procedure can be performed not only in a specialized salon, but also at home.
For this you will need additional training, the presence of emollient creams and experience (or simply an understanding of how to properly do a back massage) of the person who will perform the procedure.
So, let's learn how to do a classic back massage. Experts do not recommend applying a targeted effect to the vertebral area, since there is a possibility of causing painful sensations person or pinched a nerve.
The areas of muscles located along the spine are massaged. You should not use patting movements in the area of the kidneys. A simple massage with your palm or fingers is enough.
The rules are simple, but you need to know them:
- The procedure must be performed with clean hands. All massaging movements should be performed with hands moistened with cream or special oil. You will also need disposable towels at the end of the session to dry your back.
- The action begins in the area of the sacrum, gradually moving upward to the area of the shoulders and collar area.
- All initial movements should be progressive and gentle. Circular movements, patting and pinching are allowed. Towards the end of the procedure, you can increase the pressure and pressure.
If the person to whom you are conducting a session asks you to pay additional attention to certain areas, you should definitely take this into account, since he knows best where he experiences pain.
Experienced massage therapists are guided by their own observations, formed over many years of work. Often these observations can be classified as specific advice, so they are applied after establishing general condition person.
How often should you massage your back? The answer to this question is usually standard. It is recommended to do 8-10 sessions, lasting 40 minutes daily. Or every other day, if possible.
 The main thing is to have a dense and intensive course. If you stretch it out over weeks and months, the effect will not be so strong.
However, depending on the condition of the human body, the course may vary up or down. All on the recommendation of a massage therapist or attending physician.
Here are also the basic rules, which should become a kind of bible for you:
- Massage actions should be directed in the direction of the lymph nodes and their accumulations. You should not touch the nodes themselves in order to relieve a person of pain.
- Try to position the person so that their body is completely relaxed.
- If the patient complains of pain, the force of hand pressure on the back should be reduced. There are cases when a person has a low pain threshold, so the massage procedure should be suspended.
- Following the correct pace and rhythm of the massage allows you to carry out the procedure as efficiently as possible. It is advisable to alternate the active and passive phases, since active actions excite the human nervous system, and passive actions reduce it.
- Weak and strong techniques should alternate in equal proportions.
- The use of special creams and ointments to soften the hands and skin of the back can be abandoned if the person himself expresses this desire and does not feel pain. This procedure is considered the most effective.
- The patient's back must be bare.
There are not many rules, but clear guidance of them allows you to notice positive changes even after the first back massage session.
Indications and contraindications
Undoubtedly, it is useful to every person. But there is a certain group of people for whom it is prescribed! So, what factors require a mandatory massage procedure:

Contraindications to massage can only exist if a person has open wounds, muscle or tendon rupture, periostitis or thrombosis.
The benefits and harms of back massage
Massage is not only a pleasant procedure, but also an opportunity to get rid of serious illnesses backs.
During the session, lymph flow improves, blood begins to flow better through the veins, feeding the human brain with the necessary substances.An additional benefit is that the impact of the massage therapist’s hands on the skin allows you to remove the upper keratinized layer of the epidermis, which is replaced by “new” skin. Any congestion present in our body is eliminated.
Benefits for the nervous system
Healing actions have a positive effect on the general condition of the human nervous system. Receptors located in the skin are irritated, which relieves general tension. Positive impulses spread throughout the nervous system and are recorded in the cerebral cortex.
 Some specialists have experience in which all actions allow them to influence different areas of the back.
It has been proven that regular massage sessions fill the blood with useful substances and vitamins, so a person begins to feel completely different.
Classic back massage has an undeniable positive effect on your general condition. respiratory system.
The tension of the respiratory muscles becomes lower, so it is much easier for a person to breathe. Do not forget that it has a beneficial effect on the metabolism in the body.
If the massage therapist does not have enough experience to conduct a session, you should refuse this, since it can aggravate the condition of the disease and cause an acute attack.
Preparation for the procedure
Proper massage requires the patient to take the appropriate position. This allows all groups of spinal muscles to relax and receive healing effects.
- Lying position. The person being massaged is placed on a dense, flat surface with arms extended along the body. The palms are placed with the inside facing up. The head is turned to the side for better breathing.
- In a sitting position. The person being massaged sits on a chair and always faces the back. The arms are placed on the back and the head rests on them. To do this, you should place a small soft pillow in advance.
Several sessions can be a good preparation for our procedure. They will help the muscles of your body get used to the hands of the massage therapist a little and will be ready for more harsh techniques.
How to do a back massage?
Classic back massage is perhaps the most popular. It is divided into several main stages, each of which must be mandatory!
The technique of performing classic massage must be followed extremely carefully. So, how to do a back massage?
- Preparatory stage. The person being massaged is placed on the surface. Hands are warmed up and moistened, after which light massaging of the back surface begins.
- Stroking stage. Stroking begins from the sacral area. The first movements must be soft, and as the back warms up, they should increase. Gradually move from the tailbone to the collar area.
- Kneading stage. The pinching should be moderately strong so that the patient does not experience pain. This stage is actively combined with patting and kneading the skin to maximize the impact on the back muscles.
- Ending. The end occurs under the influence of light pressure and stroking. You should definitely rest for a while in a lying position.
Massage on different areas of the back
Massage of the collar area begins with light stroking. All rubbing actions should be directed away from spinal column to the edges of the neck, which allows normalizing the blood flow process.
Below is educational video a film about the correct technique for performing a classic back massage. Very useful video, be sure to watch it.
Over time, the pressure on the muscle mass can increase, but do not forget to monitor the patient's condition.
Next, use your fingers to warm up the trapezius muscles, which most often hurt after heavy exertion. The active phase of the massage should continue on the neck and shoulders. The duration of manipulation in this area is 15 minutes, but sometimes this time can be reduced at the request of the patient.
The same applies to the lumbar region. Under no circumstances do acupressure of the spinal column, as this can lead to pinched nerve endings.
 Massage for men and women is performed taking into account physiological characteristics.
For example, a man's back can withstand significantly greater stress and pressure that occurs during the procedure.
The preparatory stage of the massage is no different. The only thing - with a female back massage Special attention is given to the area of the hips and kidneys, since it is this area that is susceptible to the occurrence of excess weight and pain.
Conclusion
Massage is a healing and truly beneficial procedure that is prescribed to people in need with back problems.
In addition, the session can also be performed by those who want to prevent the occurrence of diseases in the future.
Now you can carry out the procedure yourself and tell your friends how to do a therapeutic back massage, what the classic massage technique is.
Classic massage is designed to promote health and optimal functioning of the entire human body, due to which it is considered healthy. It is best to combine classic massage with physiotherapeutic procedures, in particular, a trip to the bathhouse, various wraps, and physical exercises. Despite all the benefits, this type of massage is not recommended for everyone, because it has contraindications. Beauty salon specialists must know all the contraindications, otherwise the client may be harmed.
A procedure such as massage is mentioned in the works of Hippocrates and Avicenna. Even in the medical schools of Ancient China, massage was taught in the sixth century BC.
We tell you what you need to consider when developing the design of a massage room
In the 18th century, the Swedish physician Peter Heinrich Ling studied the effects of massage techniques on the human body. He was the first to become interested in this issue. Unfortunately, he did not make a significant contribution to the development of classical massage, but only studied the issue of the theory of movements. The development of massage theory is the merit of Metzger, a doctor from Germany. Professor Mozengeil developed the physiology of classical massage. He conducted experiments on animals, as a result of which he was able to put the massage technique on a scientific basis. Until now, in beauty salons and clinics, classic massage is performed using its technology.
How does classical massage affect the human body? External irritations, which during classical massage are perceived by skin and muscle receptors, are transmitted to the central nervous system. Depending on which technique is used, the tone of the nervous system increases, or the flow of impulses has a relaxing effect. As a result important systems
General classical massage has a complex effect on the body. What exactly are its advantages:
- the functioning of internal organs is regulated;
- the skin is rejuvenated;
- ensures sufficient skin hydration;
- dead cells skin are deleted;
- the activity of the nervous system is normalized;
- the human body gets rid of decay products, because metabolism increases and blood flow is stimulated;
- muscle tension is relieved;
- the walls of blood vessels are toned;
- performance is restored and increased;
- the pain goes away;
- With heavy physical exertion and injuries, the body's recovery is accelerated.
Types of classical massage
Classic massage sessions are attended by those who want to preserve beauty and improve the condition of their skin. In addition, it is used to prevent premature aging and eliminate cosmetic imperfections. There are three types of cosmetic massage.
- Hygienic. Another name is preventive. Used to moisturize, improve appearance and prevention of skin aging.
- Medicinal. This type of massage is performed only by high-level professionals. Massage is used to eliminate swelling, wrinkles, and fat deposits.
- Plastic. Prescribed to older people when skin elasticity decreases sharply. And also for young people to eliminate facial wrinkles and folds.
Classic massage differs according to the treated areas:
- hand and foot massage;
- back massage;
- abdominal massage;
- general classic massage. Includes massage of the back, collar area, neck, lower back, limbs, that is, all muscles are affected;
- face massage;
- massage of the cervical-collar area.
Classic massage: indications and contraindications
If a client applies for a classic massage service, the master must tell him that it is necessary to consult with a specialist, because such a massage has contraindications. In addition, the specialist will select the most suitable course of treatment for each client.
Indications:
- dry and problematic skin;
- scalp diseases;
- split ends;
- slow hair growth on the head;
- signs of skin fatigue;
- signs of cellulite on the thighs and abdomen.
Contraindications:
- exacerbation of skin diseases: eczema, herpes, dermatitis;
- acute forms of cardiovascular diseases;
- dysfunction of the thyroid gland;
- poor development of subcutaneous fat;
- severe hair loss;
- facial nerve diseases;
- high blood pressure, that is, hypertension;
- fungal skin diseases.
The main stages of classical massage
Stage 1. Preliminary preparation of the skin. First, the area of skin where the massage will be performed is steamed and cleaned with a special tonic.
Stage 2. Determination of skin type. Depending on the skin type, different products are used: for dry or problem skin- nourishing moisturizer; for oily skin - powder or talc. Moisturizing cream makes the massage procedure easier.
Stage 3. Beginning of the classical massage procedure. The specialist relaxes the muscles of the face, neck, arms, etc. with light strokes. At the beginning of the procedure, under no circumstances should you press or move the skin.
Stage 4. Kneading and rubbing the skin is carried out on the massaged area. But massage affects not only the area of skin that is massaged. It affects the entire body. If you use stroking movements, this will calm the patient's nervous system. Active movements, on the contrary, will have an exciting effect on her. Active actions include kneading, rubbing, and vibration shocks.
Stage 5. Completing the massage with smoothing movements.
- Thai massage: types, license, training and implementation in a beauty salon
What is the effect of classical massage
If you regularly attend classical massage sessions, the results can be as follows:
- natural color and restored face shape;
- strengthening the muscles of the neck and face;
- normalization of sebaceous and sweat glands;
- elimination of swelling on the face;
- new wrinkles rarely appear, and existing ones are smoothed out;
- normalization of skin breathing;
- elimination of signs of cellulite and skin stretch marks on the abdomen and thighs;
- the skin is firm and elastic;
- small scars on the skin disappear;
- the volume of subcutaneous fat deposits decreases even in the area of the double chin;
- skin aging processes slow down;
- the client’s general well-being and mood improves.
How to prepare the client's body for a classic massage
Before starting the massage, the specialist applies massage oil to the patient’s body. You can also use aromatic oils if you are performing a classic relaxing massage. It has a relaxing effect on the nervous system.
It is best to use ready-made massage oils if the patient does not have specific reasons why he needed a massage. These oils contain ingredients that are selected specifically for massage. Oils help the hands glide over the body, due to which a certain effect is exerted on the client’s body.
Before a classic facial massage, remove makeup and cleanse the skin. Only oils and creams are used that are intended for the skin type of the person being massaged.
- Cupping massage in a beauty salon: techniques and recommendations
What techniques to use during a classic massage
There are 4 groups of techniques:
Stroking. Any massage begins and ends with stroking. It also works between different types impact.
The specialist slides his hands over the skin, but in no case stretches it. There are several types of stroking:
- planar. It consists of the hands sliding over the skin, but only slightly touching it. Planar stroking is used in all directions;
- enveloping;
- superficial. With its help, the body is prepared for deep stroking. There are clients who cannot tolerate superficial effects. In this case, they immediately move on to the deep;
- deep.
Stroking is performed:
- fingertips;
- back surface of fingers;
- palm;
- eminence at the base of the thumb. It is called thenar.
When the angle between the massaged area and the massage therapist’s hand increases, the intensity and depth of the effect increases.
What is the purpose of stroking?
- improving vascular tone;
- increasing skin elasticity;
- improving lymph flow and blood circulation. To achieve this goal, stroking is done deeply, slowly and smoothly in the direction of lymph flow and venous blood from the periphery to the heart;
- improving inhibition processes in the cerebral cortex;
- relieving muscle tension;
- regulation of the function of the peripheral nervous system.
Trituration. When rubbing is used during a classic massage, the skin and tissues are moved by the hands of a specialist. There are four types of rubbing depending on the effect:
- superficial;
- intermittent;
- deep;
- continuous.
Rubbing is done in different ways:
- hands (both one and two);
- thenar;
- elevation of the little finger. It is called the hypothenar;
- the pads of one finger or all fingers;
- elbow;
- ulnar edge of the hand;
- ulnar edge of the forearm;
- with the crest of a hand clenched into a fist.
When the angle between the patient's body and the massage therapist's hand increases, the rubbing becomes stronger and deeper. If powders or lubricants are used with this technique of classical massage, the effect of rubbing is weakened.
Rubbing is done in all directions, because if you apply pressure on one area for a long time, you can injure the patient’s skin. The lower the rubbing speed, the higher the effect. Where there is a thick layer of soft tissue, the pressure is applied more intensely. And when thin layers of tissue are massaged, or the client feels pain, the intensity decreases.
What is the purpose of rubbing?
- improving blood circulation;
- increasing tissue mobility;
- restoration of muscle contractile function;
- eliminating foci of pathological deposits;
- reduction of scars and adhesions;
- accelerating the resorption of hemorrhages in tissues and joints;
- eliminating pain;
- warming up tissues.
Kneading. It involves pulling, squeezing and releasing tissue. Kneading happens:
- continuous;
- superficial;
- deep;
- intermittent.
Kneading can be done with your hands, palm, fingertips or one finger.
Kneading is effective when the impact is carried out at a slow pace, but with sufficient force. If everything is done correctly, the patient will not feel pain, tissue pinching, or muscle tension.
Kneading is carried out if required:
- restore tissue mobility;
- eliminate swelling and congestion;
- prevent muscle atrophy;
- get rid of adhesions and scars;
- maintain muscle tone;
- remove decay products from deep layers of tissue;
- dissolve bruises. If kneading is alternated with deep stroking, the effect on bruises will increase;
- improve blood circulation;
- speed up the regeneration process;
- restore normal muscle function.
Vibration. Vibration is that during a classic massage, oscillatory movements performed with different strengths and frequencies are transmitted to the patient’s tissues. There are several types of vibration:
- intermittent and continuous. If the client's fingers or wrist joint are very tense, the force of the impact during intermittent vibration increases;
- deep and superficial. Surface vibration is applied to areas where bony prominences are located;
- stable and labile.
Vibration is performed:
- hands (one or two);
- radial or ulnar edge of the hand;
- fist;
- fingertips or one finger;
- palm.
Vibration purposes:
- acceleration of metabolic processes;
- improving blood circulation and lymphatic drainage;
- regulation of blood pressure;
- stimulation of the myoneural apparatus (areas of contact between nerve and muscle fibers);
- improvement of tendon reflexes and vascular tone;
- increased tone and contractile function of muscle fibers.
How to do a classic massage
1. Classic facial massage. It should begin with stroking, which is performed from the middle of the chin to the earlobe (through the lower jaw). Stroking movements are done effortlessly and smoothly. Then the same movements are made higher: from the corner of the mouth to the bottom of the auricle.
Massage of the cheek area is performed in the same way as a classic facial massage: from the wings of the nose to the temple and the upper part of the auricle. Massaging the eye area is done as follows: from the outer corner through the lower eyelid we move to the inner corner, and in the opposite direction through the upper eyelid.
The nose is massaged from the top edge along the back to the bottom, the wings of the nose - from top to bottom. Then the forehead area is massaged. The forehead is massaged in a similar direction: from the center to the periphery. The massage is done with three fingers: from the midline we lead to the border of the scalp and temple area.
2. Classic back massage. First, the right side of the back should be massaged for 10-15 minutes, then the left for the same amount of time. The following scheme is used:
1. Imagine that the skin of your back is dough and start kneading it. Mentally divide each half of your back into three longitudinal parts. Do a squeeze with the base of your palm, moving from the lumbar region to the shoulder blades. Massage each longitudinal part three times.
2. Switch to the side of your back, massage it from bottom to top. Imagine that you are bending the wire and do the same with the skin on the side of your back three times.
3. Then the sacral part of the spine is massaged by squeezing with the pads of the fingers. Follow the direction from the bottom of the lower back up. Press the skin with the pads of your thumbs and pull it along the spine. Repeat five times.
4. Place your fingers at a distance corresponding to the spaces between the ribs and run your fingers along these spaces. Move towards your shoulder blades. Repeat three times.
5. Move to the periscapular area and squeeze with the heels of your palms or the pads of your thumbs. This area may be painful, please use caution. Perform three techniques of five approaches.
6. Repeat bending the wire, only direct the impact not on the side of the back, as before, but on the back itself. Move from bottom to top in the traditional manner and repeat three times.
7. Now imagine as if you were rubbing the ointment in, and try to rub it in as deeply as possible. That is, do a spiral squeeze with the bases of your palms, while moving along your back in a circular motion. Do three or four times.
8. Move to axillary area, affecting the massaged skin of the back. Do it three times.
9. Use kneading and squeezing to stretch your spine.
3. Classic massage of the collar area. After the back massage is completed, you can begin the classic massage of the collar area. Stick to the technique:
1. Similar to how you rubbed your back earlier, rub the collar area with your palms. The client's skin will be warmed up and ready for massage. Don't neglect this, do it always.
2. Use the edges of your palms to cut, moving from the shoulder to the skull. Repeat three times for each side of the collar area. Since the skin in this area is more sensitive than on the back, do not press too hard.
3. Apply squeezing with the pads of your thumbs or the heels of your palms to the skin of the peri-cervical spine. Previously, it was written in detail about how to do this. Move from the shoulder blades to the base of the skull. Repeat three times.
4. From the shoulder to the base of the skull, use a palm squeeze technique. For each side, do five or six times, alternating sides.
5. Use your palms to grab top part neck, but do not pull the hair. Gently knead the skin along the spine with the pads of your thumbs. Repeat three times.
4. Classic body massage (general classic massage). The massage is performed in the following order: back, lower back, neck, buttocks. When massaging the legs, the specialist moves from the hips to the feet. Each foot is massaged separately towards the nearest lymph nodes.
Ask the client to roll over onto their back and place a bolster under their knees. After this, start massaging your legs, but move in the opposite direction: from the feet to the hips. Move to the chest and arms. Work your arms from shoulders to hands. Finish with a belly massage.
The first massage session lasts 20 minutes, gradually increasing to 50-60 minutes. The specialist must first prepare the patient’s body for intense exposure so as not to injure him. Therefore, 30% of the session is spent on rubbing areas of the body. The bulk of the time is spent kneading. The rest of the time the massage therapist uses various techniques, which were discussed above.
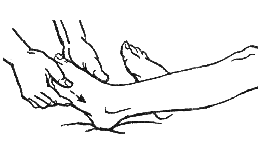
5. Classic foot massage. The session begins with stroking. Good for the skin if you use massage oil or rich cream. Pour the oil into your palm and rub it all over your leg, including your foot, between your toes and your ankle. Such products perfectly nourish and soften the skin.
It is better to do the massage in a sitting position, while keeping the leg that is being massaged suspended. The patient, if it is comfortable for him, can cross his legs. Warm up your feet before massaging your feet. To do this, rub your fingers. Hold your foot with one hand and massage each toe in turn with the other. Rub each phalanx first with straight, then with spiral movements.
Don't forget to massage the spaces between your toes, then work on the soles of your feet. There are two possible ways: wave-like movements of the fist and circular rubbing of the foot with the middle phalanges of bent fingers. To massage your foot, clench your hand into a fist and press it with your knuckles. Move from toes to heel.
Then start massaging the heel. To do this, use strong pinches and rub in a circular manner with your fingers. Massage the Achilles tendon in the same way and move towards the calf muscle.
Massage the ankle joint with light strokes. As a result, this part of the leg will be warmed up, so you can start rubbing, perform sliding movements in the direction from bottom to top, applying light pressure.
- Balinese massage in a beauty salon: differences from Thai
8 rules of classic massage
Classic massage needs to be done correctly. Only then will the client receive the maximum effect. To ensure that the procedure is useful and does not cause harm, follow the following principles:
1. The patient should be completely relaxed, especially the muscles.
2. The areas of the body where the lymph nodes are located are not massaged.
3. Impact on the body should not lead to pain.
4. During a classic massage, you need to move to the nearest lymph nodes; all techniques should be directed along the lymph nodes.
5. The muscles are massaged, starting from large areas of the body, because it is then that blood circulation and lymphatic drainage are stimulated, and blood and lymph flow out from the lower areas of the body.
6. Maintain tempo and rhythm during a classic massage.
7. From anatomical features and the functional state of the patient’s tissues depends on how long and how intense the effect on the muscle is.
8. There is no break between doses. As soon as one technique is completed, the next one begins immediately.
What is needed in a beauty salon for a classic massage?
1. Equipment. Namely, a spa couch or massage table.
2. Requirements for a specialist. The specialist must have a cosmetologist or dermatologist education (secondary or higher). Group classes lasting 52 hours are also offered. The price for the course is 13,000 rubles.
3. Premises requirements. The room should have a window to let in daylight, as well as a lamp for artificial lighting. Area 12 square meters or more. The floor and walls are made of washable materials. The presence of a sink and an exhaust ventilation system is mandatory. Heat in the office (no colder than 20 degrees).
4. Materials used. Massage oils, creams, Consumables(disposable diapers, napkins, slippers).
5. Economics. A classic massage session lasting 30 minutes costs no less than 600 rubles. If the service is popular, the costs will be recouped in one month. If massage sessions are carried out not in a beauty salon, but in a separate massage salon, then the payback will occur in 4-6 months.
Do you need a license for classic massage in a beauty salon?
If the salon provides non-medical massage, then you do not need to obtain a license. Be sure to research what services qualify as non-medical massage. According to the Government Decree, in order to provide medical massage services, you need to obtain a license.
In accordance with the order of the Ministry of Health and social development, classical medical massage work is considered performed if pre-medical care is provided. The regulatory legal acts that are in force in Russia do not explain what can be considered a medical massage and how it differs from non-medical massage. Often, non-medical massage services are provided by unlicensed companies and individuals. To distinguish one massage from another, you need to determine the following parameters:
- what is the nature of the service;
- what actions are performed and what qualifications they require;
- what specialists doing classical massage know and can do in the field of medicine. This is important so as not to harm the client’s health.
Practice opinion
Akim Benmerabet, partner of the law firm "BDP Law Firm", Moscow
To obtain a license to provide clients with a service such as medical massage, you need to contact the following government agencies:
1. Federal Service for Surveillance in Healthcare. The following organizations should contact this service:
- which are subordinate to federal authorities executive power and state academies of sciences. In addition, organizations of federal executive authorities, where military service and service equivalent to it are provided for by federal law;
- which are subordinate to the executive authorities of the constituent entities of the Russian Federation. The exception is medical organizations that, as of January 1, 2011, are municipally owned until December 31, 2012;
- who provide patients with high-tech medical care.
2. Authorized executive authorities of the constituent entities of the Russian Federation. The following organizations should be contacted:
- which are subordinate to the executive authorities of the constituent entities of the Russian Federation and, as of January 1, 2011, are in municipal ownership;
- organizations of municipal and private healthcare systems. The exception is for companies that provide patients with high-tech medical care;
- where military service and service equivalent to it are provided for by federal law. The exceptions are organizations subordinate to state academies of sciences and federal executive authorities, as well as organizations of federal executive authorities;
- which have been providing patients with high-tech medical care since January 1, 2013;
- individual entrepreneurs.
The regulations of each subject of our country regulate which body is responsible for licensing medical activities. Therefore, each subject may have a different organ. In Moscow this is the Moscow Health Department.
If you need a license to provide medical massage, please consult with a higher authority. executive body state authority of its subject, where the application must be submitted. Check with the licensing authority that the application is submitted to the authority located at the individual entrepreneur’s place of residence, or at the place where you carry out your activities.
Subscribe so you don't miss anything important
Massage is a very effective remedy in the fight against body fatigue, stress, and various diseases. Back massage is used as a preventive and therapeutic measure for almost any disease of the spine. To get the maximum benefit from this procedure, the back massage technique must be correct. Therefore, below we will consider the main points that you need to pay attention to when performing a back massage.
Rules for effective massage
If you want your back massage to be as effective as possible, you must follow a number of rules:
- The back massage procedure should begin from the lower part, smoothly moving to the shoulders;
- for upward massage movements, use the inner part of the palms, and for downward movements, use the outer part;
- The massage therapist’s hands should not be cold; they should be relaxed during the entire session to prevent fatigue;
- During the massage, continuous contact must be maintained between the massage therapist’s hands and the patient’s back;
- all massage techniques must be performed in the correct order, smoothly replacing each other;
- when rubbing, it is necessary to move along the fibers of the long spinal muscles (parallel to the spinal column);
- the massage begins and ends with stroking, but its final intensity should be greater than at the beginning;
- under no circumstances should you massage the spine area;
- deep kneading can only be done in areas with a large amount of soft tissue;
- movements such as tapping and patting must be used with great care in the projection of the kidneys and between the shoulder blades;
- the duration of the session depends on the illness, general condition of the patient, body size, age, and recommendations of the attending physician;
- the first back massage session should not exceed 15 minutes;
- gradually increase the strength of the impact during the session;
- Before the procedure, find out if the client has any contraindications; even if the technique is correct, in such cases a back massage can harm the person.

Knowledge of the anatomy and direction of the spinal muscle fibers is the key to the effectiveness and safety of back massage
Main types
There are many types of back massage and techniques for performing it. But all of them can be divided into 2 large categories:
- Relaxing back massage.
- Therapeutic back massage.
The name of this procedure speaks for itself. This massage will help you get rid of the feeling of fatigue, weakness in the body, muscle tension, improves your mood, is an effective method of dealing with stress, and preventing diseases in people who lead a sedentary lifestyle.

Relaxing massage using herbal oils and aromatic candles is an effective way to combat stress
The method of performing such a massage and its technique are very simple. Anyone can master the skills and delight their loved ones with pleasant moments. Relaxation massage techniques include:
- begin with light stroking in the direction from the lower back to the shoulders;
- then proceed to deep stroking with the edge of the palms diagonally on both sides;
- rubbing should begin from the lateral surfaces of the back in the direction of the spine; it is especially recommended to treat the area of the neck and shoulder girdle;
- Then they move on to kneading the tissues with their fingertips; the area of the spinal column cannot be kneaded;
- then you can apply pressure at the paravertebral points with your thumbs (on both sides of the spine, stepping back about 3 cm from it);
- vibration is performed in the direction from bottom to top with the tips of the fingers;
- Finish the relaxing massage with more intense stroking.
The entire session lasts about 15-20 minutes. To achieve even greater relaxation, you can light scented candles and use various vegetable oils for massage. This will have a positive effect on the condition of your skin.
Massotherapy
This group includes all massage techniques that are used to treat or prevent certain diseases. They can be either manual or hardware. The most common therapeutic massage techniques:
- classic back massage or Swedish;
- acupuncture;
- can;
- vibration;
- hydromassage;
- lymphatic drainage;
- sports;
- therapeutic, depending on the specific pathology (osteochondrosis, intervertebral hernia, scoliosis, etc.)
Most often, classical massage is used in practice, which has a therapeutic, preventive and hygienic effect on the body. Therefore, we will consider the technique of its implementation in more detail.
Basic massage techniques
There are 5 main massage techniques when performing the classical procedure:
- stroking;
- trituration;
- kneading;
- patting and tapping;
- vibration.

Classic massage should include all basic massage techniques
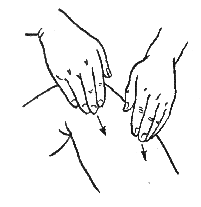
Stroking
First, apply broad superficial stroking over the entire area of the palm in the direction from the lower back to the shoulders and neck. Then they switch to deep stroking with the edges of their palms diagonally. This technique begins and ends any massage. Its goal is to relax the muscles and calm them down.
Trituration
This technique performed by moving the skin with the palms of both hands, performing vigorous zigzag movements in the direction from bottom to top. During this treatment, the blood supply to the tissues of the back and spine improves.
Kneading
During kneading, one hand is placed on top of the other to increase pressure and strength during massage movements. Depending on the purpose of the massage, you can knead the tissues in several ways - with a thumb or two, with the pads of your fingers, with all phalanges. The movements are circular in nature.
First, the long back muscles on both sides of the spine are kneaded, then the broad dorsal muscles are treated.
Pat
This technique is intended for a reflex and local irritating effect on the tissues of the back. Patting and tapping are performed by applying energetic, gentle blows with the outer edge of the hands.
Vibration
Movements during vibration are in the nature of rapid shaking of tissues with the index and middle fingers of both hands.
Massage will be effective only if it is performed correctly. It is an integral part of the treatment of a large number of diseases of the musculoskeletal system and other body systems. If you suffer from some kind of pathology and decide to improve your health by taking a course of massages, then be sure to find a massage therapist with a medical diploma, otherwise you risk not only getting no effect for your money, but also significantly worsening your condition.
At all times, massage has been famous for its healing effects on the body, having a positive effect on muscles, tissues, joints and all internal organs. If you remember a little - in ancient China, Rome, Greece, doctors and healers used massage for medicinal purposes to treat various diseases. Back massage has occupied a special place in the art of “healing”, since everyone felt its healing effects. The art was passed on from generation to generation, improving the technique and methodology over time, but not forgetting the ancient secrets.
This type of massage has been known since ancient times.
Medicine does not stand still. Together with it, the art of massage develops harmoniously. Currently, the fashion for a healthy lifestyle is becoming increasingly popular. Wellness and wellness are also growing in popularity. Without any doubt, a full body massage will always win the position over the local one. Today we will look at one of the local massage techniques, which is used both in traditional medicine, so and .
Execution technique
Sometimes we don’t pay enough attention to the condition of our back, thinking that it can endure a lot. But we are deeply mistaken: we may not notice the first signs of back problems, but they can arise long before obvious symptoms appear. Muscle strain can occur due to stressful situations, a sedentary lifestyle, or any injuries or bruises.
The therapeutic effects of massage will help to greatly alleviate the deplorable condition, relieve tension and pain, thereby giving freedom of movement.
Our lives are often hectic and dynamic. The crazy pace of life does not always have the best effect on health, and in particular on our back. Thanks to massage, we can give freedom to our body, relieving it of painful tension.

Directions of basic movements in the back and lower back. neck and pelvis
Back massage technique
Today there are a large number of back massage options. Medical practice showed that the most effective technology is one in which a preliminary massage of the entire back is first applied, lasting 5-6 minutes, and then a detailed study of individual parts: the lower thoracic region and the lumbar region.

Direction of massage movements
Let's move on to the preliminary massage: the patient should lie on his stomach.
- The figure shows 3-4 symmetrical lines along which you need to make massage movements. First, longitudinal strokes are performed for one minute. Then stroking across the back.
- Next, squeezing techniques are performed. Their duration is 1-3 minutes. Squeezing is performed with more pressure, but less intensity than stroking. It should be noted that pressure on the spinous processes of the spine must be avoided, as in any other techniques.
- After squeezing, you can perform several rubbing techniques with moderate pressure on the tissue. If the application is carried out correctly, the patient should feel a sensation of warmth.
After the preliminary massage, you should proceed to the main massage.
Massage of this area refers to the area from the seventh to the twelfth thoracic vertebrae. The figure shows the lines along which massage movements must be made.

Direction of massage movements of the lower thoracic region
- First, strokes are performed along the indicated lines.
- Stroking is followed by squeezing along the lines.
- Next, rubbing is performed.
- After rubbing, kneading must be done.
- Let's move on to striking and concussive techniques. Their implementation should be used according to indications. It is advisable to consult a doctor.
In total, it is recommended to spend 4-5 minutes on massage of this area, and up to 15 minutes with the therapeutic method. It should be noted that the 11th and 12th ribs are located close to the kidneys. approximately 5 cm. Inadequate and too intense implementation of techniques can lead to pain.
Massage under the shoulder blade
Often, during diseases such as osteochondrosis, glenohumeral periortritis, so-called trigger points are formed under the scapula, which are characterized by increased pain. In this case, massage of these points contributes to faster rehabilitation.
The technique for this zone is as follows:

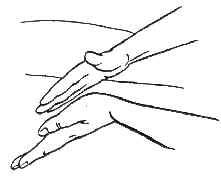
The patient lies on his stomach with his arms along his body. The massage therapist carefully places his palm under the patient’s shoulder and slowly lifts it a few centimeters. It is important to note that the patient must be completely relaxed at this point, otherwise the scapula will not rise. With the second hand, the massage therapist performs circular massage movements under the shoulder blade, as shown in the figure. On the second hand everything is similar.

Then rubbing is performed at the angle of the shoulder blade. The thumb should be as far apart from the index finger as possible. Such rubbing is often carried out for hygienic and preventive reasons.

Neck massage is a massage at the level of the cervical and 1-6 thoracic vertebrae. In this case, the pressure on the tissue should be lower than when massaging the lower thoracic and lumbar regions. The patient can take a sitting or lying position. If there are no contraindications, it is better to perform it in a lying position. In this position, maximum muscle relaxation is achieved.
- First, strokes are performed in the directions shown in the figure. Stroking is performed within 1 minute.
- This is followed by squeezing along the same lines. Performed within 2-3 minutes.
- Next is rubbing. It can be combined with kneading. The duration of kneading is 7-12 minutes.
- These are followed by vibration techniques. Vibration is performed with the fingers, no higher than the 6th cervical vertebra.
- Finish the massage of the collar area by shaking with your fingertips and lightly stroking.
In general, the entire massage of this area takes 10-15 minutes.
The massage is performed on the lumbar region, located from 1-5 lumbar vertebrae, as well as on the sacral region. The lines shown in the figure are directed laterally from the spine towards the inguinal lymph nodes.

The procedure is performed according to the following scheme:
- First, strokes are performed.
- They are followed by push-ups.
- Next, rubbing is performed.
- Then kneading.
- Afterwards, shocking techniques are performed: vibration and shock techniques.
In the general structure, a massage of this area takes 5-6 minutes, in a therapeutic form - 20 minutes. The force of influence will vary: for example, along lines 4 and 5 you can use a more intense form of movement, and along lines 1 and 2 you need to dose the force of influence, since internal organs are located in this area.
How to do a back massage correctly: features
Each type of occupation has its own subtleties and features. Let us reveal several important points that will help you understand the question: how to do a back massage.
- The massage should start from the sacrum area, smoothly moving upward.
- The massage therapist's hands should be relaxed and warm during the procedure.
- The technique is to alternate stroking and rubbing movements.
- The first session should take no more than 15 minutes.
Now let's move on to the massage techniques that are used to conduct a massage session.
This technique is the right start to a massage. Warm your hands and begin rhythmically stroking the entire surface of your back. In the lumbar and neck areas, more gentle and gentle movements should be performed. performed in an intensive manner.

The massage procedure should begin with stroking
This technique is performed in the same way as stroking, but a little more intensely and with the greatest pressure. As a rule, rubbing begins from the lower back, no more than 10 minutes.

Rubbing is a more intense technique
The kneading technique is performed with a deeper effect on the tissue. If you need to increase pressure on the massaged area, place one hand on the other. These technical exercises should begin with the forearm area. It is recommended to perform no more than 10 minutes.

Kneading affects deeper areas
Basically, vibration or light tapping should be used to complete the procedure. Vibration should be done with your fingertips over the entire surface of your back, with minimal contact.

The final stage of the massage
Undeniable benefits
Many famous scientists have proven that massage procedures bring great benefits to our body as a whole. With the help of massage techniques on the body, normalization of blood circulation in the body, as well as muscle relaxation after physical activity. This also applies to emotional tension - after a high-quality session, emotional tension and stress disappear, and endorphins come in their place, the level of which also increases due to the massage.
A professional, therapeutic back massage helps get rid of problems with incorrect posture and other spinal diseases. Therefore, you should not neglect massage procedure, which has the power to “heal” all problems and diseases.
During massage, certain techniques are used; they can be divided into five main groups. These include:
- stroking;
- trituration;
- squeezing;
- kneading;
- vibration.
In turn, the techniques can be classified as medium-deep (stroking, rubbing, squeezing), deep (kneading) and shock (vibration).
When performing a massage, you need to alternate techniques without taking breaks between them. You should also not massage the lymph nodes when performing a massage.
When starting to master massage techniques, you can massage your leg, and at the same time you will recognize and feel what sensations the person being massaged experiences.
The massage should begin softly and gently, then it should gradually intensify, and at the end soft, relaxing techniques should be repeated. The number of repetitions of individual massage techniques varies and depends on the individual characteristics of the patient and some other factors (age, health, etc.). Certain techniques have to be repeated up to 4-5 times, others less often.
The strength and dosage of the massage have great importance. Rough, hasty, haphazard and unrhythmic movements, as well as excessive duration of massage can cause pain, convulsive muscle contractions, irritation of the cerebral cortex and overexcitation of the nervous system. This type of massage can be harmful.
You should also not start the massage with sudden movements and stop suddenly. The first sessions should not be long and intense; the muscles need special preparation for intense exposure. The muscles of the person being massaged should be relaxed.
It is important to change the pressure of your fingers on the body and carefully record the sensations that arise. It is necessary to do such training massage sessions in order to create a sense of rhythm in which the hands move continuously, changing one technique to another.
It must be remembered that massage movements should be directed along the lymphatic tract towards the nearest lymph nodes. When massaging the upper limbs, the direction of movement should go from the hand to the elbow joint, then from elbow joint to the armpit.
When massaging the lower extremities, movements should be directed from the foot to the knee joint, then from the knee joint to the groin area.
When massaging the torso, neck, head, movements should be directed from the sternum to the sides, to the armpits, from the sacrum up to the neck, from the scalp to the subclavian nodes.
When massaging the abdomen, the rectus muscles are massaged from top to bottom, and the oblique muscles, on the contrary, from bottom to top.
The massage should begin with large areas of the body, and then move on to smaller ones; this sequence helps improve lymph circulation and blood circulation in the body.
CHAPTER 1. STROKING
This technique is used at the beginning and end of the massage, as well as when replacing one technique with another.
Stroking has a significant effect on the body. It cleanses the skin of keratinized scales and residual secretions of the sweat and sebaceous glands. As a result of this effect, skin respiration is cleared and the function of the sebaceous and sweat glands is activated. Exchange processes in the skin intensify, skin tone increases, as a result of which it becomes smooth and elastic.
Stroking helps and improves blood circulation, because as a result of the opening of reserve capillaries, the volume of oxygen entering the tissue increases. This technique also has a beneficial effect on blood vessels, making their walls more elastic.
If there is swelling, stroking helps to reduce it, because it helps the outflow of lymph and blood. Stroking helps and cleanses the body, because as a result of this effect, decay products are removed. Stroking is used for pain relief for injuries and other diseases.
The effect of stroking on the nervous system depends on the dosage and methods: deep stroking can excite the nervous system, while superficial stroking, on the contrary, calms.
It is especially useful to perform stroking techniques in case of insomnia and increased excitability of the nervous system, after heavy physical activity, with traumatic injuries, etc.
Stroking also helps to relax the muscles before subsequent massage techniques.
When stroking, the hands glide freely over the body, the movements are soft and rhythmic. These techniques never affect the deep layers of muscle mass; the skin should not move. The oil is first applied to the skin, and then, using wide, smooth movements, the oil is rubbed into the body, which at the same time relaxes and warms up.
When stroking, your hands are relaxed, they glide over the surface of the skin, touching it very lightly. Stroking should be done in one direction, usually along the lymphatic vessels and veins. The exception is planar superficial stroking, which can be carried out regardless of the direction of lymph flow. If there is swelling or stagnation, then you need to start stroking from the overlying areas to facilitate the outflow of fluid.
You can use stroking yourself, in the form of a separate massage effect. But most often, stroking is used in combination with other massage techniques. Usually the massage procedure begins with stroking. You can finish each individual massage session with stroking.
When performing the stroking technique, you should remember that superficial stroking is always used first, only after which can you use deep stroking. When stroking, do not apply excessive pressure, which can cause pain and discomfort at the person being massaged.
The stroking of the flexor areas of the limbs should be deeper; this is where the largest blood and lymphatic vessels pass.
All stroking techniques are performed slowly, rhythmically; approximately 24-26 sliding strokes should be performed in 1 minute. Do not stroke with too sharp and fast movements, so as not to displace the skin. The surface of the palms should fit tightly to the surface being massaged. When performing each stroking session, you can choose only those techniques that will most effectively affect a given area of the massaged body.
STROKING TECHNIQUES AND TECHNIQUES
The two most important stroking techniques are flat and enveloping strokes. They need to be done with the entire brush, placing it on the surface to be massaged.
Planar stroking is used on flat and large surfaces of the body, such as the back, stomach, chest. With this stroking, the hand is relaxed, the fingers should be straightened and closed. Directions
movements may be different. You can perform movements transversely, longitudinally, in a circle or in a spiral. Stroking movements can be made with either one or two hands (Fig. 65).
Enveloping stroking is used to massage the upper and lower extremities, buttocks, neck, and lateral surfaces of the torso. Perform grasping strokes with a relaxed hand, while thumb should be laid aside, and the remaining fingers should be closed. The brush should tightly grasp the massaged surface (Fig. 66). Movements can be continuous or intermittent (depending on the goals).
|
Figure 65 |
You can perform stroking with one hand, or with both hands; the hands should follow parallel and in a rhythmic sequence. If stroking is performed on large areas in which excess subcutaneous fat is concentrated, you can increase the pressure by massaging with a weighted brush. In this case, one brush is placed on top of the other, thereby creating additional pressure.
Stroking movements can be superficial and deep.
Superficial stroking is characterized by particularly gentle and light movements, has a calming effect on the nervous system, helps muscle relaxation, improves blood circulation and metabolism in the skin.
Deep massage should be done with force, while pressing is best done with the wrist. This stroking technique helps remove removal of metabolic products, elimination of edema and stagnation. After deep stroking, the functioning of the circulatory and lymphatic systems body. Figure 66
Stroking, especially planar, can be done not only with the entire inner surface of the palm, but also back side two or more folds, the side surfaces of the fingers - this depends on the area of the body that is being massaged. For example, when massaging small areas of the facial surface, at the site of callus formation, as well as when massaging the interosseous muscles of the foot or hand, you can use stroking with the pads of the index or thumb. Stroking with fingertips is used to massage individual muscles and tendons, and to massage the fingers and face.
When performing a massage of large surfaces of the muscles of the back, chest, thighs, you can use stroking with the palm of your hand or a hand folded into a fist. In addition, stroking can be continuous or intermittent. With continuous stroking, the palm should fit snugly to the surface being massaged, as if sliding along it. Such stroking inhibits the reaction of the nervous system, calming it. In addition, continuous stroking promotes the outflow of lymph and the destruction of swelling.
Continuous stroking can be alternate, while the second hand should be raised above the first, which completes the stroking, and perform the same movements, but in the opposite direction.
When performing intermittent stroking, the position of the hands is the same as during continuous stroking, but the movements of the hands should be short, jerky and rhythmic. Intermittent stroking has irritant effect on the nerve receptors of the skin, so this massage stimulates the central nervous system. Thanks to this, intermittent stroking can activate blood circulation in tissues, tones blood vessels and activates muscle activity.
Depending on the direction of the stroking movements, stroking can be divided into the following types:
- straight;
- zigzag;
- spiral;
- combined;
- circular;
- concentric;
- longitudinal stroking with one or two hands (Finnish version).
When performing straight stroking, movements are made with the palm of the hand, the hand should be relaxed, and the fingers should be pressed against each other, except for the thumb, which should be moved slightly to the side. The hand should fit snugly to the body surface being massaged; movements should be made with the thumb and forefinger. They should be light and gliding.
When carrying out zigzag stroking, the hand should make a quick and smooth zigzag movement directed forward. Zigzag stroking creates a feeling of warmth and calms the central nervous system. This stroking can be performed with different pressure levels.
Spiral stroking is performed without tension, with light and sliding movements, just like zigzag stroking. The trajectory of the hand movement should resemble a spiral. This stroking has a tonic effect.
You can combine straight, zigzag and spiral movements into combined stroking. Combined stroking must be performed continuously in different directions.
When massaging small joints You can perform circular stroking. The movements should be made with the base of the palm, making circular movements towards the little finger. In this case, movements with the right hand will be directed clockwise, and movements with the left hand will be directed counterclockwise.
To massage large joints, you can use another circular stroking - concentric. The palms should be placed on the massaged area, placing them close to each other. In this case, the thumbs will affect the outer side of the joint, and the remaining fingers will act on the inner side. This performs a figure-eight movement. At the beginning of the movement, the pressure should be increased, and towards the end of the movement, slightly weakened. After this, the hands should return to their original position and repeat the movement.
To perform longitudinal stroking, the thumb should be moved as far as possible, then the brush should be placed along the surface being massaged. Movements should be made with your fingertips forward. If longitudinal stroking is performed with both hands, the movements must be made alternately.
When stroking, auxiliary techniques are also used:
- comb-shaped;
- rake-shaped;
- pincer-shaped;
- cruciform;
- ironing
Comb-like stroking is used for deep massaging of large muscles in the dorsal and pelvic areas, as well as on the palmar and plantar surfaces. This stroking helps to penetrate into the depths of massive muscle layers, and is also used for significant subcutaneous fat deposits. Comb-like stroking is performed using the bony protrusions of the phalanges of the fingers, bent into a fist. The fingers of the hand should be bent freely and without tension; they should not be pressed tightly against each other (Fig. 67). You can perform comb-like stroking with one or two hands.
 |
|
Figure 67 |
Rake-like stroking is used to massage the intercostal spaces, the scalp, and also on those areas of the skin where it is necessary to bypass damaged areas.
To perform rake-like movements, you need to spread your fingers and straighten them. Fingers should touch the massaged surface at an angle of 45 degrees. Rake-like stroking should be done in longitudinal, transverse, zigzag, and circular directions. They can be performed with one or two hands. If the movements are performed with both hands, the arms can move
 |
|
Figure 68 |
in parallel or in series. To increase pressure, rake-like movements can be done with weights (the fingers of one hand are superimposed on the fingers of the other hand) (Fig. 68).
Pincer-like stroking is used to massage tendons, fingers, feet, face, nose, ears, as well as small muscle groups. The fingers should be folded in a pincer-like manner, and, grasping a muscle, tendon or skin fold with the help of the thumb, index and middle fingers, make straight stroking movements (Fig. 69).
 |
|
Figure 69 |
Cross strokes are commonly used in sports massage and are used to massage the extremities. Cross-shaped stroking is also carried out in the system of rehabilitation measures after serious illnesses and operations. In these cases, you can do cross-shaped stroking of the back, pelvic area, buttocks, and back surfaces of the lower extremities. Cross-shaped stroking helps in preventing bedsores. When performing cross-shaped stroking, your hands need to be clasped and grasped around the surface being massaged. This stroking is performed with the inner surfaces of the palms of both hands (Fig. 70).
 |
|
Figure 71. |
Ironing- the technique is soft and gentle, so it is often used in children's massage (Fig. 71). Ironing is also used to massage the skin and muscles of the face and neck, as well as to massage the back, abdomen and soles. Ironing with weights is used to massage internal organs.
Ironing is done with one or two hands. The fingers should be bent at the metacarpophalangeal joints at a right angle. If ironing needs to be done with weights, you should place the hand of the other hand on the clenched fingers of one hand.
CHAPTER 2. RUBBING
After stroking comes the next technique, which has a deeper effect, since when it is performed, movement, displacement and stretching of body tissues occurs. When rubbing, your fingers or hands should not slide over the skin, as when stroking.
Rubbing is widely used in almost all types of massage. Rubbing techniques dilate blood vessels and increase blood circulation, while the local skin temperature rises. This promotes better saturation of tissues with oxygen and nutrients, as well as rapid removal of metabolic products.
Typically, rubbing is used in areas poorly supplied with blood: on the outer side of the thigh, on the sole, heel, as well as in the locations of tendons and joints.
Rubbing is used for neuritis and neuralgic diseases, since rubbing reduces the excitability of the nervous system, as a result of which the pain characteristic of these diseases disappears.
Rubbing techniques help treat sore joints, restore them after injuries and damage.” Rubbing also has a beneficial effect on muscles, making them more mobile and elastic.
By rubbing, which increases tissue mobility, it is possible to avoid fusion of the skin with the underlying surfaces. Rubbing helps stretch adhesions and scars, promotes the resorption of swelling and fluid accumulations in tissues.
Rubbing is usually performed in combination with other massage movements. When rubbing surfaces that have swelling and pathological deposits, rubbing should be combined with stroking. Rubbing is also used before kneading.
Rubbing should be done at a slow rhythm. In 1 minute you should make from 60 to 100 movements. Unless absolutely necessary, you should not linger in one area for more than 10 seconds. Longer rubbing of the same area can cause pain in the person being massaged.
If you need to increase the pressure, rubbing can be done with weights. The pressure increases if the angle between the brush and the massaged surface increases.
When performing rubbing, the direction of lymph flow should be taken into account; the direction of movements during rubbing depends only on the configuration of the surface being massaged.
RUNNING TECHNIQUES AND TECHNIQUES
The main rubbing techniques are rubbing with the fingers, the edge of the palm and the supporting part of the hand.
Rubbing with fingers is used to massage the scalp, face, intercostal spaces, back, hands, feet, joints and tendons, and iliac crests. Rubbing is performed using the fingertips or the back of their phalanges. You can rub with one thumb, while the other fingers should rest on the surface being massaged (Fig. 72).
 |
|
Figure 72 |
If rubbing is performed with all fingers except the thumb, the supporting function is performed by the thumb or the supporting part of the hand. Figure 72.
Can be used for rubbing
only the middle finger, using its pad to rub in straight lines, circles, or strokes. This method of rubbing is very convenient to use when massaging the intercostal and intermetacarpal spaces.
You can rub with the fingers of one hand or both hands. The second hand can be used for weights (Fig. 73), or you can perform rubbing movements in parallel.
 |
|
Figure 73 |
As mentioned above, the choice of direction when rubbing depends on the configuration of the surface being massaged, i.e. anatomical structure joints, muscles, tendons, as well as the location of scars, adhesions, edema and swelling on the massaged area. Depending on this, rubbing can be carried out in the longitudinal, transverse, circular, zigzag and spiral directions.
Rubbing with the elbow edge of the hand is used to massage large joints such as the knee, shoulder and hip joints. You can use rubbing with the elbow edge of the hand when massaging the back and abdomen, the edges of the shoulder blades and the crests of the iliac bones (Fig. 74).
When rubbed with the elbow edge of the hand, the underlying tissues should also shift, forming a skin fold when displaced.
 |
|
Figure 74 |
On large muscle layers, an intensive technique such as rubbing with the supporting part of the hand is used. It is usually used to massage the back, thighs, and buttocks. You can rub with the supporting part of the hand either with one or with two hands. With this technique, movements are performed linearly or spirally. Depending on the direction of movement, rubbing occurs:
- straightforward;
- circular;
- spiral-shaped.
Straight-line rubbing is usually done with the pads of one or more fingers. Straight-line rubbing should be used when massaging the face, hands, feet, small muscle groups and joints.
Circular rubbing is done using the fingertips. In this case, the hand should rest on the thumb or the base of the palm. You can carry out circular rubbing with the back of all half-bent fingers, as well as with one finger. This method of rubbing can be done with weights or alternately with both hands. Circular rubbing is used to massage the back, abdomen, chest, limbs and other parts of the body. Spiral rubbing, used to massage the back, abdomen, chest, limbs and pelvic areas, is performed with the elbow edge of the hand, bent into a fist, or the supporting part of the hand. With this method of rubbing, you can use both brushes or one brush with weights. When rubbing, auxiliary techniques are also used:
Hatching. Correctly performed shading technique helps to increase the mobility and elasticity of the tissues undergoing massage. This technique is used in the treatment of post-burn skin scars, cicatricial
 |
|
Figure 75 |
adhesions after other skin injuries, postoperative adhesions, pathological compactions. In certain doses, shading can reduce the excitability of the central nervous system, which contributes to the analgesic effect. Hatching is done with the pads of the thumb, index and middle fingers (each separately). Can be carried out
shading with the index and middle fingers together. When shading, straightened fingers should be at an angle of 30 degrees to the surface being massaged (Fig. 75).
Hatching is done with short and straight movements. The fingers should not slide over the surface; the underlying tissues shift in different directions when performing the technique.
 |
|
Figure 76 |
Planing. This auxiliary rubbing technique is used for le
in the treatment of psoriasis and eczema, when it is necessary to exclude exposure to the affected areas of the skin, as well as in the restorative treatment of skin with significant scarring. This technique is used to increase muscle tone, since planing has a stimulating effect on the neuromuscular system (Fig. 76). Positive Action It also has a planing effect in the fight against increased fat deposits in some areas of the body. Planing is done with one or both hands. When performing a two-handed massage, both hands should move sequentially, one after the other. The fingers should be folded together, while they should be straightened at the joints. The fingertips apply pressure and then displace tissue.
Sawing. The technique is used to massage the back, thighs, legs, abdomen, as well as those areas of the body where large muscles and joints are located.
Sawing needs to be done with one or two hands. Movements are made by the ulnar edge of the hand. Sawing with one hand should be done in a forward-backward direction, while the underlying tissues are displaced and stretched. If sawing is done with both hands, the hands should be placed on the massaged surface with palms facing each other at a distance of 2-3 cm. They should move in the opposite direction. It is necessary to perform the movement so that the hands do not slide, but move the underlying tissues (Fig. 77).
 |
|
Figure 77 |
Crossed. The technique is used to massage the muscles of the back and abdomen, limbs, cervical spine, and trapezius muscles. You can perform the crossing with one or two hands. The movements are made with the radial edge of the hand, the thumb should be moved to the side as much as possible (Fig. 78).
If crossing is done with one hand, you should make rhythmic movements from yourself and towards yourself. When performing a technique with both hands, the hands should be placed at a distance of 2-3 cm from each other. Hands should move away from you and toward you alternately, displacing the underlying tissue.
Forceps rubbing. The technique is used to massage the face, nose, ears, tendons and small muscles.
 |
|
Figure 78 |
The pincer-like rubbing should be done with the ends of the thumb and index finger or the thumb, index finger and middle finger. The fingers take the form of forceps and move in a circle or in a straight line.
Comb-shaped trituration. This technique is used to massage the palms and soles of the feet, as well as on areas with large muscles: on the back, buttocks, outer surface hips. Comb-like rubbing should be done with a hand clenched into a fist, placing it on the massaged surface with the bony protrusions of the middle phalanges of the fingers.
rake-shaped trituration. The technique is used if it is necessary to bypass the affected areas on the massaged surface. It is used when varicose veins veins in order to massage the areas between the veins with spread fingers without touching the veins themselves.
Rake-like rubbing is also used to massage the intercostal spaces and scalp.
Perform movements with widely spaced fingers, while the pads of the fingers perform rubbing movements in a straight line, circle, zigzag, spiral or hatching manner. Rake-like rubbing is usually done with two hands; movements can be made not only with the pads of the fingers, but also with the dorsal surfaces of the bent nail phalanges.
CHAPTER 3. SQUEEZING (EXTRUSION)
The main massage techniques include squeezing, which is somewhat reminiscent of stroking, but is performed more energetically and with greater speed of movement. Unlike stroking, squeezing affects not only the skin, but also the subcutaneous tissue, connective tissue and upper muscle layers.
Squeezing helps improve blood supply to body tissues, enhances lymph outflow and helps get rid of swelling and congestion, improves tissue nutrition, increases the temperature in the massaged area, and has an analgesic effect.
Due to its effect on the body, squeezing is widely used in therapeutic, hygienic and sports massage.
Squeezing is usually done before kneading. Movements during squeezing should be directed along the blood and lymphatic vessels. When performing squeezing to reduce swelling, movements should begin from an area located above the swelling and closer to the lymph node. For example, squeezing for swelling in the foot area should begin with the thigh, and then the lower leg, only after that can you move on to foot massage.
Squeezing should be done slowly and rhythmically; failure to comply with these requirements can lead to pain in the person being massaged, as well as damage to the lymphatic vessels. Squeezing on the surface of the muscles should occur along the muscle fibers. The force of pressure should "depend on which part of the body surface is being massaged. If the massage is performed on a painful area or an area of increased sensitivity, as well as at the location of bony protrusions, the pressure force should be reduced. In areas where large muscles and large vessels are located , as well as in areas with a thick layer of subcutaneous fat, the pressure must be increased.
SQUEEZING TECHNIQUES AND TECHNIQUES
The main squeezing techniques include:
- cross squeezing;
- squeezing performed with the edge of the palm;
- squeezing performed with the heel of the palm;
- two-handed squeezing (with weights).
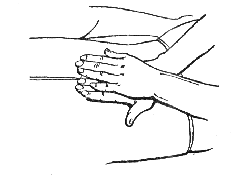
Transverse squeeze. To perform this technique, place your palm across the muscle fibers, press your thumb against your index finger, and press the remaining fingers together and bend them at the joints. Movements must be made with the base of the thumb and the entire thumb, moving the hand forward.
 |
|
Figure 79 |
Squeezing the palm with the edge. To perform the technique, place the edge of the palm across the massaged area (across the direction of the blood vessels), place the thumb on the index finger and move forward. The remaining fingers should be slightly bent at the joints (Fig. 79).
Squeezing with the heel of the palm. The hand, palm down, should be placed on the massaged surface along the muscle fibers. The thumb should be pressed to the edge of the palm, moving the nail phalanx to the side (Fig. 80).
Pressure on the massaged surface is exerted by the base of the thumb and the base of the entire palm. The remaining fingers should be slightly raised and moved towards the little finger. Figure 80
Squeezing with two hands is performed with weights. This technique helps to enhance the effect on the massaged area. If the weight is performed perpendicularly, three fingers (index, middle and ring) should exert pressure on the radial edge of the thumb of the hand that is performing the massage (Fig. 81). If the weight is performed in the transverse direction, the second hand should apply pressure to the entire hand, performing massage (Fig. 82).
In addition to the basic squeezing techniques, there is also an auxiliary technique called beak-shaped. Beak-shaped squeezing is performed in the following several ways:
- ulnar part of the hand;
- radial part of the hand;
- the front part of the hand;
- the back of the hand.
 |
|
Figure 81 |
When performing beak-shaped squeezing, the fingers need to be folded in the shape of a bird's beak, pressing the thumb to the little finger, the index finger to the thumb, the ring finger placed on top of the little finger, and the middle finger placed above the ring and index fingers. When performing beak-shaped squeezing with the elbow part of the hand, movements should be made with the edge of the little finger, moving the hand forward (Fig. 83). When performing beak-shaped squeezing with the radial part of the hand, forward movements should be made with the edge of the thumb (Fig. 84).
CHAPTER 4. KNEWING
This technique is one of the main ones in massage. More than half of the total time allotted for a massage session is devoted to kneading. To make the kneading effect more noticeable, the muscles of the person being massaged should be as relaxed as possible.
By kneading, access to the deep muscle layers. When using it, you need to grab muscle tissue and press it to the bones. The tissue is captured with simultaneous compression, lifting and displacement. The entire kneading process can be divided into three phases: gripping the muscle, pulling and squeezing, and then rolling and squeezing.
 |
|
Figure 84 |
The kneading technique should be done using the thumbs, fingertips and the top of the palm. The movements should be short, fast and sliding.
When kneading, you should strive to capture deeper and deeper layers of muscle tissue. You can use your body weight and place one hand on top of the other to increase pressure. It is as if squeezing and squeezing the skin of the massaged area is performed.
Kneading should be done slowly, painlessly, increasing its intensity gradually. You should make 50-60 kneading movements per minute. When kneading, your hands should not slip; you should also not make sharp jerks or twist the tissue.
 |
|
Figure 85 |
The movements should be continuous, from the belly of the muscle to the tendon and back, and the muscle should not be released, jumping from one area to another. You need to start the massage from the place where the muscle passes into the tendon.
The positive effect of kneading is that it improves the circulation of blood, lymph and tissue fluid. At the same time, the nutrition of the tissues of the massaged area significantly increases, the saturation of the tissues with oxygen, and muscle tone improves.
Kneading helps to quickly remove carbon dioxide and lactic acid from tissues, so kneading is necessary after heavy physical and sports activities. Kneading significantly reduces muscle fatigue.
 |
|
Figure 86 |
With the help of kneading, muscle fibers are stretched, as a result of which the elasticity of muscle tissue increases. With regular exposure, muscle strength increases.
TECHNIQUES AND TECHNIQUES OF KNEADING
There are two main kneading techniques - longitudinal and transverse.
Longitudinal kneading. It is usually used to massage the muscles of the limbs, the sides of the neck, the muscles of the back, abdomen, chest, and pelvic areas. Longitudinal kneading should be performed along the muscle fibers that form the belly (body) of the muscle, along the axis of the muscles through which the tendon of origin (head) and the tendon of attachment (tail) are connected (Fig. 87).
Before performing longitudinal kneading, straightened fingers should be positioned on the surface to be massaged so that the thumb is on the side of the massaged area opposite to the other fingers. Having fixed your fingers in this position, you should lift the muscle and pull it back. Then you need to make kneading movements directed towards the center. You cannot let go of the muscle even for a moment; your fingers should clasp it tightly. Initially, pressure on the muscle should be applied towards the thumb, and then the thumb applies pressure on the muscle towards the rest of the fingers. Thus, the muscle experiences pressure on both sides.
You can perform longitudinal kneading with both hands, with all movements performed alternately, one hand moving after the other. Movements are performed until the entire muscle is completely warmed up.
You can carry out longitudinal kneading with intermittent movements, jumps. With this method, the brush massages individual areas of the muscle. Typically, intermittent kneading is used when it is necessary to bypass affected areas of the skin, as well as to stimulate the activity of the neuromuscular system.
Transverse kneading. It is used for massage of the limbs, back and abdomen, pelvic and cervical areas.
When performing transverse kneading, the hands should be positioned across the muscle that is being kneaded. The angle between the hands placed on the massaged surface should be approximately 45 degrees. The thumbs of both hands are located next to one side of the massaged surface, and the remaining fingers of both hands are located on the other side. All kneading phases are performed simultaneously or alternately. If kneading is performed simultaneously, both hands move the muscle to one side (Fig. 88), but in the case of alternating transverse kneading, one hand should move the muscle toward itself, and the other away from itself (Fig. 89).
 |
|
Figure 89 |
If kneading is carried out with one hand, the other hand can be used for weights (Fig. 90).
Transverse kneading should begin from the belly (body) of the muscle. Next, the movements should be gradually directed towards the tendon.
It is better to knead the core of the muscle and tendon with one hand longitudinally, therefore, when approaching the tendon, you can remove the second hand and finish kneading with one hand. After the tendon and the muscle attachment site have been massaged, you can begin to move in the opposite direction; in this case, you need to place a second, free hand on the muscle and perform a transverse kneading with both hands. One muscle should be massaged in this way several times, changing the transverse kneading to the longitudinal one.
The types of longitudinal and transverse kneading include:
- ordinary;
- double single;
- double neck;
- double ring;
- double ring combined kneading;
- double circular longitudinal kneading;
- ordinary-longitudinal;
- circular;
- kneading with the base of the palm with a roll.
 |
|
Figure 90 |
Ordinary kneading. This type of kneading is used to massage the muscles of the neck, large dorsal and gluteal muscles, the front and back of the thigh, the back of the lower leg, shoulder, and abdomen.
When performing a normal kneading exercise, you need to grasp the muscle very tightly across it with your straight fingers. The muscle should then be lifted by moving the thumb and all other fingers towards each other. The fingers should move with the muscle and not slide over it. The next stage is returning the muscle to its original position. At the same time, the fingers should not let go of the muscle, the palm should fit tightly to the muscle. Only when the muscle returns to its original position can the fingers be unclenched. Massage all areas of the muscle in this way.
Double normal kneading. This technique effectively stimulates us
cervical activity.
When massaging the muscles of the back of the leg and shoulder, the person being massaged should lie on his back. If the thigh muscles are being massaged, the leg should be bent at the knee.
The difference between this technique and the usual ordinary kneading is that you need to alternately perform two ordinary kneading with both hands. In this case, movements should be directed from bottom to top.
Double neck. This method is used to massage the muscles of the front and back of the thigh, oblique abdominal muscles, back and buttock muscles, and shoulder muscles.
A double bar is performed in the same way as a regular warm-up, but the double bar must be performed with weights. There are two double neck options.
Option 1. When performing this version of the double bar, the hand of one hand is weighed down by the other so that the thumb of one hand presses on the thumb of the other hand. The remaining fingers of one hand apply pressure to the fingers of the other hand.
Option 2. The double bar in this version is performed with the weight of the base of the palm of one hand on the thumb of the other hand.
Double ring kneading. It is used to massage the trapezius muscles, abdominal muscles, chest, latissimus dorsi, limb muscles, neck and buttocks. When massaging flat muscles, double circular kneading cannot be used because it is impossible to pull these muscles upward.
It is more convenient to do this kneading by placing the person being massaged on a flat surface. The person being massaged should relax the muscles as much as possible. The hands of both hands should be placed on the massaged area so that the distance between them is equal to the width of the hand. The thumbs should be located on the opposite side of the massaged surface from the other fingers.
Next, you should grab and lift the muscle with straightened fingers. In this case, one hand moves the muscle away from itself, and the other hand moves toward itself. Then the direction changes to reverse order. You should not let go of the muscle from your hands; this kneading should be done smoothly, without sudden jumps, so as not to cause pain to the person being massaged.
Double ring combined kneading. The technique is used to knead the rectus abdominis muscles, latissimus dorsi muscles, gluteal muscles, pectoralis major muscles, thigh muscles, back of the leg, shoulder muscles. This technique is similar in technique to double ring kneading. The difference is that when performing a double circular combined kneading, the right hand performs an ordinary kneading of the muscle, and left palm stretches the same muscle. To make this technique easier to perform, place the index finger of your left hand on the middle finger of your right hand. The movements performed by each hand should be in opposite directions.
Double circular longitudinal kneading. Used to massage the front of the thigh and back of the leg.
To perform this kneading technique, you need to place your hands on the massaged area, squeezing your fingers together (thumbs should be moved to the sides). Grasping the muscle with both hands, you should make circular movements with your fingers, your hands should move towards each other. Having met, they continue to move, moving away from each other at a distance of 5-6 cm. In this way, you need to massage all parts of the muscle.
When massaging the right thigh and left calf right hand should be placed in front of the left, and when massaging the left thigh and right shin - in the reverse order.
Ordinary longitudinal kneading. The technique is used to knead the back of the thigh.
This technique combines ordinary and longitudinal kneading: longitudinal kneading is used to massage the outer surface of the thigh, and ordinary (transverse) kneading is used on the inner surface.
Circular kneading can be divided into the following subtypes:
- circular beak-shaped;
- kneading in a circular manner with the pads of four fingers;
- circular kneading with the pad of the thumb;
- circular kneading of the phalanges of the fingers clenched into a fist;
- kneading in a circular manner with the base of the palm.
Circular coracoid kneading is used to massage the long and latissimus dorsi muscles, neck muscles and limb muscles.
When performing this technique, the fingers are folded in the shape of a bird's beak: press the index and little fingers to the thumb, place the ring finger on top, and then the middle finger. When massaging, the hand moves in a circle or spiral towards the little finger. You can do this kneading with both hands alternately.
Circular kneading with the pads of four fingers. The technique is used to massage the back muscles, neck muscles and limb muscles, as well as to massage the head. Kneading should be done with the pads of four fingers, placing them diagonally to the muscles. The thumb should be positioned along the muscle fibers. He does not directly participate in kneading, he only glides over the surface, and the pads of the four fingers press on the massaged surface, making circular movements towards the little finger.
Circular kneading with the pad of the thumb. The technique is used to massage the back muscles, muscles of the limbs and sternum.
The technique is performed with the pad of the thumb in the same way as kneading in a circular manner with the pads of four fingers, only in this case the four fingers do not take any part in the kneading.
The technique can be performed with one hand, making circular movements with the thumb to the side index finger. The pressure of the finger on the massaged surface should be different, the strongest at the beginning, and weaker when the finger returns to its original position. Every 2-3 cm you should move your finger to a new area of the massaged surface in order to stretch the entire muscle. When performing this technique, you must ensure that your thumb does not slide along the surface, but moves the muscle. The technique can be performed with both hands alternately or with one hand with weights.
Circular kneading of the phalanges of the fingers clenched into a fist. The technique is used to massage the muscles of the back, limbs, and sternum. It is also used to massage the anterior tibia and calf muscles, but in this case the massage is performed with both hands. When performing this kneading technique, the phalanges of the fingers bent into a fist apply pressure to the muscle, and then shift it in a circular motion towards the little finger. When performing a technique with both hands, the hands, clenched into a fist, should be placed on the massaged surface at a distance of about 5-8 cm from each other. Circular movements towards the little finger are made with both hands alternately. You can perform this technique with one hand and weights.
Circular kneading with the base of the palm. The technique is used to massage the muscles of the back, buttocks, limbs, and sternum. Circular movements are performed with the base of the palm towards the little finger. You can perform this technique with both hands, placing them on the massaged surface at a distance of 5-8 cm from each other. You can also do kneading with one hand and weights.
Kneading with the base of the palm with a roll. The technique is used to massage the deltoid muscles, long back muscles, pectoralis major muscles, gluteal
ny muscles. The hand, with the fingers pressed together, is positioned palm down along the muscle fibers. Raising your fingers, apply pressure by rolling the hand from the base of the thumb to the base of the little finger through the base of the palm. So it is necessary to move further along the entire muscle.
In addition to the above techniques, there are auxiliary techniques:
- wallow;
- rolling;
- shifting;
- stretching;
- pressing;
- compression;
- twitching;
- tong-like kneading.
Wallow. Typically, the technique is used to massage the muscles of the shoulder and forearm, thigh and lower leg. In addition, due to the gentle effect of felting, it is used for damage to muscle fibers and blood vessels as a result of trauma, for sclerotic lesions of blood vessels, etc. The technique is performed with both hands. The hands of both hands should be grasped on both sides of the massaged area, the hands are parallel to each other, the fingers are straight. The movements of each hand are performed in opposite directions; the hands should be gradually moved over the entire area of the massaged surface (Fig. 91).
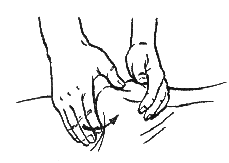 |
|
Figure 91 |
Rolling. The technique is used to massage the anterior wall of the abdomen, as well as the muscles of the lateral surfaces of the back, chest, in the presence of significant fat deposits, and with flabbiness of the muscles. When performing a massage of the abdominal muscles, you should first relax the muscles by performing a flat circular stroking of the massaged surface of the abdomen. After this, place the edge of the palm of your left hand on the surface of the abdomen and try to immerse it deeply into the thickness abdominal wall. Grab with your right hand soft fabrics abdomen and roll them onto the left hand. Knead the captured part in a circular motion, and then proceed to rolling the areas located nearby (Fig. 92).
Shift. The technique is usually used when massaging long muscles to treat scar formations, skin diseases, in the treatment of paralysis and paresis. Shifting increases blood circulation and lymph flow, improves metabolism in tissues, this technique warms the tissues and has a stimulating effect on the body. Figure 92
When performing the sliding technique, you need to lift and grab the massaged area with the thumbs of both hands, and then move it to the side. You can, without grabbing the tissue, press on the surface being massaged and move the tissues towards each other using your palms or fingertips. It should be moved in both longitudinal and transverse directions.
Grabbing is used to move the large pectoral muscle and gluteal muscles. When massaging the back muscles, there is no need to grab while moving. The sternocleidomastoid muscles are moved using a forceps-like grip.
When massaging the tissues of the cranial cover, the hands are placed on the forehead and the back of the head; with light pressure, the hands should alternately slowly move from the forehead to the back of the head. If the frontal plane of the skull is being massaged, the brushes should be applied to the temple areas. In this case, the shift occurs towards the ears.
When massaging the hand, the interosseous muscles of the hand shift as follows. The fingers of both hands should grasp the hand of the person being massaged by the radial and ulnar edges. With short movements, the tissues move up and down. In a similar way, you can move the muscles of the foot (Fig. 93).
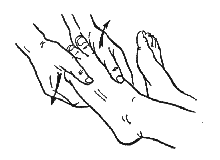 |
|
Figure 93 |
Stretching. This technique has an effect on the nervous system; it is used to treat paralysis and paresis, scars after injuries and burns, and postoperative adhesions.
As with shifting, you should grab the muscle, and if this is not possible, press on it. Then you need to move the tissues in opposite directions, while the muscles stretch (Fig. 94). You should not make sudden movements, as this may cause pain to the person being massaged.
To grasp a large muscle, use the entire hand; small muscles should be grasped in a pincer-like manner with your fingers. If the muscles cannot be grasped (flat muscles), they need to be smoothed out with the fingers or palm, thus also stretching occurs. When stretching adhesions and scars, you should use the thumbs of both hands, placing them opposite each other. To stimulate muscles during paresis and paralysis, it is advisable to alternate rhythmic passive stretches with gentle passive stretches, directing the movement towards muscle contraction. This procedure has a positive effect on muscle tendons. Figure 94
Pressure. With this technique, tissue receptors are excited, as a result of which tissue nutrition and blood supply improves. It also exerts pressure on the internal organs, activating the secretory and excretory functions of the body, as well as the peristalsis of the internal organs.
Pressure is used in the treatment of diseases of the musculoskeletal system (damage to the spine, consequences of bone fractures, etc.).
This technique is performed with intermittent pressures, the pace of movements varies - from 25 to 60 pressures per minute.
Pressure can be applied with the palm or the back of the fingers, the pads of the fingers, the supporting part of the palm, as well as with the hand clenched into a fist.
When massaging the front wall of the abdomen, it is best to apply pressure with the palm or back of the fingers or fist at a rate of 20-25 times per minute. At the same pace, you can massage the internal organs. When massaging the abdomen, you can use pressure with weights. When massaging the back, in order to activate muscle activity, apply pressure in the spine area. In this case, the hands need to be placed across the spinal column, the distance between the hands should be approximately 10-15 cm. In this case, the fingers should be placed on one side of the spinal column, and the wrists on the other. Using rhythmic movements (20-25 movements in 1 minute), you should move your hands up the spinal column to the cervical region, and then down to the sacrum, thus applying pressure to the muscles along the entire spinal column (Fig. 95).
 |
|
Figure 95 |
The facial muscles of the face are massaged with the palms and backs of the fingers placed together. Approximately 45 pressures must be applied in 1 minute.
Massage of the scalp can be done with the pads of your fingers, placing them in a rake-like manner, making 50 to 60 pressures in 1 minute.
You can also apply pressure to the scalp with the palmar surface of your hands, clasping your head with your palms on both sides. With this method, 40 to 50 movements should be performed in 1 minute.
Compression. The technique is used to massage the muscles of the torso and limbs. Compression helps to activate blood circulation and lymph flow, enhances blood supply to muscles, increases muscle tone and improves their contractile function.
Compression is used during facial massage to improve skin nutrition. The result is an increase in tone facial muscles, the skin becomes firmer and more elastic. Compression should be performed with short squeezing movements of the fingers or hand (Fig. 96).
 |
|
Figure 96 |
The pace when performing the technique should be about 30-40 movements in 1 minute. Compression during facial massage should be done at a pace of 40 to 60 movements per 1 minute.
Twitching. This technique is used for facial massage to activate the work of facial muscles, as well as to increase the elasticity and firmness of the facial skin. Twitching is also used for flabbiness of the muscles of the anterior abdominal wall, in the treatment of paresis and paralysis of the muscles of the upper and lower extremities.
Twitching is also used in the treatment of scars after burns and injuries, as well as postoperative adhesions, since this technique helps improve the mobility and elasticity of the skin.
Twitching should be done with two fingers: the thumb and forefinger, which should grab a section of tissue, pull it back, and then release it. You can also twitch with three fingers: thumb, index and middle. The rate of twitching should be from 100 to 120 movements in 1 minute. You can perform movements with one or two hands.
 |
|
Figure 97 |
Forceps kneading. This technique is used to massage the muscles of the back, chest, neck, and face. Pincer-type kneading is good for massaging small muscles and their outer edges, as well as tendons and muscle heads. The technique should be performed with the thumb and index fingers folded in the form of forceps (Fig. 97). You can also use your thumb, index finger and middle fingers. Forceps kneading can be transverse or longitudinal. When performing a transverse forceps-like kneading, the muscle must be grabbed and pulled. Then, using alternating movements away from you and towards yourself, stretch the muscle with your fingers. If longitudinal forceps-shaped kneading is performed, the muscle (or tendon) should be grabbed with the thumb and middle fingers, pulled back, and then kneaded between the fingers in a spiral manner.
CHAPTER 5. VIBRATION
Massage techniques in which vibrations of different speeds and amplitudes are transmitted to the massaged area are called vibration. Vibrations spread from the massaged surface to the muscles and tissues of the body located deeper. The difference between vibration and other massage techniques is that, under certain conditions, it reaches deep-lying internal organs, blood vessels and nerves. Physiological influence vibration on the body is characterized by the fact that it enhances the reflex reactions of the body, depending on the frequency and amplitude, it is capable of dilating or enlarging blood vessels. Vibration is used to reduce blood pressure and decrease in heart rate. After fractures, vibration reduces the time required for callus formation. Vibration can change the secretory activity of some organs. When carrying out vibration, it should be remembered that the strength of the technique depends on the angle between the massaged surface and the massage therapist’s hand. The greater the angle, the stronger the impact. To ensure the greatest impact of vibration, the brush must be positioned perpendicular to the surface being massaged. You should not vibrate in one area for more than 10 seconds, and it is advisable to combine it with other massage techniques. Vibrations with a large amplitude (deep vibrations), which last a short time, cause irritation in the massaged area, and long-term vibrations with a small amplitude (shallow vibrations), on the contrary, soothe and relax. Vibrating too intensely can cause pain in the person being massaged. Intermittent vibrations (effleurage, chopping, etc.) on unrelaxed muscles also cause pain in the person being massaged. It is impossible to carry out intermittent vibrations on the inner surface of the thigh, in the popliteal region, in the area of the heart and kidneys. Particular care must be taken when using intermittent vibrations when massaging older people. Painful sensations can be caused by intermittent vibration when performed simultaneously with both hands. Caution should also be observed when performing the shaking technique. Using this technique on areas of the upper and lower extremities without following the direction of movement can lead to damage to the joints. In particular, shaking of the upper limbs leads to damage to the elbow joint if it is performed not in the horizontal, but in the vertical area. Do not shake lower limb, bent in knee joint, this can lead to damage to the bursa-ligamentous apparatus. Manual vibration (using hands) usually causes rapid fatigue for the massage therapist, so it is more convenient to use hardware vibration. VIBRATION TECHNIQUES AND TECHNIQUES Vibration techniques can be divided into two types: continuous vibration and intermittent vibration. Continuous vibration is a technique in which the massage therapist’s brush acts on the massaged surface without leaving it, transmitting continuous oscillatory movements to it. Movements must be performed rhythmically. You can perform continuous vibration with the pads of one, two, or all fingers; palmar surface of fingers, back of fingers; palm or supporting part of the palm; with a hand bent into a fist. The duration of continuous vibration should be 10-15 seconds, after which stroking techniques should be performed for 3-5 seconds. l You should start performing continuous vibration at a speed of 100-120 vibrations per minute, then the vibration speed should be gradually increased so that by the middle of the session it reaches 200 vibrations per minute. Towards the end the vibration speed should be reduced. When performing continuous vibration, not only the speed must change, but also the pressure. At the beginning and end of the session, the pressure on the massaged tissues should be weak, in the middle of the session - deeper. Continuous vibration can be performed longitudinally and transversely, zigzag and spirally, as well as vertically. If, when performing vibration, the hand does not move from one place, the vibration is called stable. Stable vibration is used for massage of internal organs: stomach, liver, heart, intestines, etc. Stable vibration improves cardiac activity, enhances the excretory function of the glands, improves the functioning of the intestines and stomach. There is also spot vibration - a stable vibration performed Figure 98
with one finger (Fig. 98). Point vibration, acting on peripheral non-
ragged endings, helps reduce pain in myositis and neuralgia.
Point vibration is used in the treatment of paralysis and paresis, and in recovery
innovative treatment after fractures, since point vibration promotes accelerated formation of callus. Continuous vibration can be labile; with this method, the massage therapist’s hand moves over the entire massaged surface (Fig. 99).
Labile vibration is used in the treatment of paralysis, to restore weakened muscles and tendons. They produce labile vibration along the nerve trunks.
Continuous vibration can be performed with the pad of one finger (point vibration). You can vibrate the entire back or palm side of the finger; this method is widely used in the treatment of paresis of facial muscles, trigeminal neuralgia, and also in cosmetic massage.
You can perform continuous vibration with your palm. This method is used to massage internal organs (heart, stomach, intestines, liver, etc.). Vibration should be performed at a rate of 200-250 vibrations per minute, movements should be gentle and painless. When massaging the abdomen, back, thighs, and buttocks, you can use continuous vibration with your fingers clenched into a fist. With this method, the hand, folded into a fist, should touch the massaged surface with the phalanges of four fingers or with the ulnar edge of the hand. Such vibrations should be performed longitudinally or transversely. Continuous vibration can be produced while gripping tissue. This technique should be used when massaging muscles and tendons. Small muscles and tendons are grasped with the fingers in a pincer fashion, while large muscles are grasped with the hand.
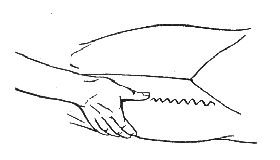 |
|
Figure 99 |
Continuous vibration includes auxiliary techniques:
Shaking;
- shaking;
- pushing;
- concussion.
Shaking. The technique is used for the rehabilitation treatment of muscles after fractures, for paralysis and paresis, since the main feature of shaking is the activation of muscle contractile activity. Shaking enhances lymphotography, so it is often used to reduce swelling. Shaking is used to treat damaged soft tissues, to smooth out traumatic scars and postoperative adhesions, and is also used as an anesthetic. Before performing the shaking technique, the muscles of the person being massaged must be relaxed. The fingers should be spread wide and clasped around the massaged area. Then you should perform shaking movements in the longitudinal or transverse direction (Fig. 100). Movements must We need to be rhythmic, they should be performed at different speeds, increasing as
When shaking the lower limb, you need to fix the ankle joint with one hand, and grab the instep of the foot with the other hand and slightly pull the leg. In this case, it is necessary to ensure that the leg is straight. Then you should make rhythmic oscillatory movements.
When shaking limbs in elderly people, special care should be taken.
Nudge. The technique is used to massage internal organs.
To perform the technique, place your left hand on the area of the organ that
 |
|
Figure 102 |
you need to undergo an indirect massage, and apply light pressure, fixing your hand in this position. Then, with your right hand, make short pushing movements, pressing on the nearby surface, as if pushing the massaged organ towards the left hand (Fig. 103). Oscillatory movements must be performed rhythmically.
Shake. Is used for indirect massage internal organs (liver, gall bladder, stomach, etc.).
When performing a concussion, the right hand must be fixed on the body in the area where internal organ, which needs to be traced. Left hand should be placed on the massaged surface parallel to the right one so that the thumbs of both hands are located next to each other. Fast and rhythmic
 |
|
Figure 103 |
movements (either bringing your hands together or moving them away from each other) you need to oscillate the massaged surface in the vertical direction.
Abdominal shocks are used to resolve adhesions in abdominal cavity, to enhance intestinal motility, for chronic gastritis with secretory insufficiency, to increase the tone of the smooth muscles of the abdominal wall, etc.
When performing an abdominal shake, both hands should be positioned so that the thumbs are on an imaginary line crossing the navel, and the remaining fingers are wrapped around the sides. Then you should make oscillatory movements horizontally and vertically (Fig. 104).
Chest concussion. This technique helps improve blood circulation and increase the elasticity of the lung tissue, so it is used for diseases of the respiratory system. Chest concussion is used for chest injuries, osteochondrosis, etc.
When performing this technique, you need to clasp the hands of both hands chest on the sides and perform oscillatory movements in the horizontal direction. Movements should be performed rhythmically (Fig. 105).
 |
|
Figure 104 |
Concussion of the pelvis. The technique is used to treat adhesions in the pelvic area, osteochondrosis and spondylosis, etc.
The technique should be performed with the massaged person lying on his stomach or back. The pelvis should be clasped with both hands so that the fingers are located on the lateral surfaces of the iliac bones. Oscillatory movements should be carried out rhythmically in a horizontal direction, slowly moving the hands towards the spine.
Intermittent vibration. This type of vibration (sometimes also called percussion) consists of single beats that must be performed rhythmically, one
after another. In contrast to continuous vibration, the massage therapist’s hand is separated from the massaged surface after each individual blow. Figure 105
When performing intermittent vibration, blows should be applied with the tips of the fingers, half-bent at the joints. You can strike with the ulnar edge of the palm (edge of the palm), with a hand clenched into a fist, or with the back of the fingers. Produce shock vibration You can use one hand or two hands alternately.
Basic intermittent vibration techniques:
- puncturing;
- effleurage;
- chopping;
- pat;
- quilting.
Puncturing. This technique should be used on small areas of the body surface where the subcutaneous fat layer practically absent (for example, on the face, in the chest area), in places where callus forms after fractures, on ligaments, tendons, small muscles, and in places where important nerve trunks exit.
Puncture should be performed using the pads of the index and middle fingers together or with each of these fingers separately. You can perform this technique with four fingers at the same time. The technique of puncturing can be done either simultaneously or sequentially (like typing on a typewriter). To perform puncturing, you can use one or both hands (Fig. 106).
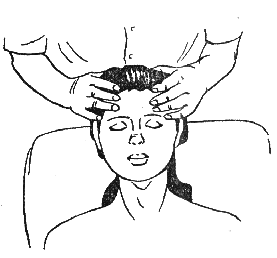 |
|
Figure 106 |
When massaging the muscles of the limbs and scalp, you can use puncturing with movement (labile). Movements during labile puncturing should be performed in the direction of the massage lines to nearby lymph nodes.
Puncture without displacement (stable) is performed in areas of callus formation after fractures.
To make the impact of puncturing deeper, it is necessary to increase the angle between the finger(s) performing the puncturing and the massaged surface.
The speed of movements during puncturing should be from 100 to 120 beats per 1 minute.
Effleurage. This technique has a positive effect on skeletal and smooth muscles, causing its rhythmic reflex contraction. As a result of this, blood supply to tissues improves and their elasticity increases. Most often, effleurage together with kneading is used for paresis and muscle atrophy.
When performing effleurage, strikes should be made with one or more fingers, the palm or back of the hand, as well as with the hand clenched into a fist. Typically, tapping is performed using both hands. Tapping should be done with a relaxed hand at the wrist joint.
Tapping with one finger. This method of tapping should be used when massaging the face, in places of fractures, on small muscles and tendons.
This technique must be performed with the back surface of the index finger or its elbow edge. The rate of blows should be from 100 to 130 beats per 1 minute. Strikes should be made with the hand relaxed at the wrist joint.
Tapping with several fingers. The technique is used for facial massage
by means of circular tapping (“staccato”), as well as by massaging the scalp
parts of the head.
This technique should be performed with the palmar surface of all fingers, straightening the straightened fingers at the metacarpophalangeal joints as wide as possible. Tapping should be done alternately, as when playing the piano. You can also perform tapping with the back of your fingers.
The technique can be performed simultaneously with all fingers, using the palmar surface of the ends of four fingers.
Tapping with bent fingers. The technique should be used for mass in places with a significant muscle layer: on the back, hips, buttocks. This technique helps to improve muscle tone, activation of secretory and vascular nerves. When performing the technique, the fingers must be bent freely so that the index and middle fingers lightly touch the palm, and there is free space inside the bent hand. The blows should be applied with the back of the bent fingers, placing the hand across the massaged surface (Fig. 107).
 |
|
Figure 107 |
Fist pounding. The technique should be used in locations
significant muscle layers: on the back, buttocks, thighs.
When performing the technique, the hand and forearm muscles of the massager should be as relaxed as possible, otherwise the person being massaged will experience pain. The fingers must be loosely bent into a fist so that the ends of the fingers lightly touch the surface of the palm, and the thumb is adjacent to the index finger without tension. The little finger needs to be slightly removed from the other fingers and relaxed. The blows are applied with the elbow surface of the fist; upon impact, the hands are lowered perpendicularly to the massaged surface (Fig. 108).
Chopping. Reception has an effect on the skin, improves blood circulation, resulting in an influx of oxygen and nutrients to the massaged areas increases. Lymph flow increases, metabolism and the functioning of the sweat and sebaceous glands improves.
Chopping has a positive effect on muscles, especially smooth and striated muscles.
The fingers need to be slightly relaxed and slightly moved away from each other. The forearms should be bent at a right or obtuse angle. The brushes should strike rhythmically on the surface being massaged; at the moment of impact, the fingers are connected to each other. Strikes with a brush with initially closed fingers can be painful for the person being massaged; the free space between the fingers softens the blow. The hands need to be positioned along the muscle fibers (Fig. 109). When chopping, blows should be made at a speed of 250 to 300 blows per 1 minute.
Pat. The technique promotes the dilation of blood vessels, with its help you can reduce the sensitivity of nerve endings and increase the temperature on the massaged surface.
Patting should be used when massaging the chest, abdomen, back, thighs, buttocks, and limbs.
 |
|
Figure 110 |
Patting should be done with the palmar surface of the hand, slightly bending the fingers so that upon impact, a formation forms between the hand and the massaged surface. air bag- this will soften the blow and make it painless
(Fig. 110). The arm must be bent at a right or obtuse angle. The blows are delivered with one or two hands when they are bent at the radial joint. Quilting. The technique is used in cosmetic massage to increase elasticity Figure 111
guests for skin elasticity. Quilting is used in therapeutic massage for paresis
muscles, in the treatment of obesity, scar tissue changes. Quilting enhances
blood circulation of the massaged surface, improves metabolic processes.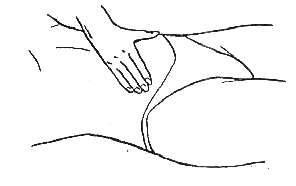
When performing a technique, blows are delivered with the edge of the palm, one or more
fingers (Fig. 111). On large areas of the body, quilting is done using the entire surface of the palm.


